You can add a sale in several ways:
- Click the “Add Sales” button at the top of the page (Screen 1).
- Go to the “Sales” section and click the “Add first sale” button if you haven’t had any sales today.
- Go to the “Products” section, find the desired product and press the “Add sale” button in the product management buttons (Screen 2).
- Scan the barcode of the product using a barcode reader or the HugeProfit mobile application, after which the window for adding a sale will open on the website, if the product is already entered in the database, or the window for adding the product, if it is not in the database.


If the sale is made in real time (for example, someone buys something from you in a physical store), select the option “Add a sale” and fill in all the fields of the form, indicating: (Screen 3)
– Product/article/brand/barcode – you can find the desired product from the ready-made list, using the barcode reader or by starting to enter the article or brand name. If the desired product is not found, it can be created in this field by specifying the name and selecting the “Create” item from the menu or by pressing the Enter button.
When adding a sale, you can select several products that the buyer wants to buy at once. You can also specify the required quantity of each selected product.
If a customer has rejected an item, it can be easily removed from the list by clicking the Remove icon.
– Customer’s phone number (optional). You can choose an existing phone number from the database or add a new buyer to the database (for this you need to enter the number in the field, press Enter or select “+Create” and fill in the buyer’s card).
– Account – the “Cash” account is selected by default in the system. You can create any number of accounts (Privat, Cashier, etc.). Read more in the “Payments” section.
– Sales channel – by default “Store” is specified. But you can add any number of other sales channels: through social networks, online store, advertising, partners. To add a new sales channel, you need to enter its name in the corresponding field, then press Enter or click the “Create” button, after which the channel will be added to the list.
– Date. The system automatically selects the current date of sale. However, if you enter the sale after the fact, you can change the date to any day in the past.
There is also a comment box at the bottom. The entered data will be displayed in the sales card. You can add any information about the sale, such as customer wishes and advice.
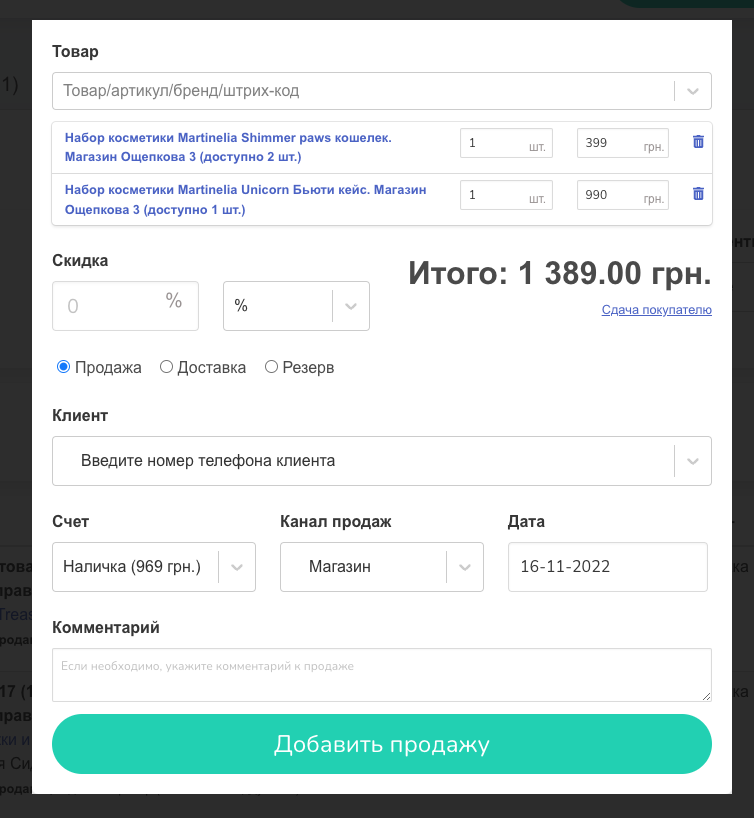
It is also possible to change the price of the product directly during the sale. This is possible if you simply change the price of the product in the corresponding field yourself, or give the buyer a discount. The discount can be percentage or fixed (Screen 4).
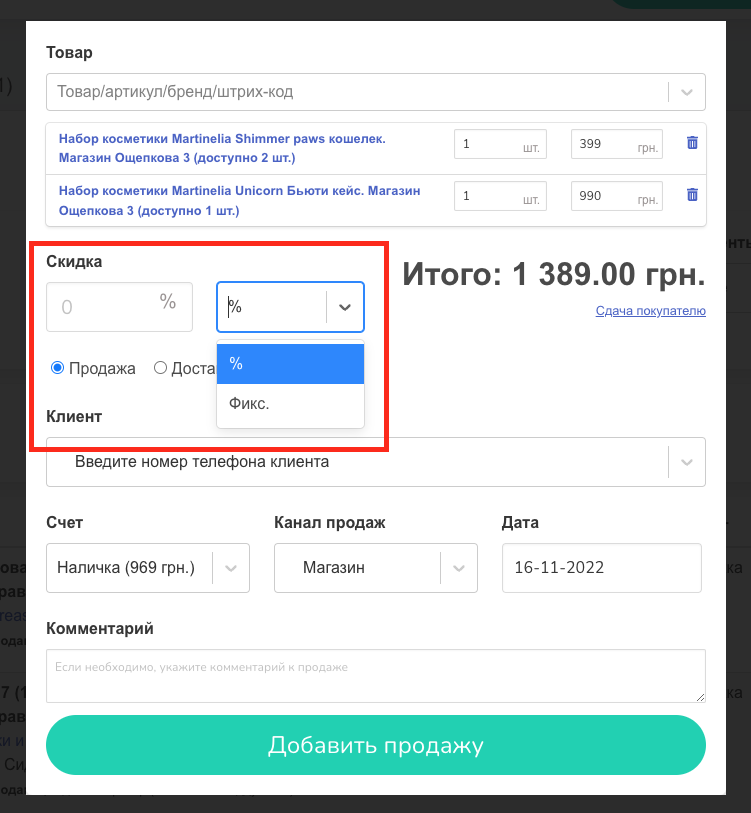
If the purchase is made in the store for cash, it is convenient to use the “Letting a buyer” function. By clicking on the appropriate button, you can enter the amount received from the buyer in the field, and the program will automatically calculate the change (Screen 5).
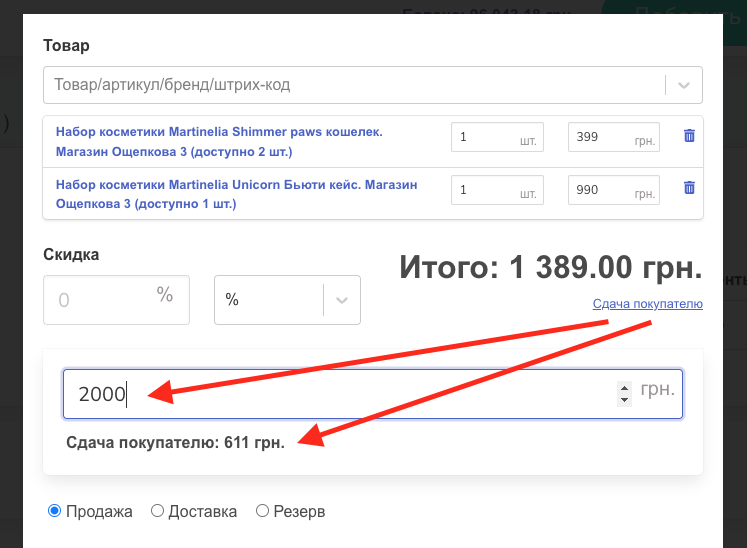
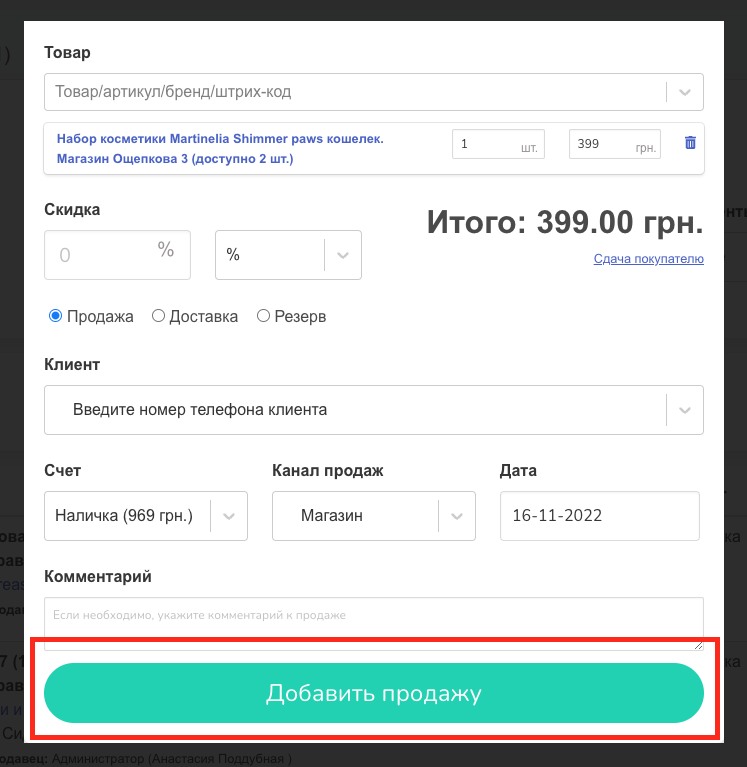
When all the required fields are filled in, you select “Add Sale”. Your sale will be successfully added and will appear in the “Sales” section (Screen 6).
Adding a sale from the app on your phone via a barcode scanner
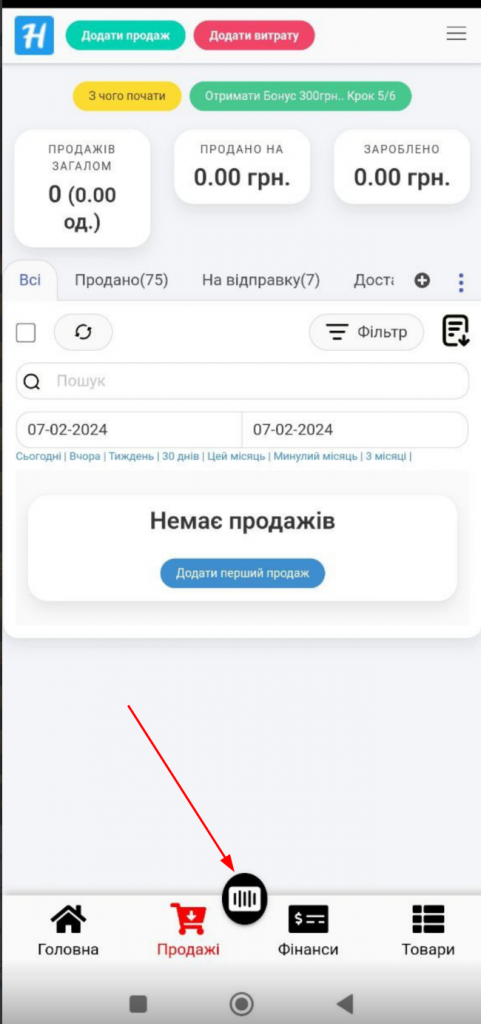
Open the application -> press the scanner button -> scan the barcode of the product (Screen 7). A sales window will open with the entered product, if it exists in the Products section (Screen 8).
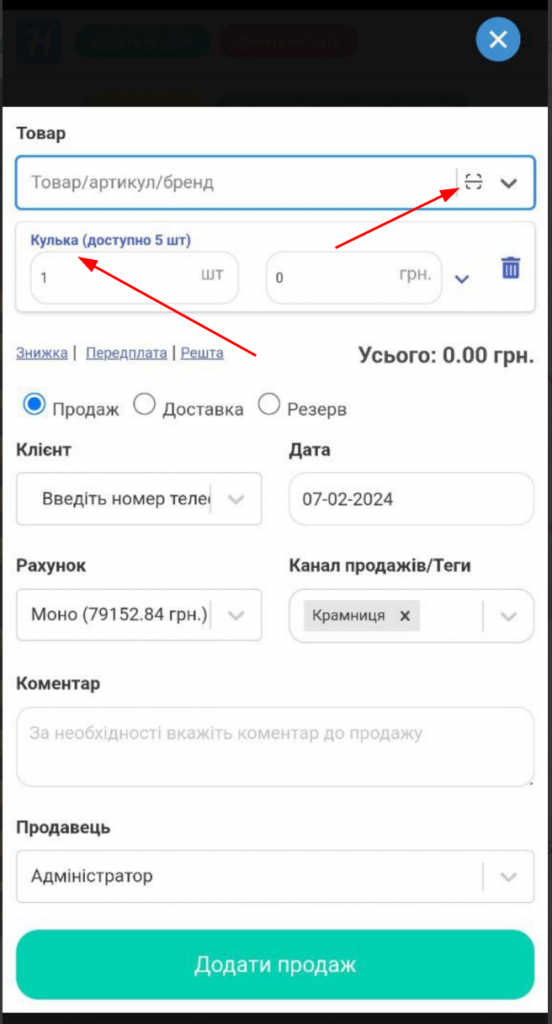
You can then click the button in the upper right to scan more products (Screen 8).
Thus, you can enter all the necessary goods in one sale with a barcode scanner!
