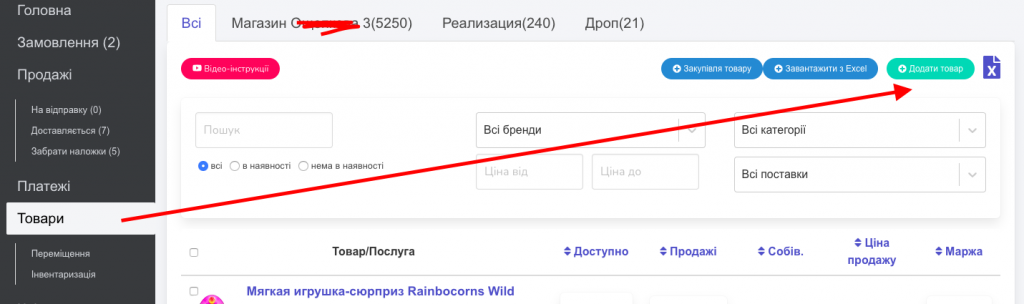
To add a new product, you need to go to the Products section and click the “Add Product” button (Screen 1).
After you select the Add Product option, a window for filling out a new product card will open for you.
If you need to create a set of products that already exist, choose the Set option (Screen 2).
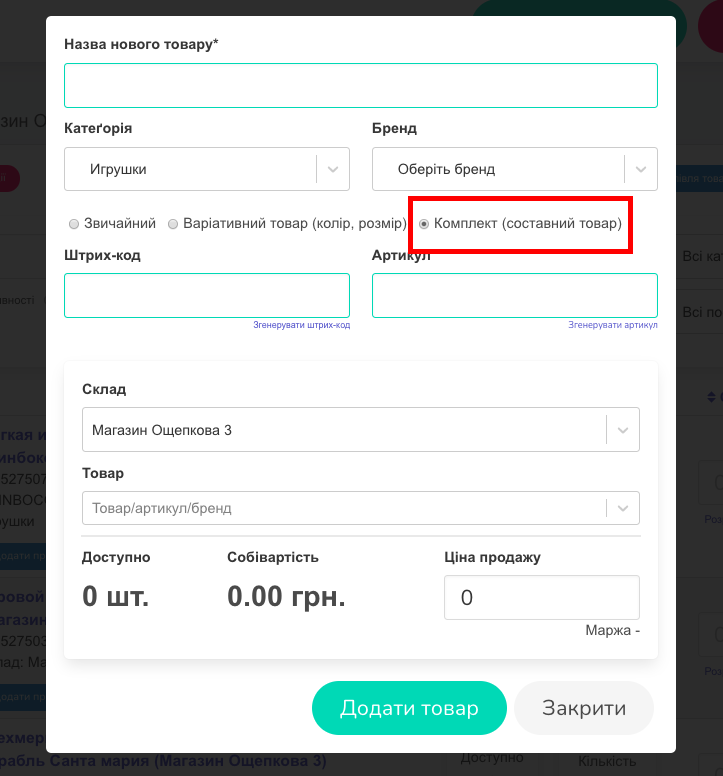
Let’s proceed to fill out the set card.
1. Name of the New Product – enter the name of the new set (mandatory field).
2. Category. By default, the first (or only) category in the list is selected, but you can choose any category from the list that you have already created, or create a new one by starting to enter the name in the field and pressing Enter. You can also use +Create (Screen 3).
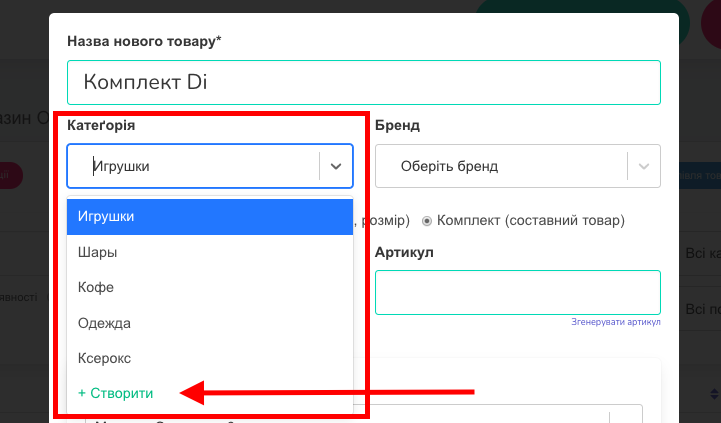
3. Next, you can choose a Brand from the list that you have already created, or create a new brand by starting to enter the name in the field and pressing Enter. You can also use +Create (optional field).
4. Inventory. By default, the first (or only) inventory in the list is selected, but you can choose any inventory from the list that you have already created.
Attention! When you choose a specific inventory, you will only be able to select those products for the set that are located in the selected inventory.
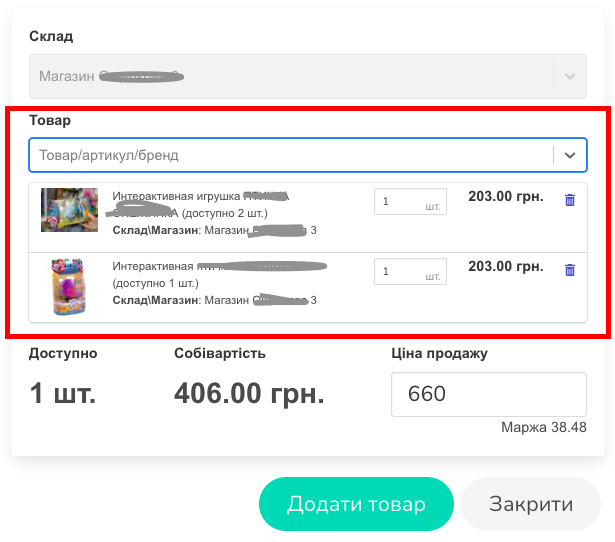
5. Then, select the products you want to include in the set (Screen 4).
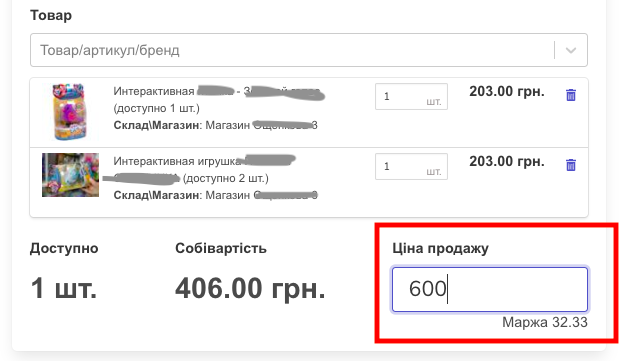
In the Product section, the system will show you the available quantity of the selected product, its cost price, and also allow you to change the quantity of each unit of the product that will be included in the set. If you need to remove a product selected for the set, simply click on the Trash icon and the product will be deleted.
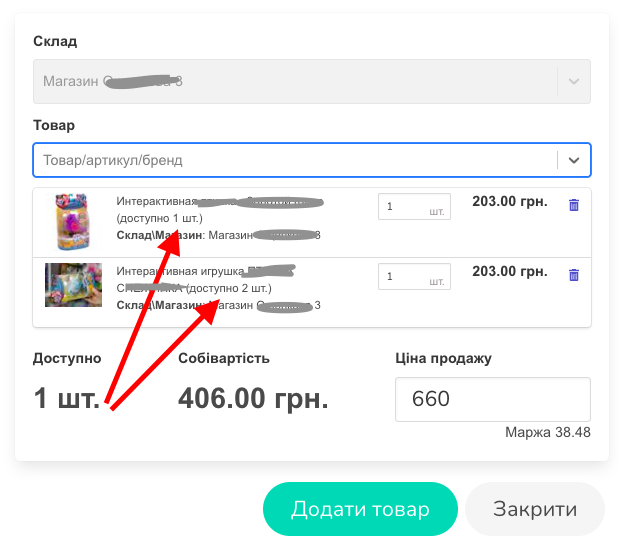
Under the Products section, you will also see information about how many sets you can create based on the quantity of the selected product. In this example, you can see that in this situation, you can only create one set, as one of the products that will be included in the set is available in a quantity of 1 unit (Screen 5).
The system will also show you the total cost of the selected items for creating product sets and the total selling price of the selected items, which by default will become the selling price of the entire set. The current margin is also displayed here (Screen 6).
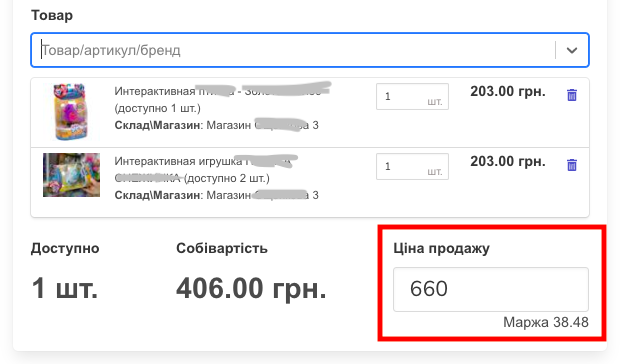
If needed, you can increase or decrease the price for the set. The margin will change accordingly in this case (Screen 7).
6. Once the items for the set are selected and the set price is determined, click Add item.
Attention! If you choose a product for creating a set that is not in stock, the set will NOT be created.
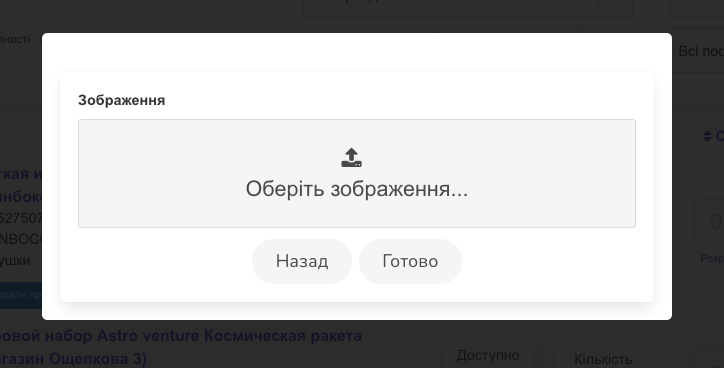
Next, the system will suggest choosing a photo for the product (adding a photo if desired) (Screen 8).
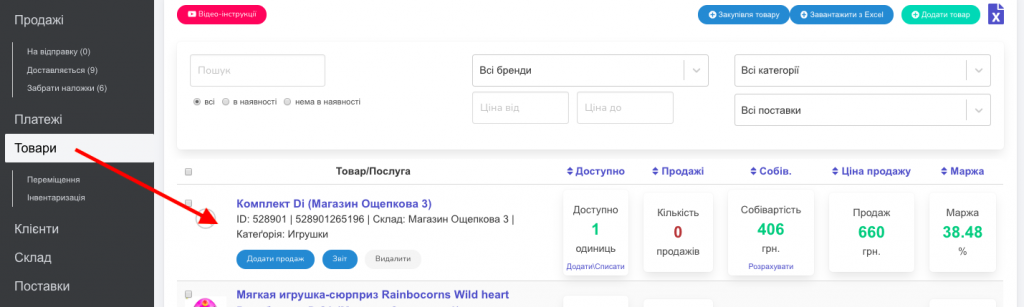
After creating the set, it will appear in the Products section (Screen 9).