
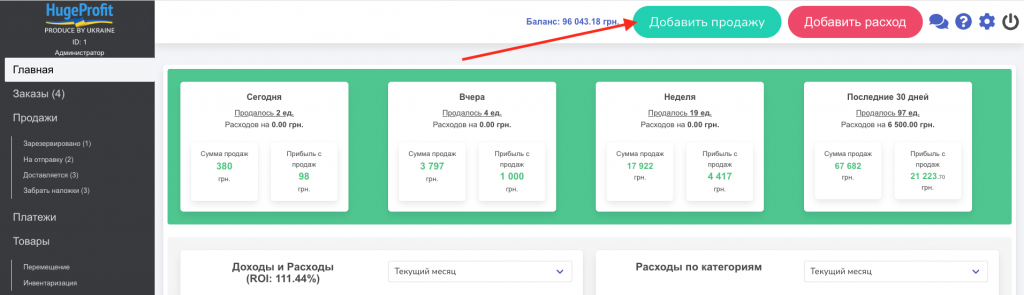
You can add a sale in several ways: (Screen 1, 2, 3).
- Click the “Add sales” button at the top of the page and switch to the “Shipping” tab in the window that opens, if you have not disabled this section (see Disabling sections).
- Go to the “Sales” section and click the “Add first sale” button if you haven’t had any sales today, and also switch to the “Shipping” tab.
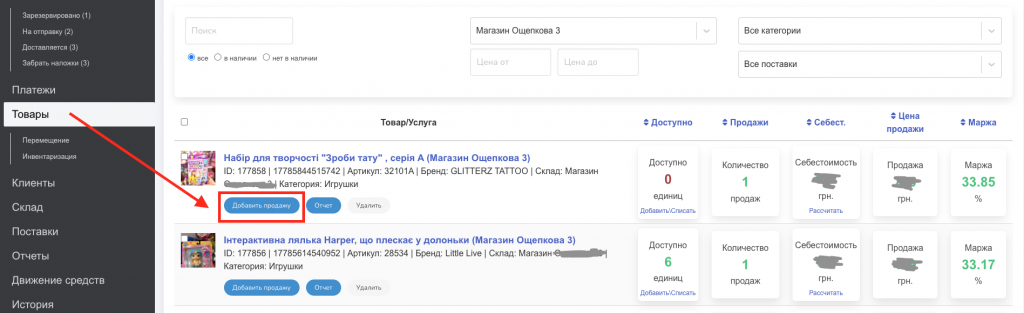
- Go to the “Products” section, find the desired product and click the “Add sale” button in the product management buttons, and switch to the “Delivery” tab.
- Scan the barcode of the product using a barcode reader or the HugeProfit mobile application, after which a window for adding a sale will open on the website, if the product is already entered in the database, or a window for adding a product if it is not in the database. If the product is already in stock, switch to “Delivery”.
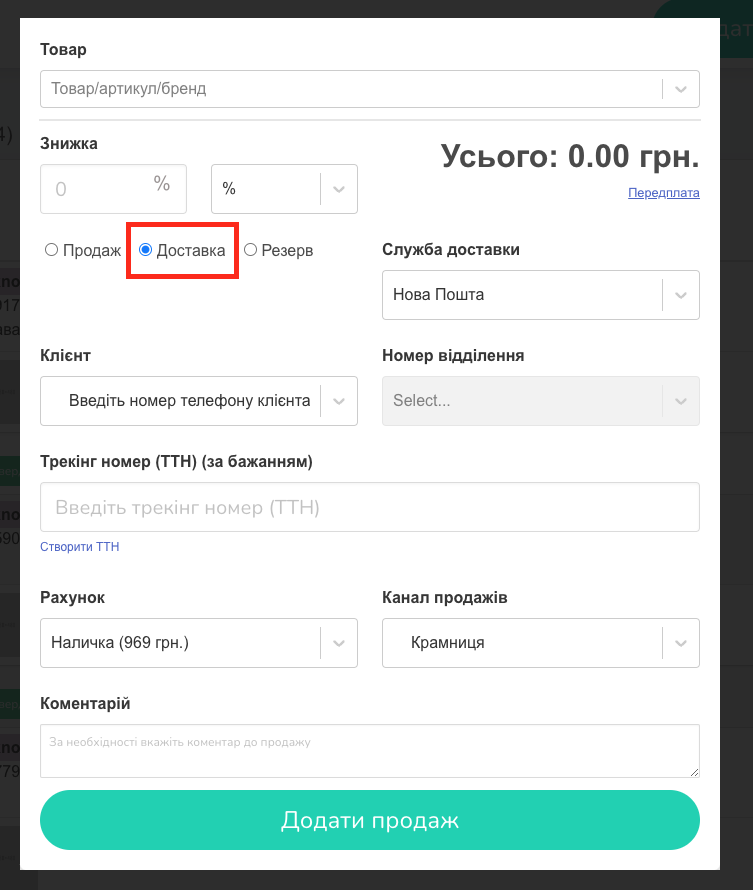
To arrange delivery, you need to fill in all the mandatory fields in the window:
— Product/article/brand/barcode – you can find the desired product from a ready-made list, using a barcode reader or by starting to enter the article or brand name. If the desired product is not found, it can be created in this field by specifying the name and selecting the Create item from the menu or by pressing the Enter button.
You can choose several products that the buyer wants to buy at once. You can also specify the required quantity of each selected product.
If a customer has rejected an item, it can be easily removed from the list by clicking the Remove icon.
It is also possible to change the price of the product directly during the reservation. This is possible if you simply change the price of the product in the corresponding field yourself, or give the buyer a discount. The discount can be percentage or fixed.
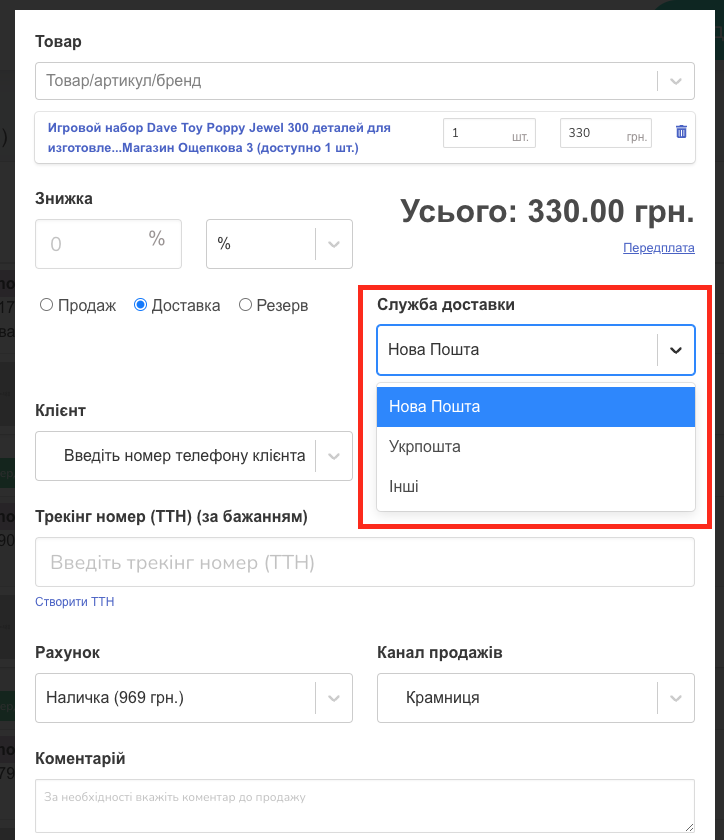
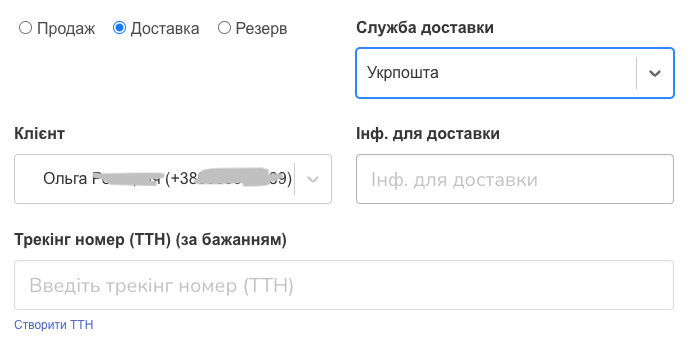
— Choose the delivery service you will use to send the package: (Screen 4.)
- Nova poshta.
- UkrPoshta.
- Other.
— Enter the client’s telephone number by selecting an existing one from the database or adding a new buyer to the database (for this, you need to enter the number in the field, press Enter or select Create, and fill in the buyer’s card) (Screen 5).
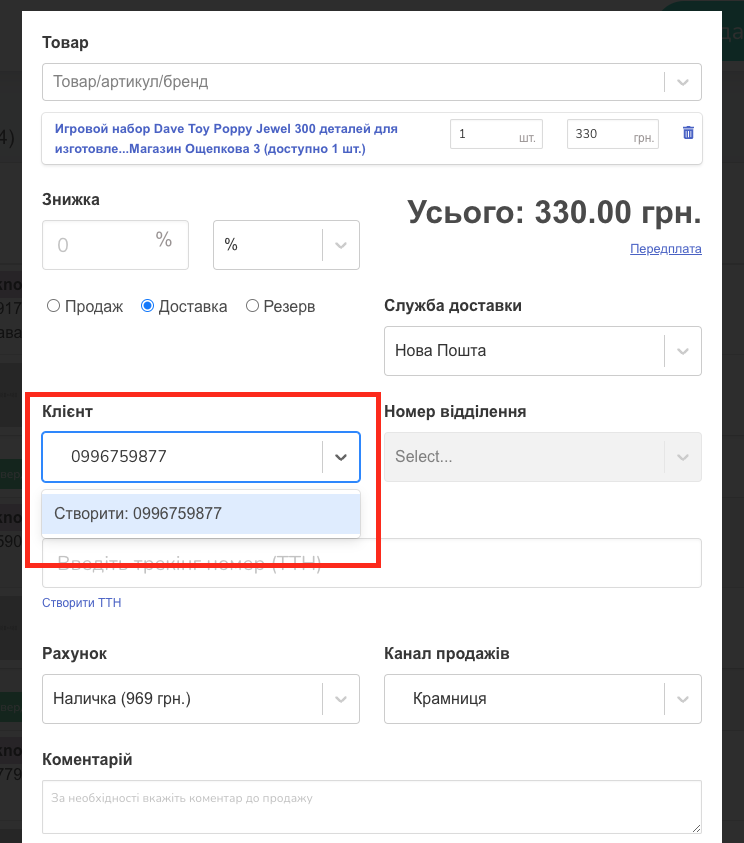
When issuing a buyer’s card, you automatically register him in the system. The system remembers the buyer’s personal data (full name) and delivery data.
Currently, such data for ordering delivery as City and Branch number are valid only for the Nova Poshta service!
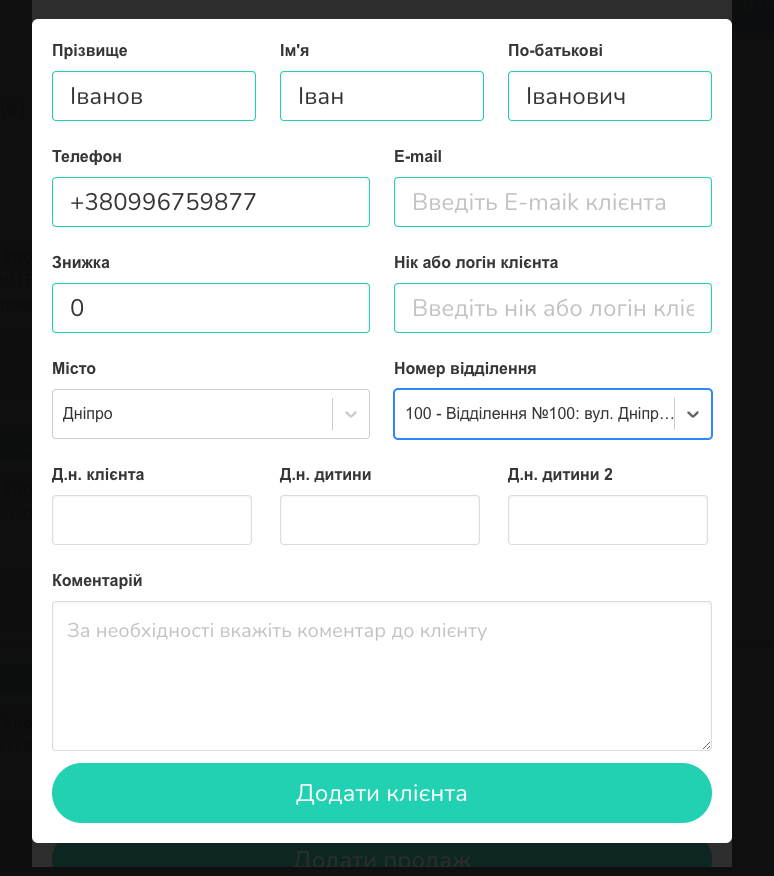
The buyer’s card includes: (Screen 6.)
- (full name);
- Phone;
- E-mail (Optional);
- Personal discount of the client (Optional);
- Nickname or login of the client (Optional);
- City of delivery;
- Branch number;
- Additional information about the birthday of the client or his children (Optional);
- Comment (Optional).
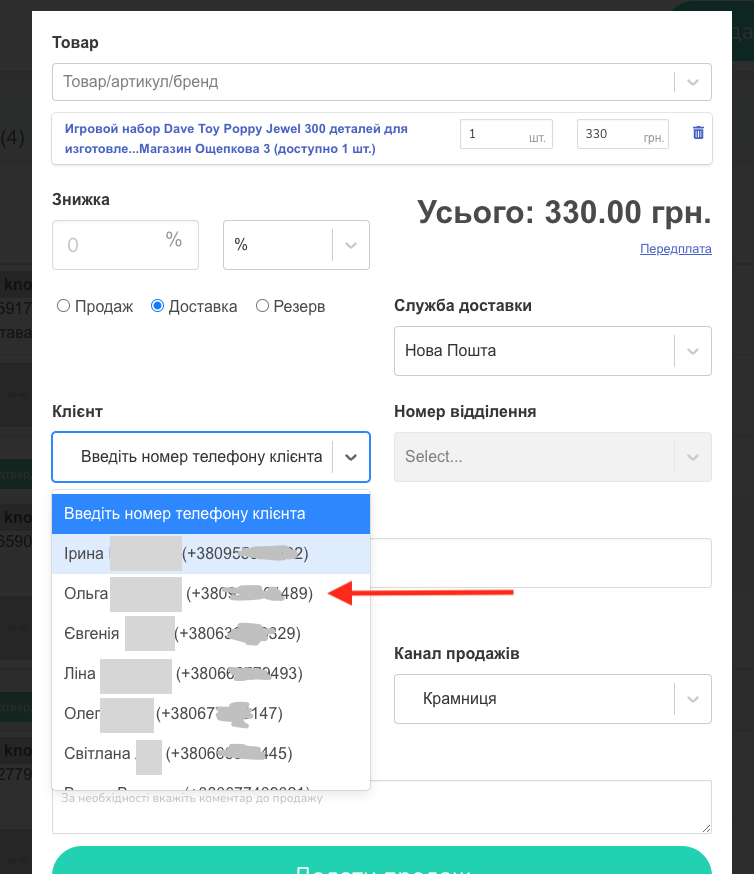
If a customer makes repeat purchases from you with delivery, you just need to enter a phone number or personal information, and the complete information will be pulled into the add sale window automatically (Screens 7, 8).
If the customer saved in the system has changed the place of delivery
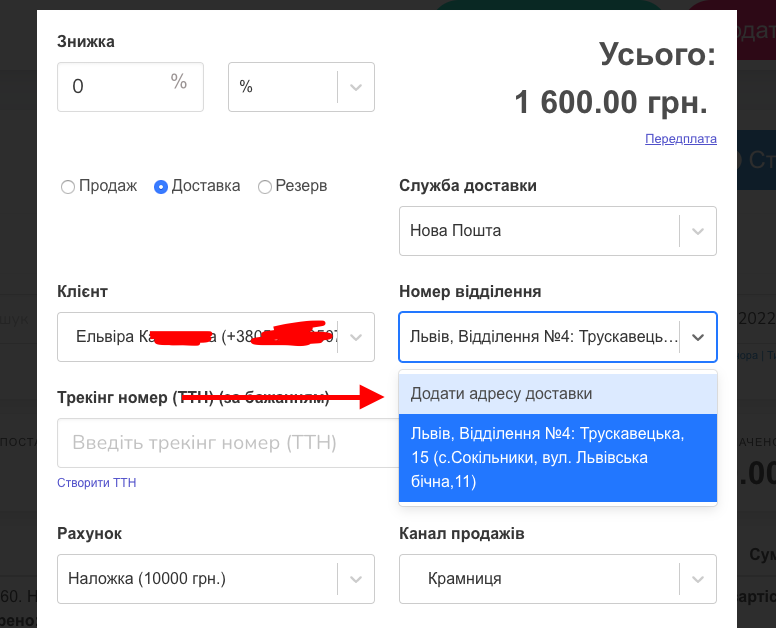
If you have added a customer to the system, their data is saved and automatically pulled when you select that customer to resend orders. If the customer has changed the shipping address, you can add another one. For this:
- Click on the Department number field;
- In the list, select Add delivery address (Screen 9);
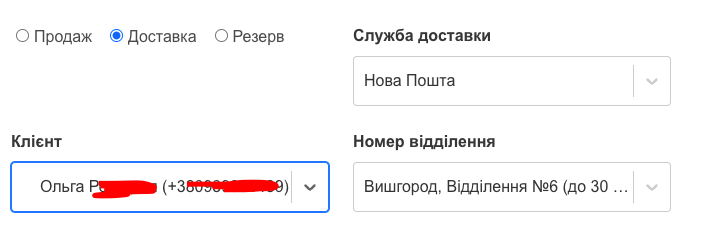
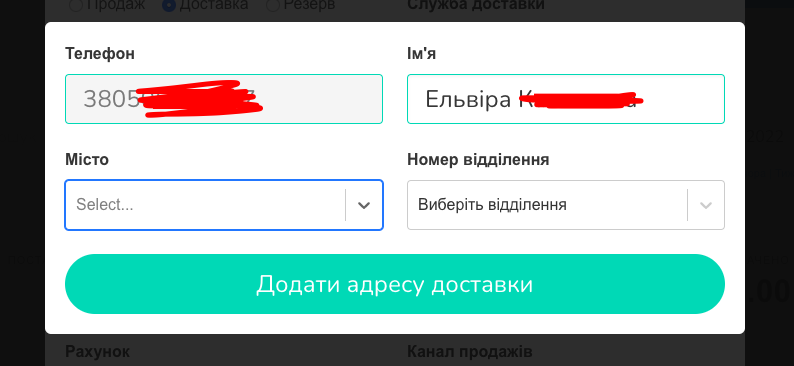
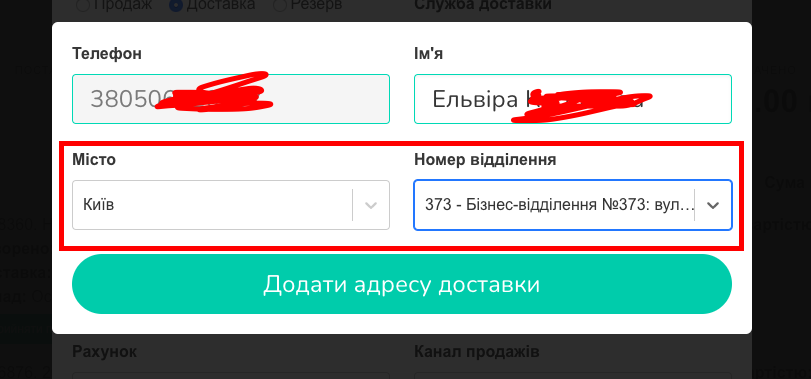
- In the modal window that opens, you can change the client’s first and last name, city and branch of the new post office (Screen 10, 11).
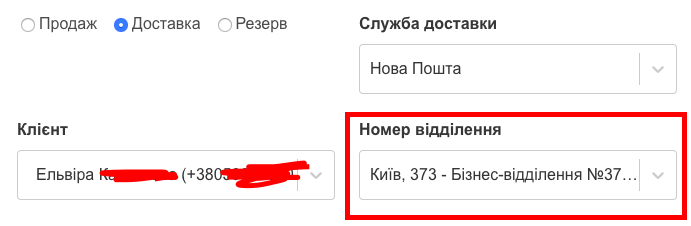
Once you have entered the new data and saved it, the updated information will be pulled into the Add Sale window (Screen 12).
How to send a prepaid parcel?
To use the Subscription option, you need to click on the corresponding button under the Total field. After specifying the prepayment amount, the Balance field will appear. The amount is calculated by subtracting the advance payment from the total cost of the product (Screen 13).
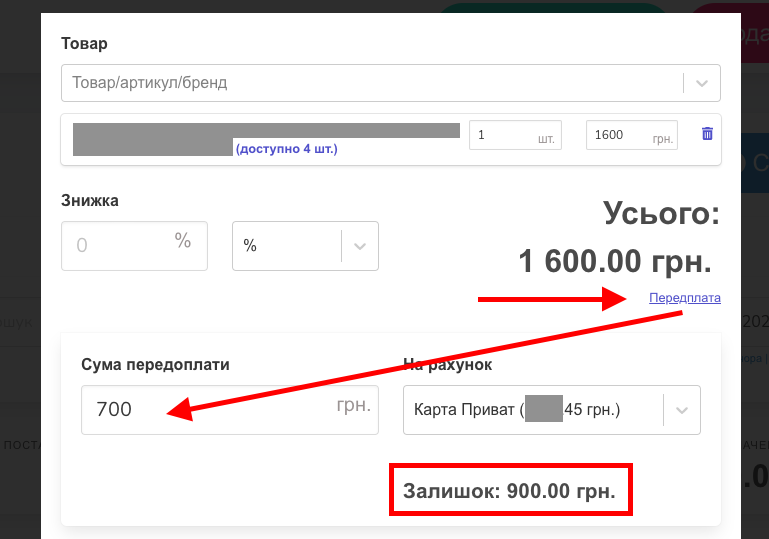
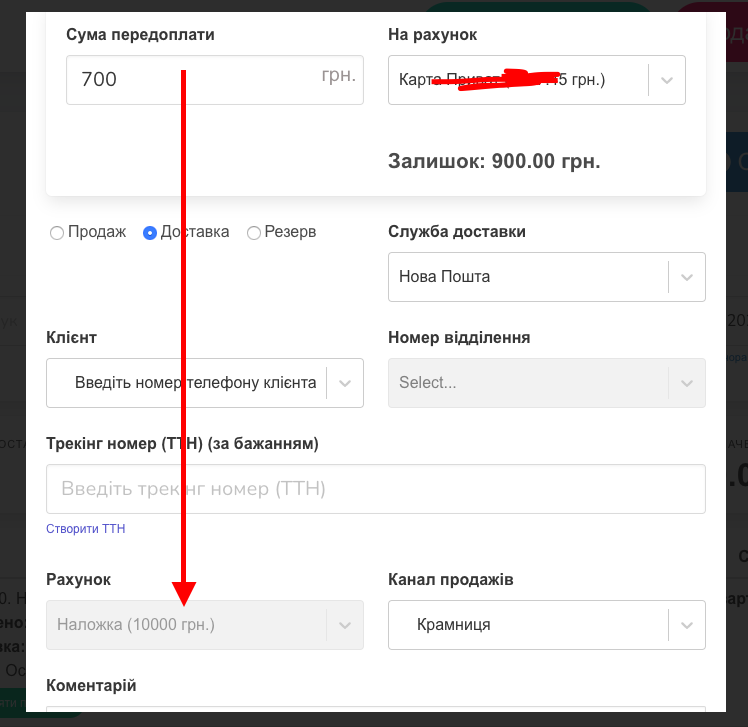
Importantly! After receiving the prepayment, the system automatically deposits the remaining amount into the deposit. It is possible to choose an account option (cash, card) only if there is no prepayment (Screen 14).
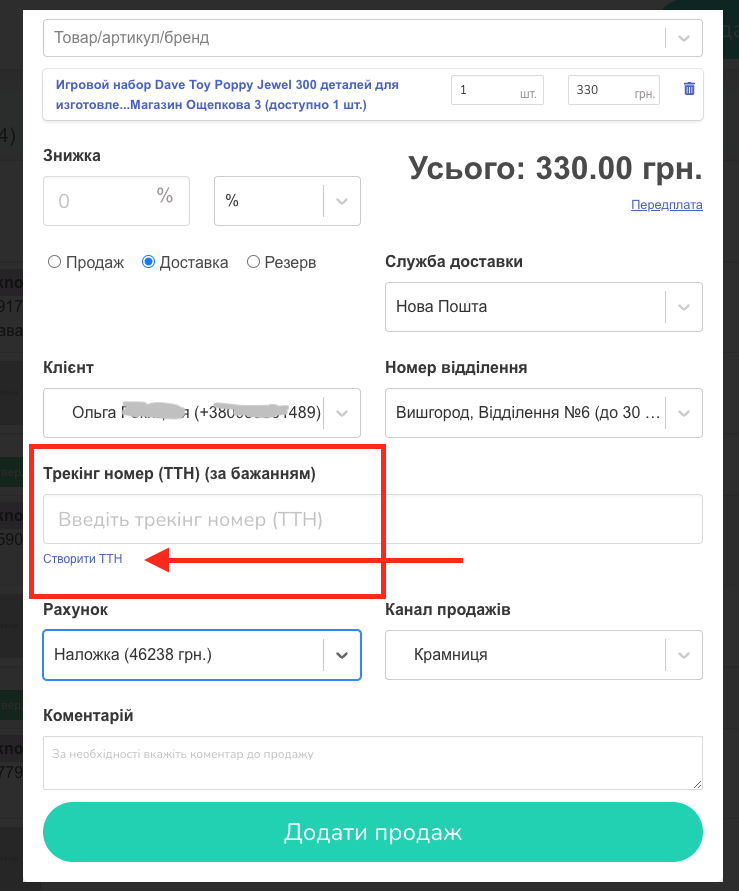
What else you need to know if you have chosen the Nova Poshta delivery service
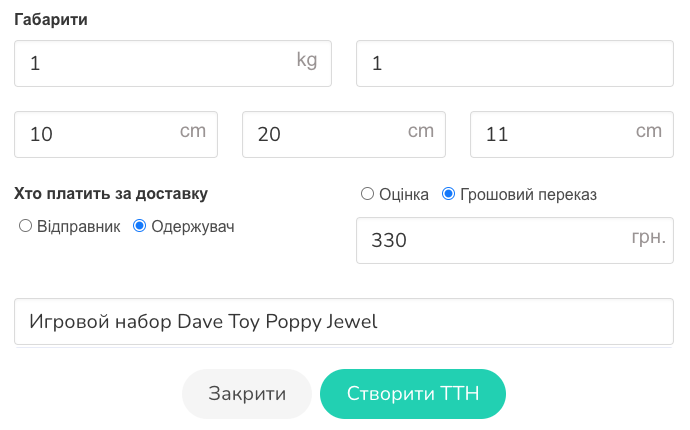
You can create the TTN of your parcel directly in the system. To do this, you must select Create TTN and in the dialog box that opens, fill in all the necessary fields (Screen 15, 16).
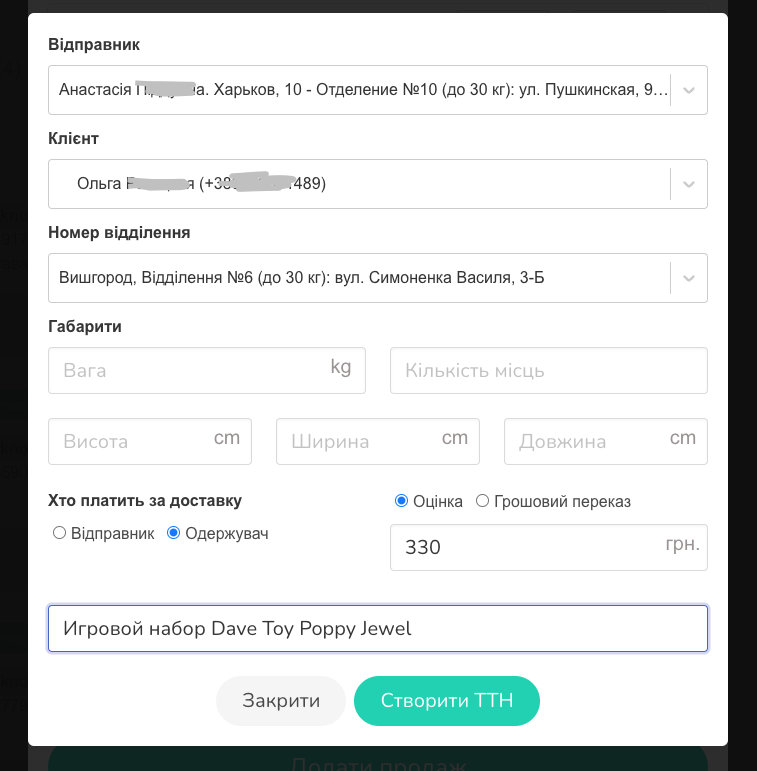
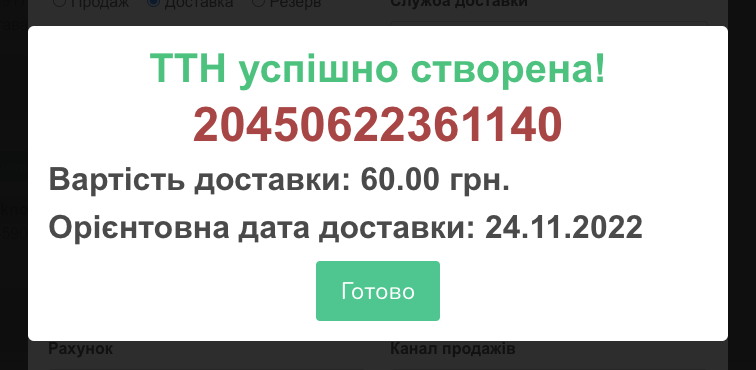
When you have filled in all the necessary data, click “Create TTN” (Screen 17).
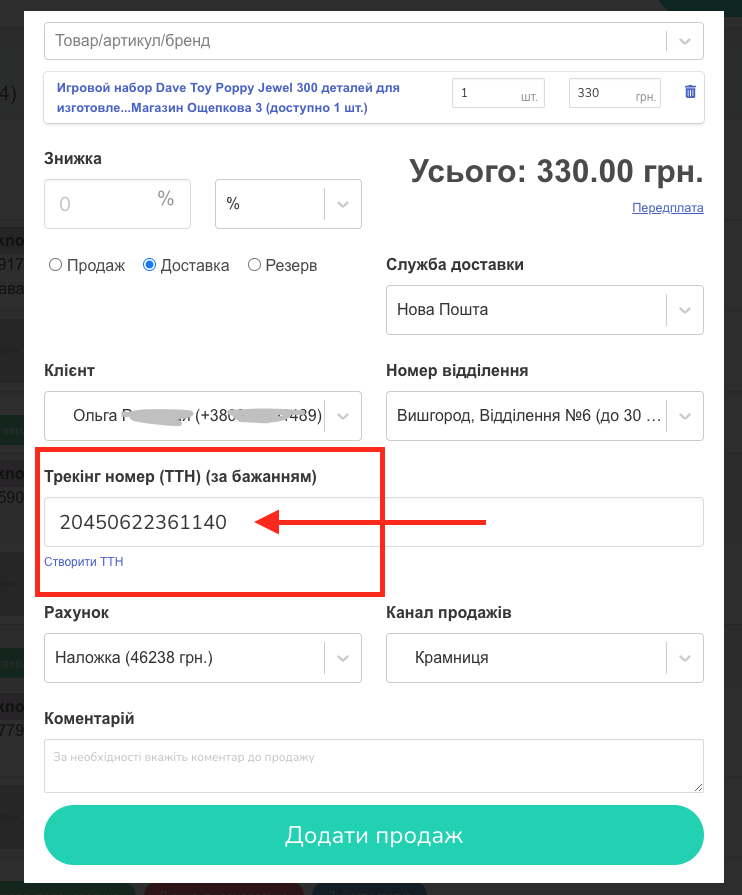
TTN is created and added to the sales card (Screens 18, 19).
Shipment statuses
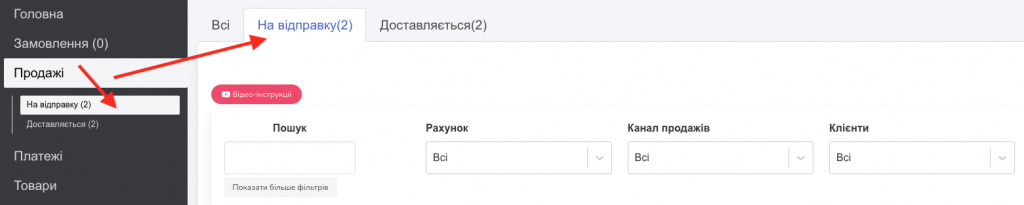
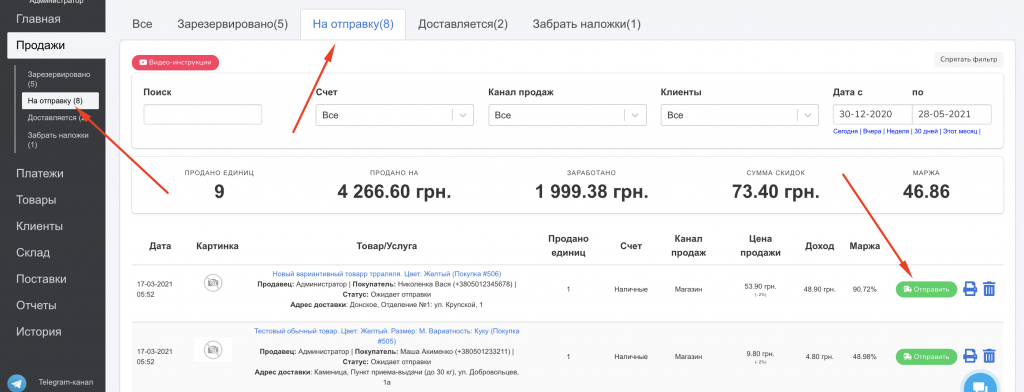
After you order the delivery of the goods, the status “Shipping” will be added to the Sales section (Screen 20).
You can change the statuses of parcels by clicking the “Send” button in the corresponding line (Screen 21).
After clicking on the button, the Work on delivery modal window opens with all data indicated (Screen 22).
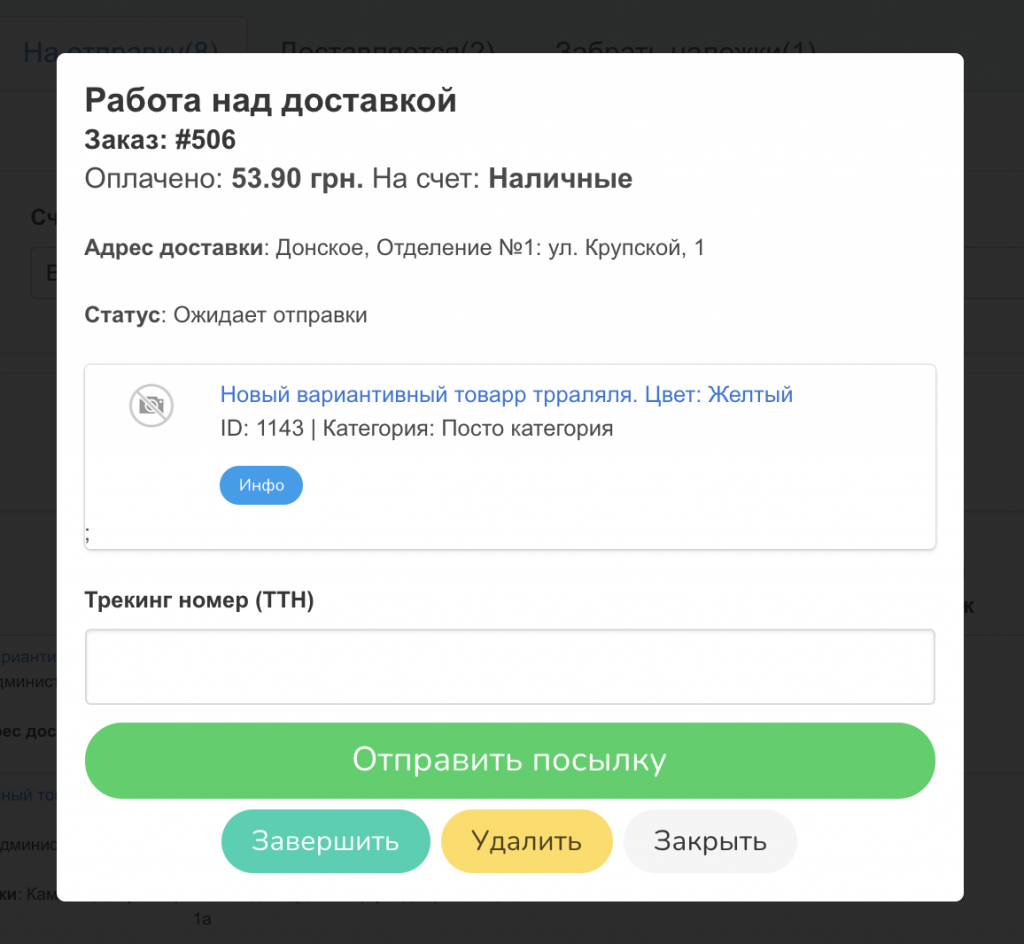
Work in a modal window:
- If the product has not yet been shipped, simply click the “Close” button, and the status of the package will remain the same.
- If the send is cancelled, click the “Delete” button.
- If the package was received by the buyer, click the “Finish” button.
- If the product needs to be sent, click the “Send parcel” button, after which the system will notify that the parcel has been sent, and the status of the product in the table will change from “Send” to “Complete”.
If you have NOT specified the TTN
If the TTN is not specified, you will have to track the status of the parcel yourself. When the postal service informs that the customer has picked up the parcel, you need to select the sent product from the general sales list or the Delivered list, and then click the “Finish” button.
Just in case, the program will clarify whether the parcel has been delivered or not. If so, select the appropriate button, after which the Transfer Amount field will open.
If you have specified the TTN
If you specified the TTN, the parcel will AUTOMATICALLY change to the status Delivered as soon as the carrier sends your parcel (Screen 23).

If you chose the delivery service of UkrPoshta or Others (Justin, Meest, other)
See above for general steps for shipping.
Additionally! If you chose a different mail, the Delivery information field will be available to you, where you can enter the shipping data yourself, as well as the Enter tracking number field (Screen 25).
At the moment, you can only enter a parcel already created through the UkrPoshta application (Justin, Meest, etc.) or created directly in the TTN department, but you cannot create it directly within the system.
Pick up payment (deposit)
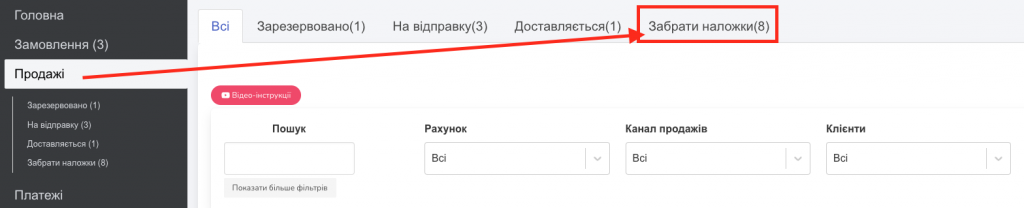
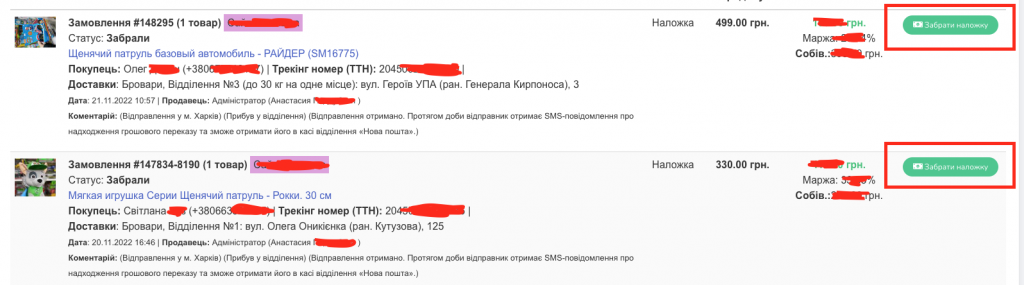
If you specified the TTN number and issued a post-payment, after the buyer receives the goods, in the Sales section at the top, next to the All, Reserved, For shipment and Delivered tabs, the Pick up deposit box will appear (Screen 26).
By selecting this field, you will be able to find all sales in which users have collected and paid for goods. After pressing the button “Remove deposit“, you will be able to choose the account to which the money will go (cash, card) (Screens 27, 28).
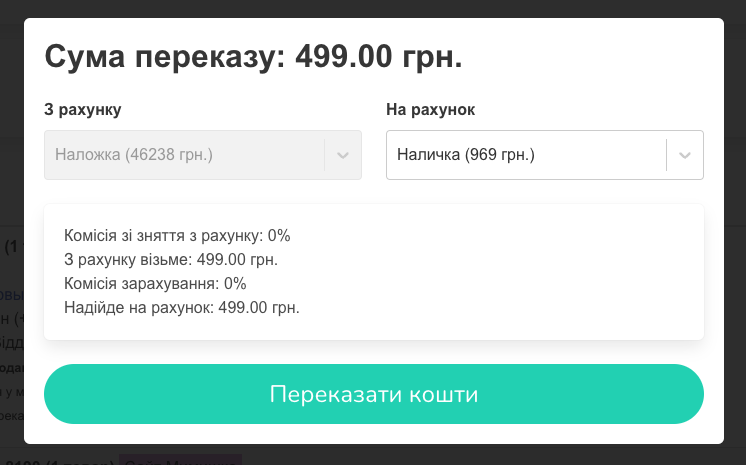
After that, click the “Transfer funds” button and the transaction will be closed.
They refused the package with payment on delivery
If you specified the TTN number and issued a post-payment, and the user refused to pick up the parcel, the system will automatically determine the return and a new tab will appear in the Sale – Returns section. This tab will display all returns of users who have not collected their parcels.
You can process a return and indicate how much it cost you to return this product and whether you need to return this product to stock.