To import goods from Cloudshop to our service, you need to:
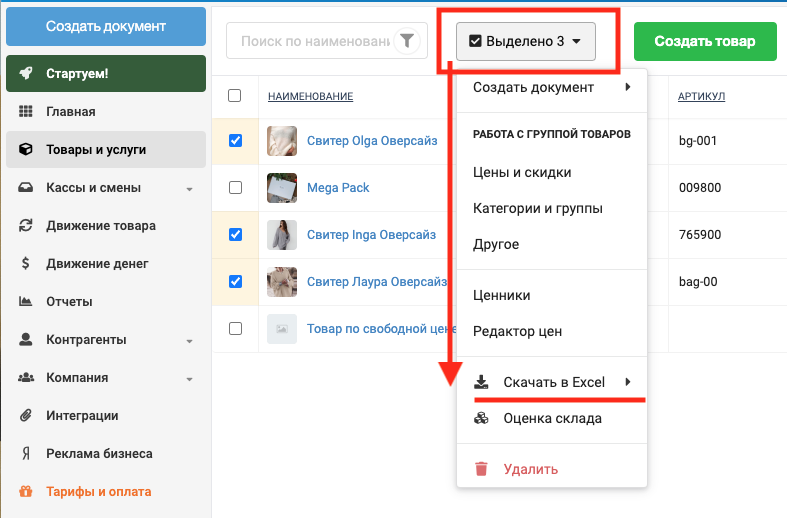
1. Go to the Products and Services section in your Cloudshop and check all the products you want to transfer (Screenshot 1).

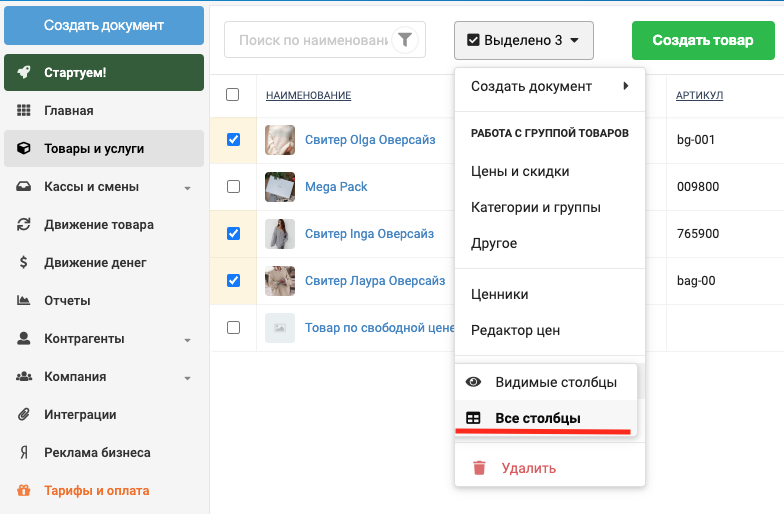
2. Click the button to work with the selected product, choose “Download from Excel – All Columns” (Screenshots 2, 3).
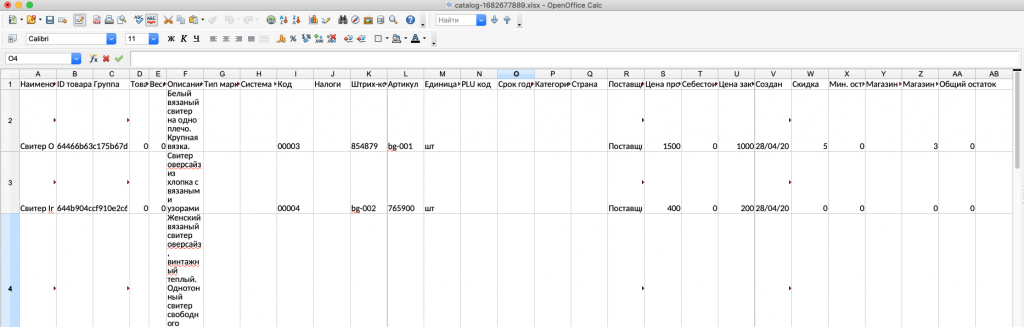
3. Open the downloaded file (Screenshot 4).
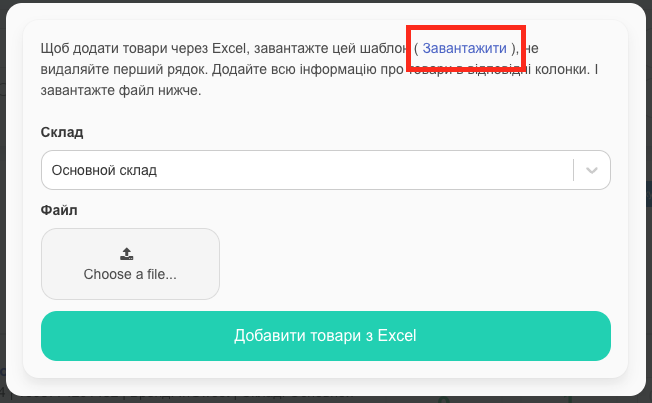
4. In our service, go to the Products – “Upload from Excel” section (Screenshot 5).

5. Next, you need to upload our template by clicking the “Upload” button (Screenshot 6).
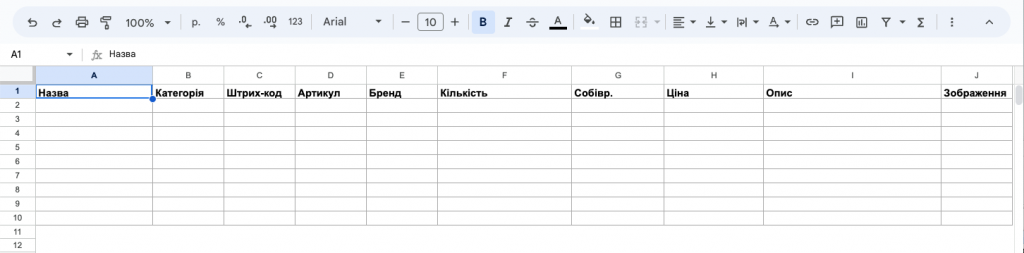
6. Open the downloaded file (Screenshot 7). You will have access to the following criteria:
- Name.
- Category.
- Barcode.
- Article.
- Brand.
- Quantity.
- Cost.
- Price.
- Description.
- Image (link).
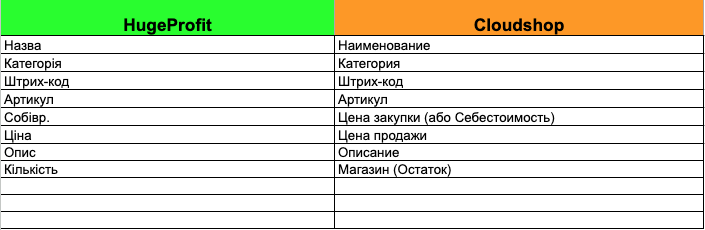
7. Transfer all matching fields from the file created in Cloudshop to the template created in our system (Screenshots 8, 8a).
You will be able to transfer:
- Name.
- Category.
- Barcode.
- Article.
- Quantity.
- Cost.
- Price.
- Description.
And you will not be able to – Brand and Image. If necessary, you can add them manually.

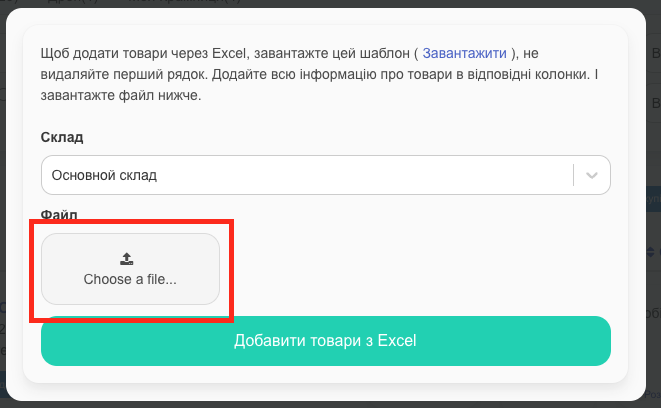
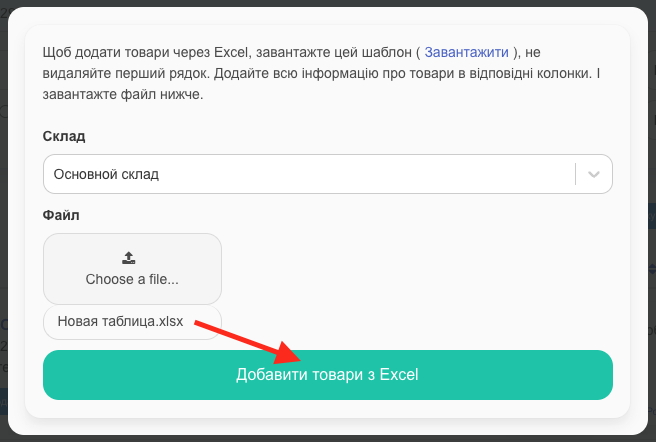
8. When you have transferred the data, upload the document (Choose a file) and click “Додати товари з Excel” (Screenshots 9, 10).
9. Congratulations, your products have been transferred (Screenshot 11)!

ATTENTION! Cloudshop does not include criteria such as variability (similar products with different colors, sizes, etc.) and components of composite sets in its xlsx-file.
To import clients from Cloudshop to HugeProfit, you need to:
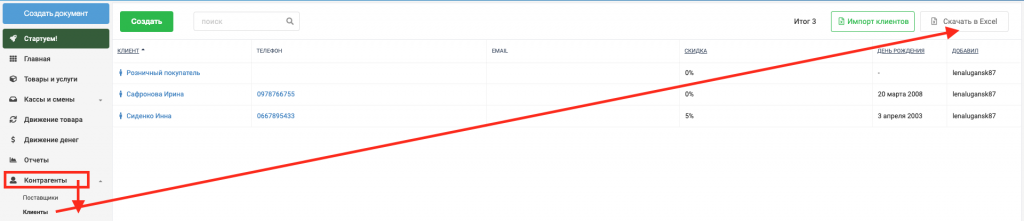
1. Go to Cloudshop to the section Counterparties – Clients – Download to Excel (Screenshot 12).
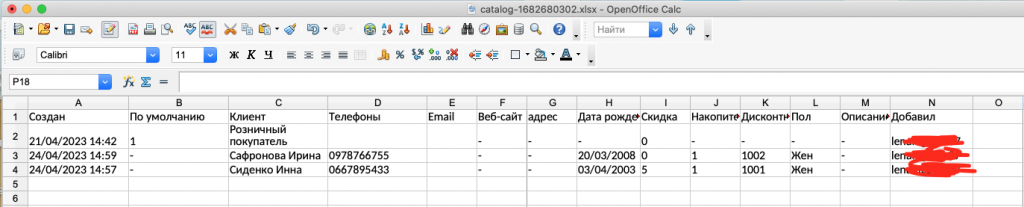
2. Open the downloaded file (Screenshot 13).
3. Go to our service to the section Clients – “Download from Excel” (Screenshot 14).

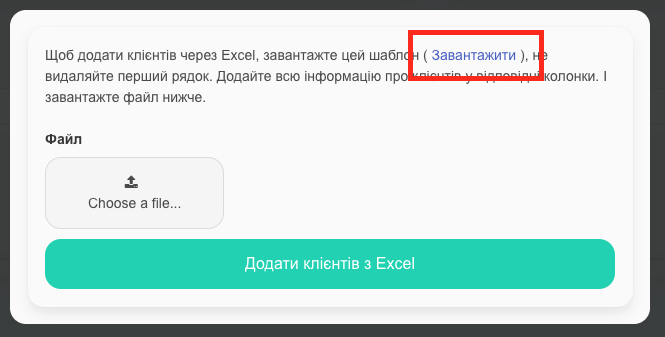
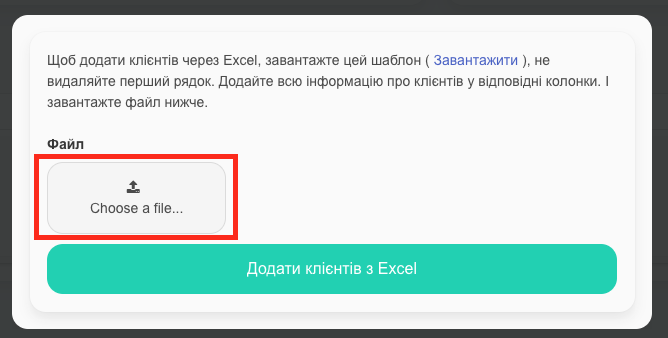
4. Next, you need to upload our template by clicking the “Upload” button (Screenshot 15).
5. Open the downloaded file (Screenshot 16). You will have access to the following criteria:
- Full name.
- Last name.
- First name.
- Nickname.
- Phone.
- Company.
- E-mail.
- Birth date.
- Discount.
- Comment.
- Payment details.

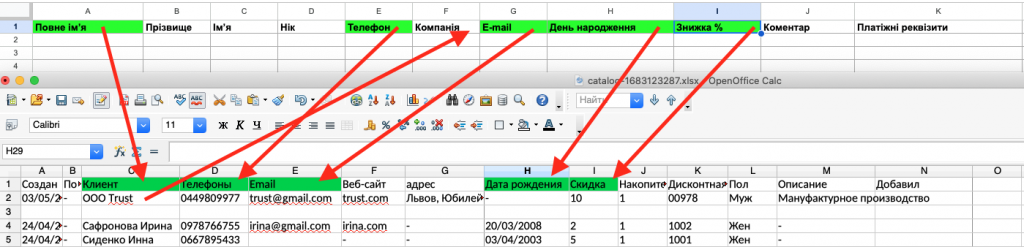
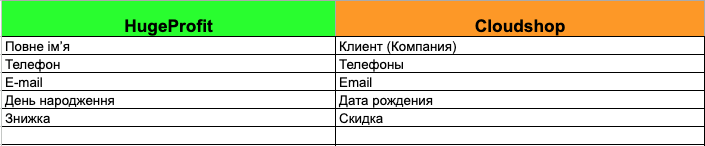
6. Transfer all matching fields from the file created in Cloudshop to the template created in our system (Screenshots 17, 17a).
You will be able to transfer:
- Full name (If you are working with a legal entity, you can independently select clients and transfer them to the Company column).
- Phone.
- E-mail.
- Birth date.
- Discount.
And you will not be able to transfer:
- Last name.
- First name.
- Nickname.
- Comment.
- Payment details.
If necessary, you can order them manually.
7. When you have transferred the data, upload the document (Choose a file) and click “Add clients from Excel” (Screens 18, 19).
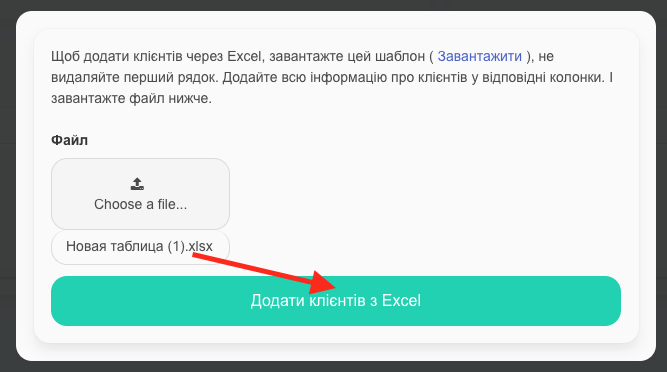
8. Your clients have been transferred.