
To import goods from My Store, you need to transfer data from a file created in My Store to our system.
There are two ways to transfer:
- Transfer from a file created in the Reserves category;
- Transfer the file from the Goods and Services category.
In the first case, you will be able to transfer: Name. Article. Quantity. Cost price. Price.
And you will NOT be able to – Category, Barcode, and Description (Screen 1).

In the second case, you will be able to transfer: Name. Category. Barcode. Article. Cost price. Price. Description.
And you will NOT be able to – Quantity in stock (Screen 2).

Attention!
Brand and Image CANNOT be transferred in either the first or second option.
SO.
If you choose the first option, what you need to do.
1. Go to your My Store in the Goods – Reserves section. Here you can sort the goods by the criteria you need. For example, sorting by residues is done for all available options (Screen 3).

2. Then go to Print – Stocks by items (Screen 4).

3. In the dialog box that opens, select Download in Excel format (Screen 5).

4. Upload the generated file and open it (Screen 6).

ATTENTION!
When creating a file in My Store and transferring data to our service, we can currently ONLY work with simple single-store goods, as well as with variable goods with modifications.
5. Then go to our service.
Option 1: IF YOU TRANSFER ONLY SIMPLE GOODS
A) Go to HugeProfit in the Goods – “Upload from Excel” section (Screen 7).

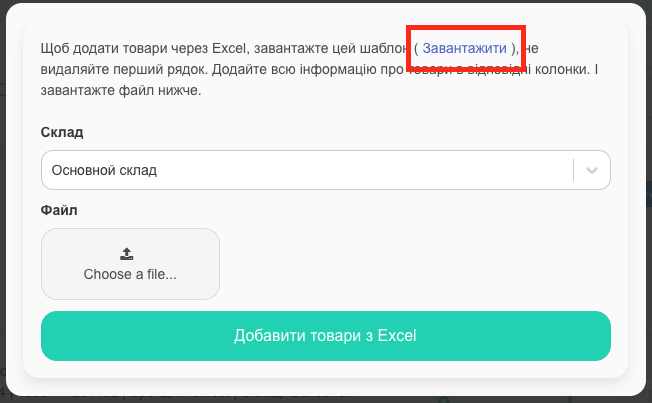
Б) Next, you need to upload our template by clicking “Upload” (Screen 8).
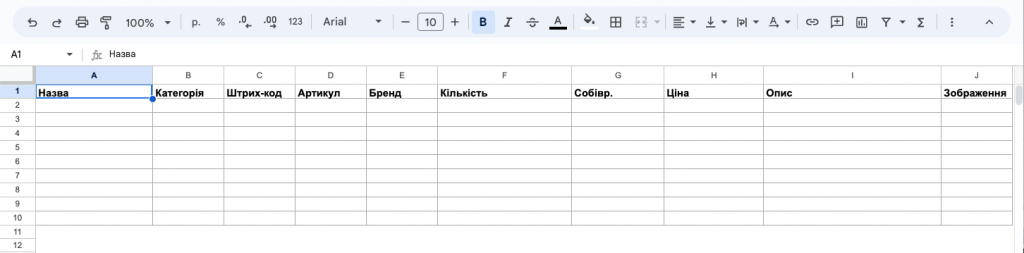
В) Open the uploaded file from HugeProfit (Screen 9). You will have the following criteria:
- Name.
- Category.
- Barcode.
- Article.
- Brand.
- Quantity.
- Cost.
- Price.
- Description.
- Image (link).
Г) Transfer ALL fields that match from the file created in My Store to the template created in our system (Screen 10).

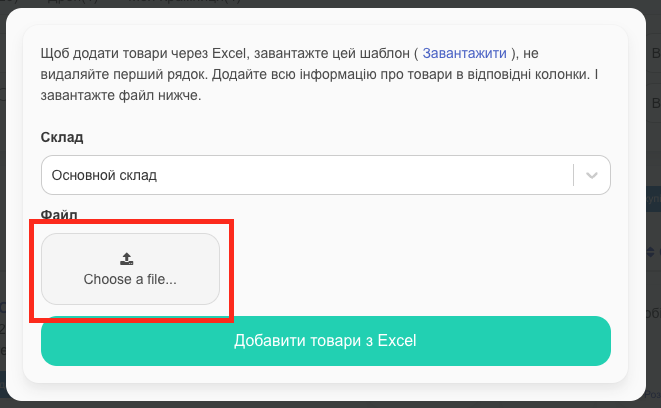
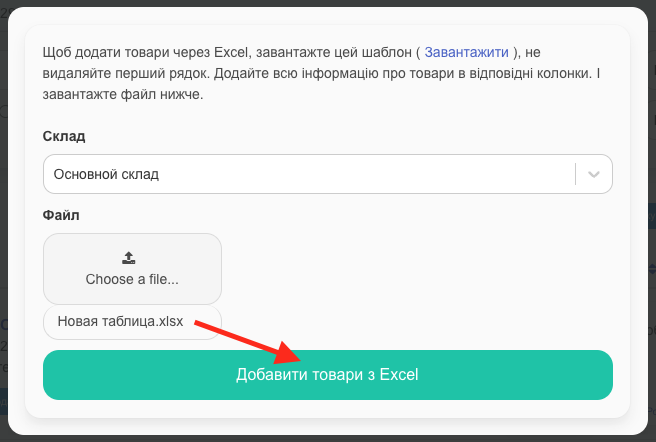
Д) Once you have transferred the data, upload the document, add it to HugeProfit, and click “Add products from Excel” (Screens 11, 12).
Е) The products have been transferred.
Option 2: IF YOU ARE TRANSFERRING A VARIABLE PRODUCT.
А) You need to create at least one variable product with the necessary modifications in HugeProfit (How to add a variable product) (Screen 13).

Б) Next, you need to export your variable product to Excel using the Export to Excel icon (Screen 14).
B) Next, you need to upload your variable product to Excel, using the Upload to Excel icon (Screen 14).

C) Open the created file. Your product with modifications (in our case, color and size) will be displayed there (Screen 15).

D) Delete all data and fill in the variable products from the file generated in My Store (Screens 16, 17). Save the file.
Important!
All variable products must have the SAME NAME. In our case, it’s Sweater Olga Oversize.


E) Go to HugeProfit to the section Products – “Upload from Excel” (Screen 18).
E) Next, you need to upload the saved file by clicking the “Upload” button (Screen 19).
Z) When you have added the file, click “Add products from Excel” (Screen 20).
I) The products have been transferred (Screen 21).

What you need to do if you choose the second option.
1. Go to your My Store in the section Products – Products and Services, where your products will be displayed (Screen 1).

2. Next, click on the “Export” button and select Export to Excel (Screen 2).

3. Upload the generated file and open it (Screens 3, 4)


ATTENTION!
When creating a file in My Store, a simple single-component product, a variable product with modifications, and a composite product may be formed, but without marking the components.
4. Next, go to the HugeProfit service.
Option 1: IF YOU TRANSFER ONLY A SIMPLE PRODUCT
A) Go to HugeProfit to the section Products – “Upload from Excel” (Screen 5).
B) Then you need to upload our template by clicking the “Upload” button (Screen 6).
C) Open the uploaded file from HugeProfit (Screen 7). You will have access to the following criteria:
- Name.
- Category.
- Barcode.
- Article.
- Brand.
- Quantity.
- Cost.
- Price.
- Description.
- Image (link).
D) Transfer ALL matching fields from the file created in Cloudshop to the template created in our system (Screens 8, 9).


E) When you have transferred the data, upload the document, add it to HugeProfit, and click “Add products from Excel” (Screens 10, 11).
E) The goods have been transferred.
Option 2: IF YOU ARE TRANSFERRING A VARIABLE PRODUCT.
A) You need to create at least one variable product with the necessary modifications in HugeProfit yourself (How to add a variable product) (Screen 12).
B) Next, you need to export your variable product to Excel using the Export to Excel button (Screen 13).
C) Open the created file. Your product with modifications (in our case, color and size) will be displayed there (Screen 14).
D) Delete all data and fill in the variable products from the file generated in My Store (Screens 15, 16). Save the file.

E) Go to HugeProfit to the section Products – “Upload from Excel” (Screen 17).
E) Next, you need to upload the saved file by clicking the “Choose a file” button, then “Add products from Excel” (Screen 18).
I) The goods have been transferred (Screen 19).
To import clients from My Warehouse into our system, you need:
1. Go to My Warehouse to the section Counterparties – Counterparties – Export (Screen 20).

2. Upload the file and open it (Screens 21, 22).


3. Go to our service to the section Clients – “Upload from Excel” (Screen 23).

4. Next, you need to upload our template by clicking the “Download” button (Screen 24).
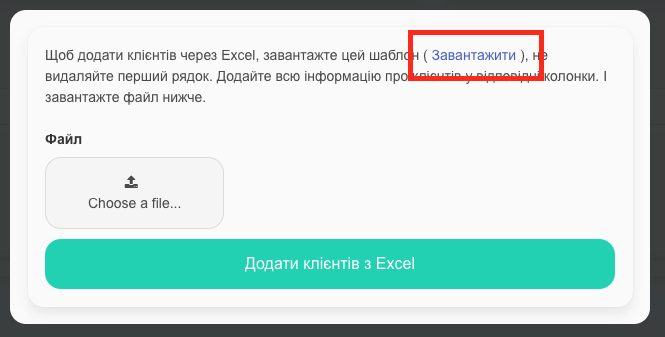
5. Open the uploaded file (Screen 25). You will have access to the following criteria:
- Full Name.
- Last Name.
- First Name.
- Nickname.
- Phone.
- Company.
- E-mail.
- Date of Birth.
- Discount.
- Comment.
- Payment Details.

6. Transfer all matching fields from the file created in My Warehouse to the template created in our system.
You will be able to transfer: Last Name. First Name. Phone. E-mail. Comment.
And will not be able to transfer – Full Name. Nickname. Company. Date of Birth. Discount and Payment Details (Screen 26). If necessary, you can fill them in manually.

Attention!
Last Name and First Name are uploaded from the Contact Persons section in My Warehouse, and Phone, E-mail, and Comment are from the About the Counterparty section.
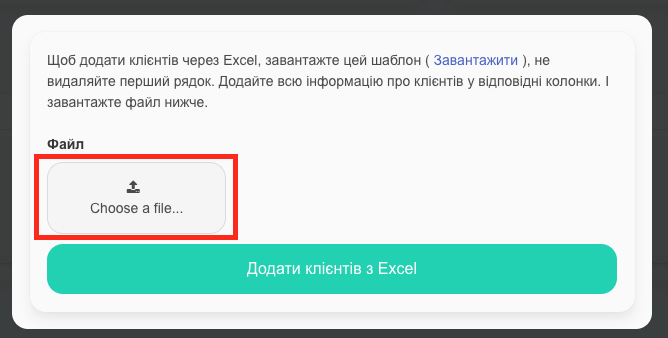
7. After you have transferred the data, upload the generated document (Choose a file) and click “Add clients from Excel” (Screens 27, 28).
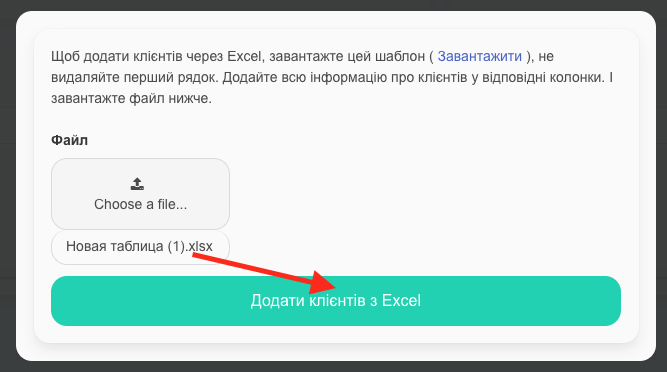
8. Your clients have been transferred.
Learn more on the warehouse accounting software page.
