If you have any questions or need help setting up, you can immediately contact our support +38 (073) 584-73-73 (Viber, Telegram).
Step 1.
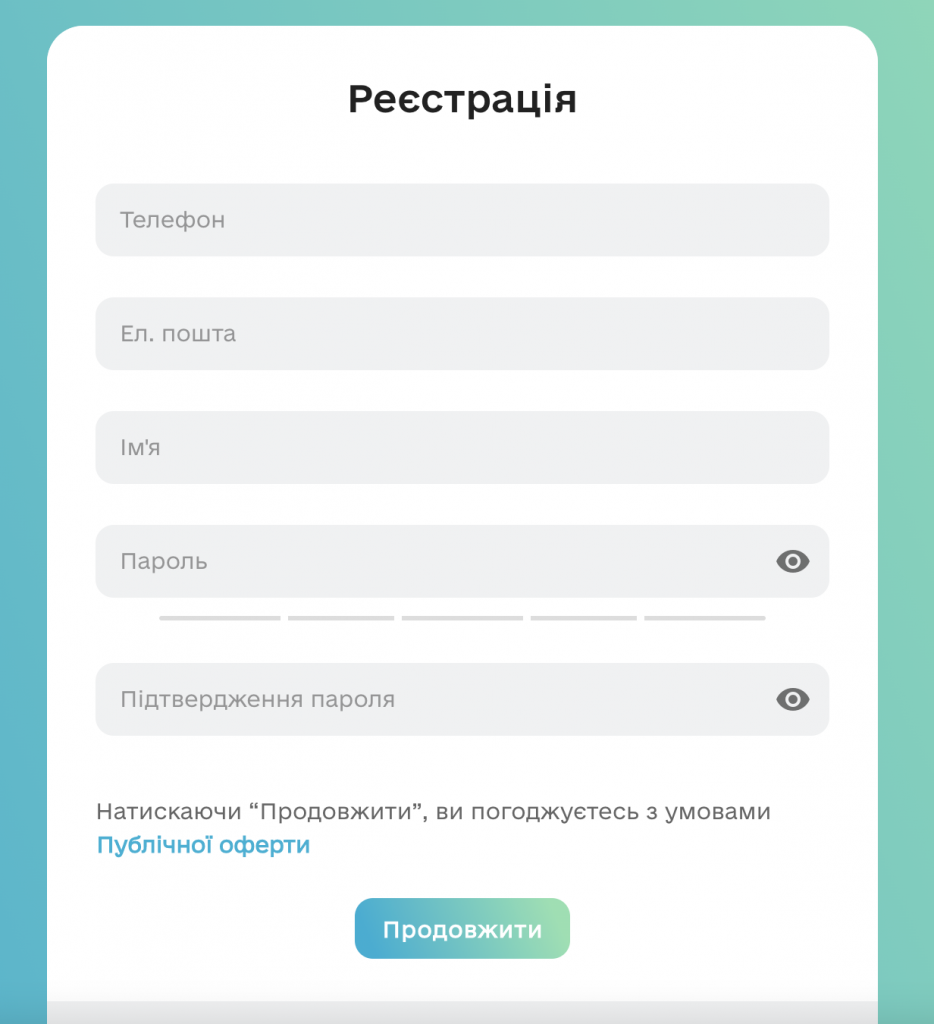
In order to integrate with Checkbox’s PRRO service (software clearinghouse), you need to register on Checkbox.ua.
Step 2.
Next, you need to follow the instructions on the website and complete all the steps to set up the service, namely:
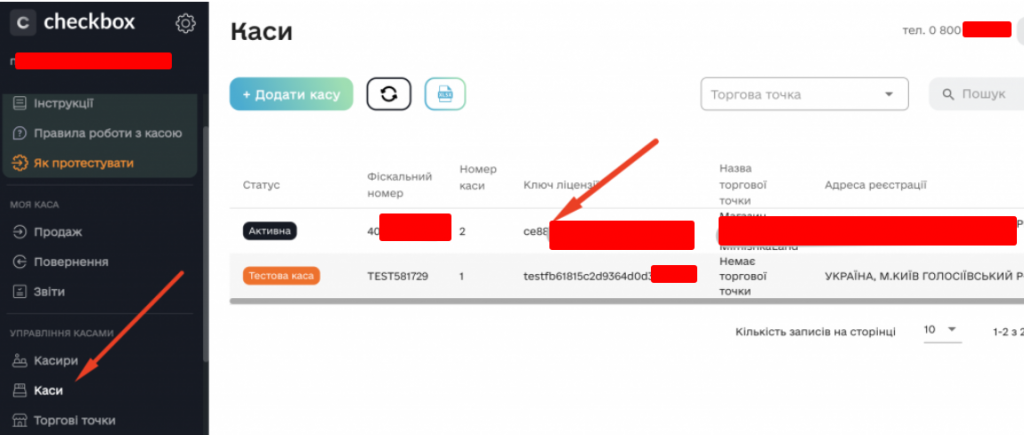
- Create a trading point
- Add checkout
- Register a cashier. Be sure to save the cashier’s login and password, you will need it to configure our service. And save your key in the Checkbox cloud service to automatically sign your checks.
More details about Checkbox settings can be found at the link: Setup instructions
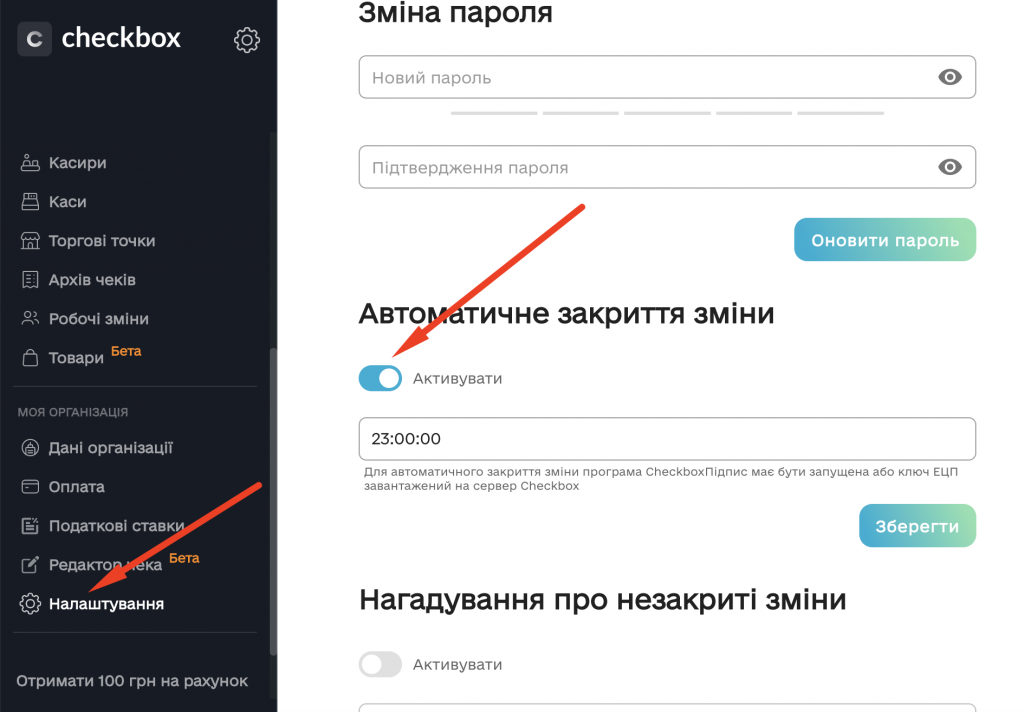
Step 3.
Be sure to set the switch in the Settings to Automatically close shift after your work is finished.
Step 4.
Next, you need to take the login and password of the cashier that you specified when creating it and fill in the corresponding fields in the Integration Settings.
You also need to take the Cash Register License Key and also fill in the appropriate field. (see screenshot)
If you want every sale you add to be automatically sent to the tax office, then check the box Automatically send all sales to the tax office. If this check is not checked, after adding the yarn, you will be prompted to send the sale to the tax office. So you will be able to control which checks should be taxed and which should not be taxed.
And click the Save button.
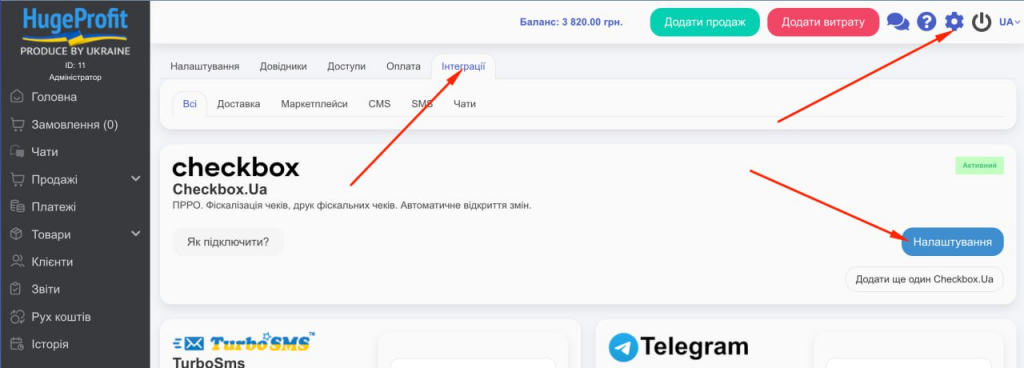
First, Fill in the Cashier Login, Cashier Password and Cash Register License Key.
In the integration settings, you can flexibly specify who to fiscalize (Warehouse/store, users such as a seller or cashier). You can indicate exactly how to fiscalize the deposit, in cash or non-cash.
Fiscalization of post-payment
You can fiscalize the cover at the moment when the customer picks up the parcel, that is, for example, if you do not want to fiscalize in advance, put this check mark. At the moment when the goods are collected and the imposed payment is paid, this sale will be fiscalized for the entire amount of the check, within a few minutes.
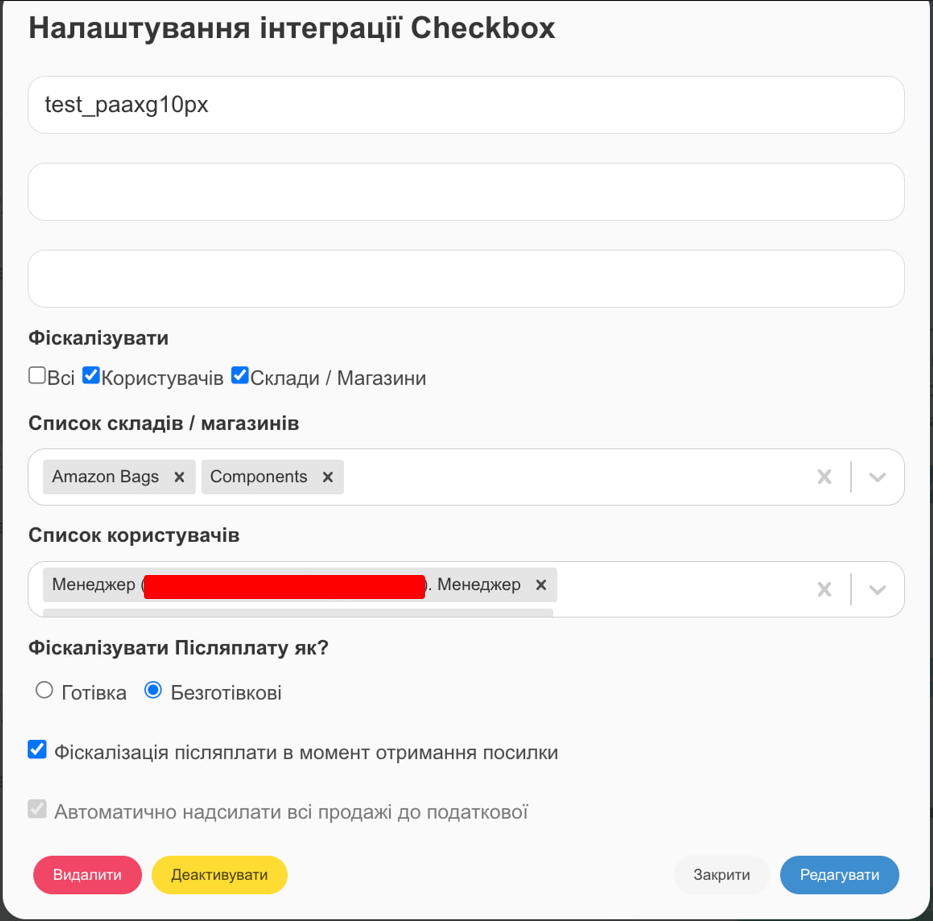
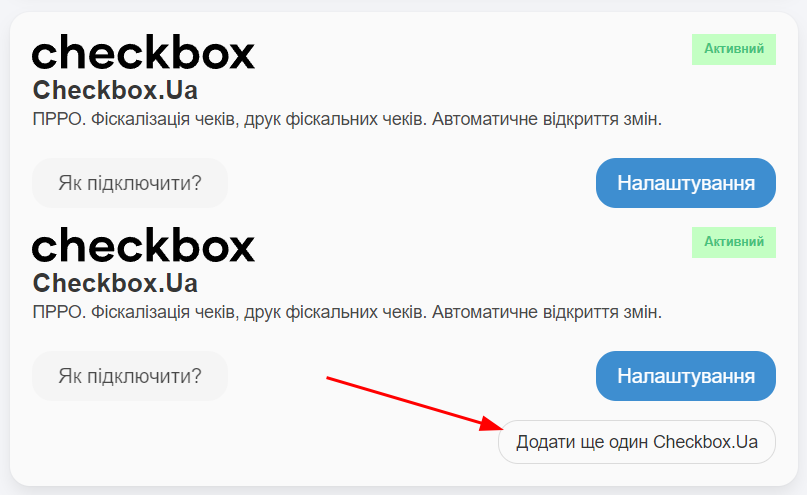
After creating an integration, you can edit it and add new ones with different settings.
Important! Integrations with the same settings cannot be created.
Step 5.
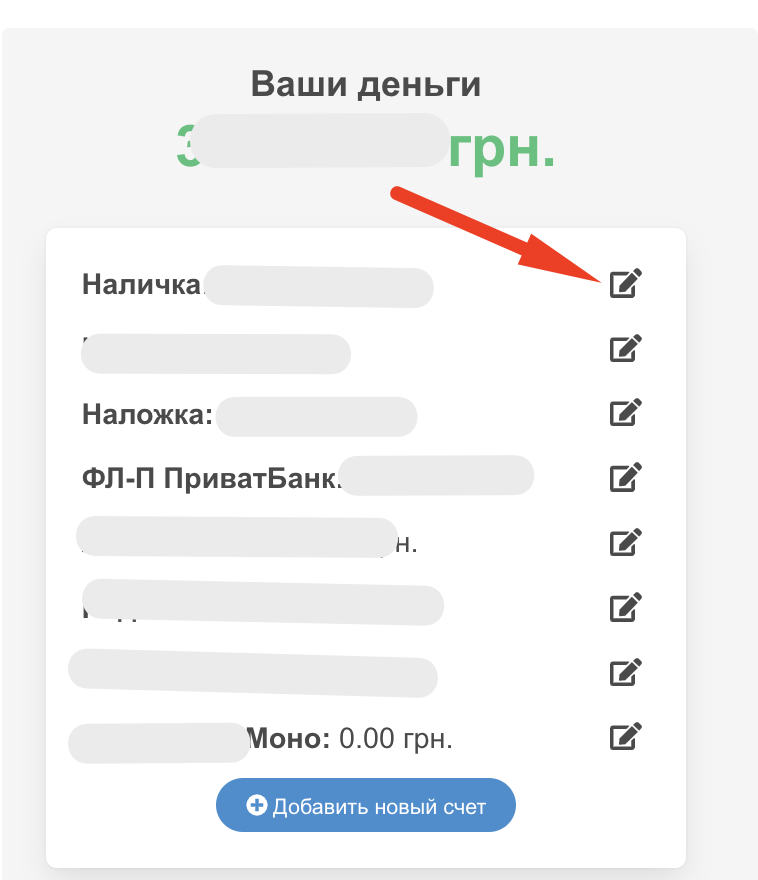
Next, you need to specify the sales to which accounts should be fiscalized (sent to the tax office). For example, sales for which you receive money on IBAN accounts do NOT require fiscalization, but for example, if you receive money on a payment card or cash, mandatory fiscalization is required. For more details, see the link in the tax office: (https://zir.tax.gov.ua/main/bz/view/?src=ques&id=30163)
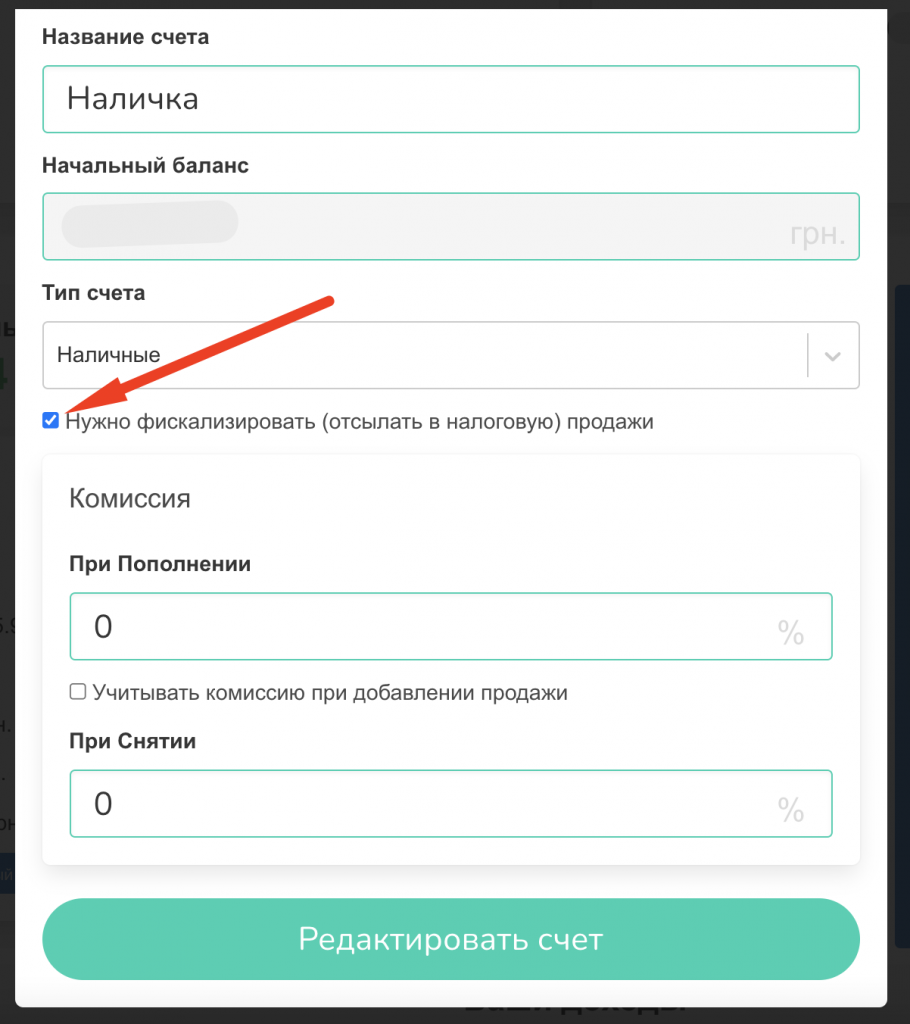
To do this, on the main dashboard in the section with your accounts, click on the Edit button next to the desired account. But put a check mark in the item It is necessary to fiscalize (send to tax) the sale. (see screenshot)
This completes the settings.
How to use?
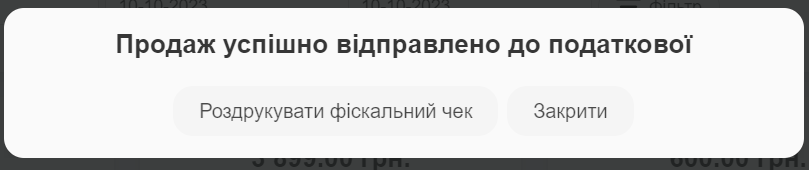
If you ticked the box Automatically send all sales to the tax office, then when adding sales to those accounts in which you have activated fiscalization, all sales will be automatically sent to the tax office.
If you did not check the box Automatic send to tax, then after adding the sale, you will be able to fiscal the check manually.

After adding the sale and fiscalizing the check, you can immediately print the fiscal check:
If, when adding a sale, you specified a client with an e-mail address in the data, he will be automatically sent a letter with a fiscal check.
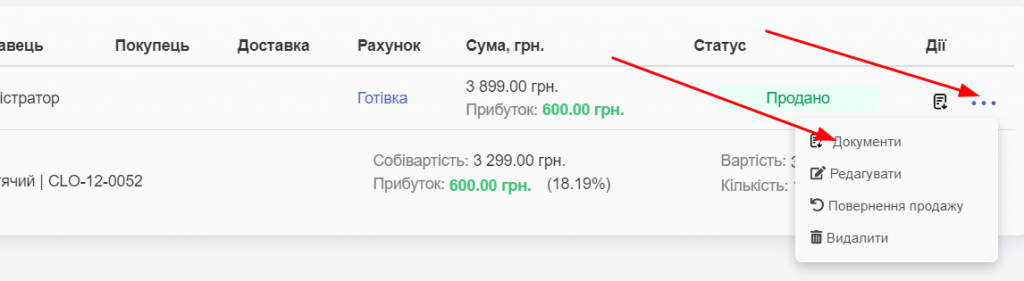
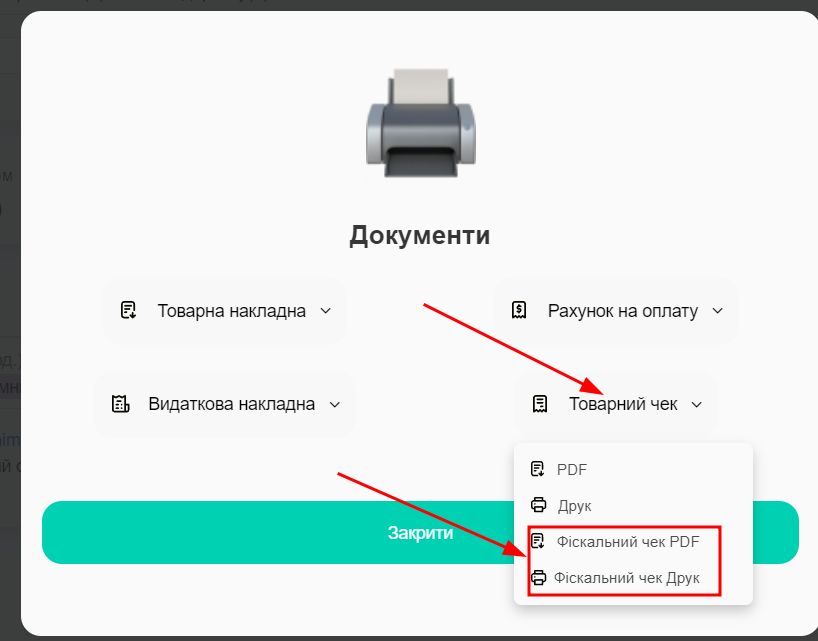
You can also print a receipt from the sales list in the section Sales -> “three dots” -> Documents.
Editing a fiscal sale will lead to the cancellation of the sale, if there is automatic fiscalization, a new fiscal check will be created immediately. If there is a manual fiscalization, then the cancellation will take place, and you will have to press Fiscalize again.
If you have any questions, you can contact our support and we will gladly help you!
Addition
Some problems faced by users:

You need to close the change on the Checkbox, our program should open the change itself. if you opened a change manually on Checkbox, our program cannot work with it. You close the change, and the program automatically opens the change itself at the first sale.
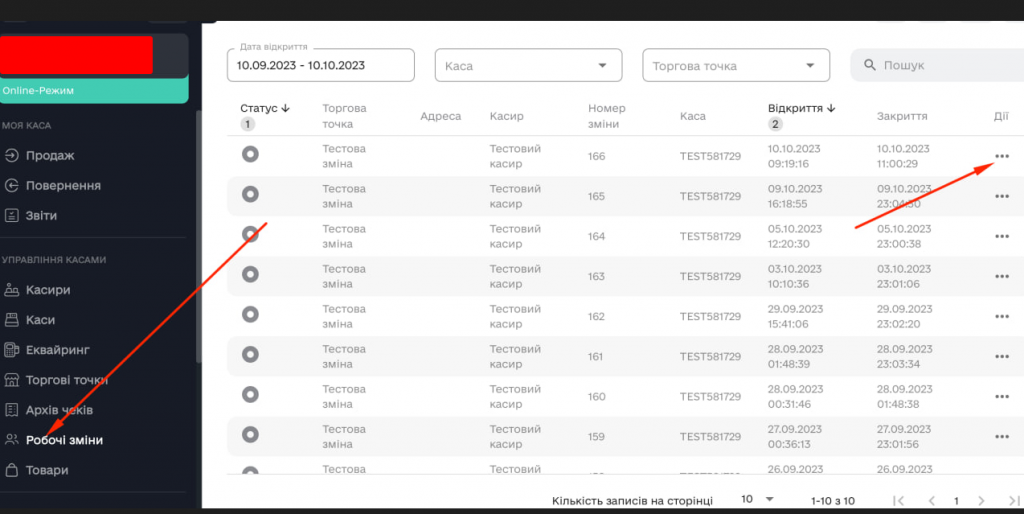
If there is a need to manually close the shift, it is done on the Checkbox website in the Working shifts section.
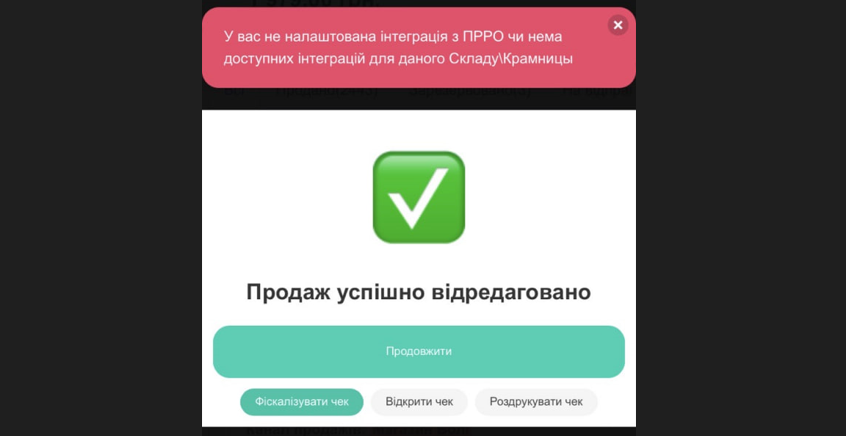
This means that the Checkbox integration is not configured for this warehouse from which the sale is made.
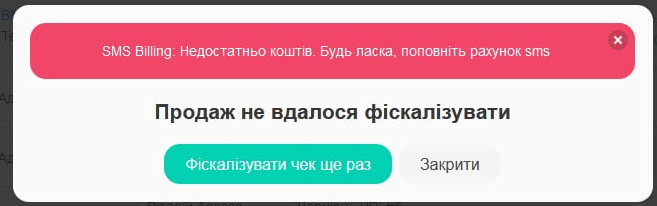
You need to top up your balance or turn off SMS notifications in the Checkbox itself