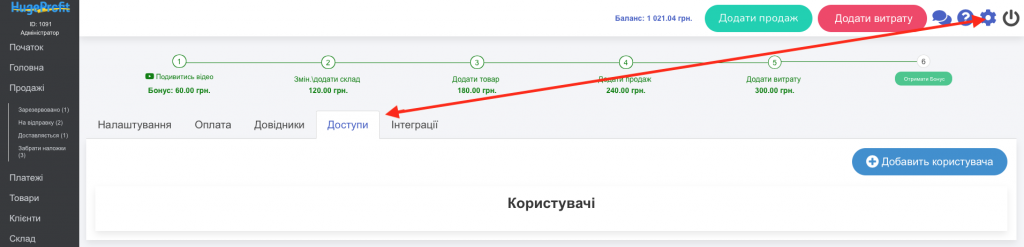
How to go to the Access section
To do this, you need to click on the button with the image of a gear located at the top of the page and go to the “Access” tab (Screen 1).
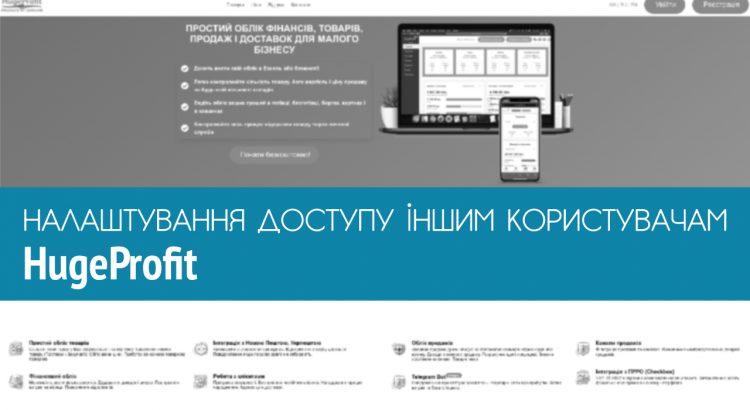
If you want the service to also be used by business partners or sellers in your store, use this tab.
Adding users
In the “Access” tab, click the “Add User” button (Screen 2).

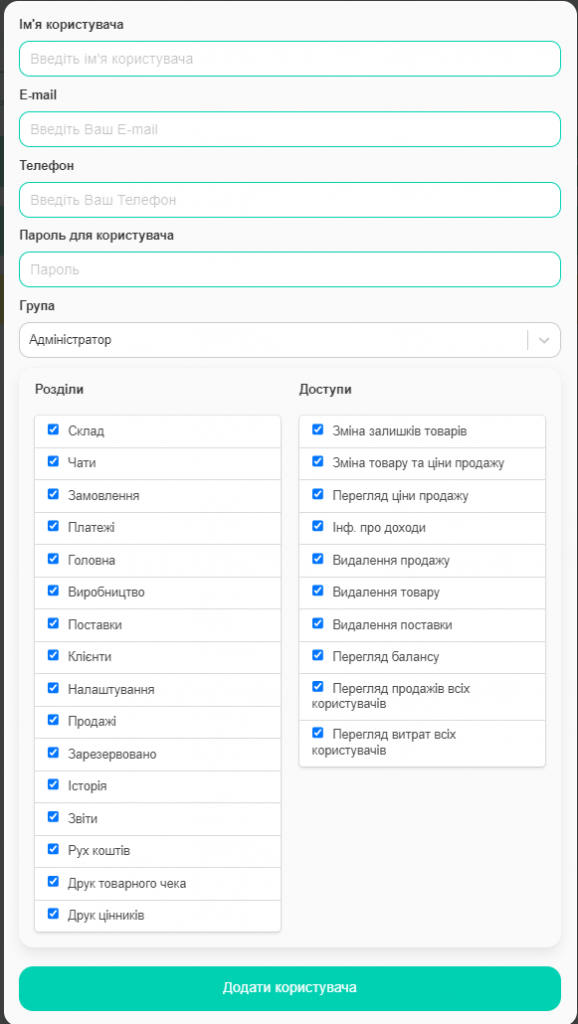
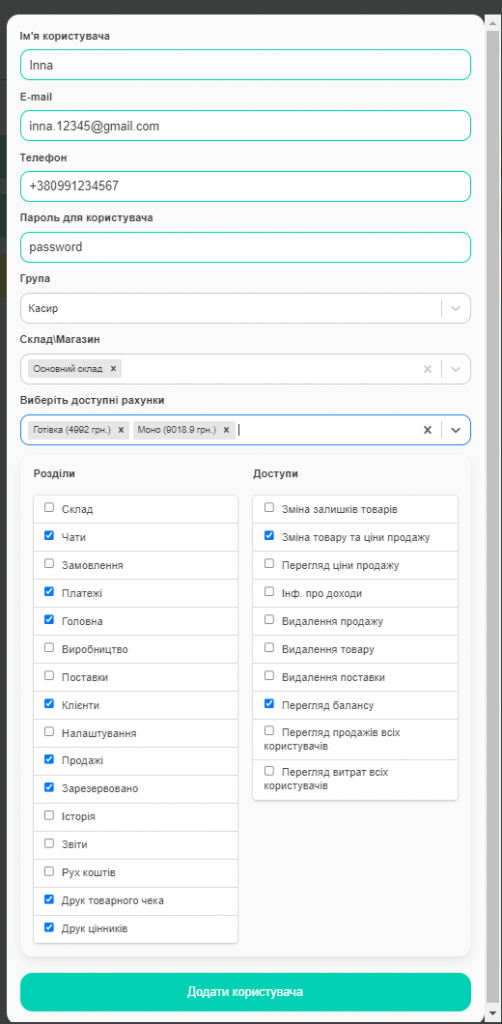
Fill in the fields of the form that opens:
- new user name,
- email,
- phone,
- password,
- group (administrator, cashier, assembler, manager, guest).
- sections to which the new user will have access; For the cashier, stockist, manager, guest, it is also necessary to choose warehouses and accounts to which they will have access.
- accesses of the added user to all or individual functionalities of the service.
And then click the “Add User” button (Screens 3, 4).
A new user has been added! (Screen 5).

In the future, you will be able to change the list of accesses for a specific user by going to the “Accesses” tab, selecting the desired user from the list and clicking the “Edit” button.
Importantly! To restrict access to certain sections or options of the site, remove the checkmarks opposite the desired items. To grant permission – add a check mark