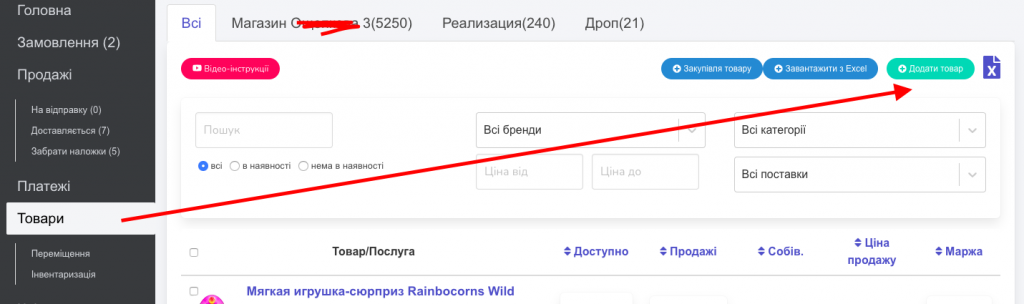
To add a new product, you need to go to the “Items” section and click the “Add new item” button (Screen 1).
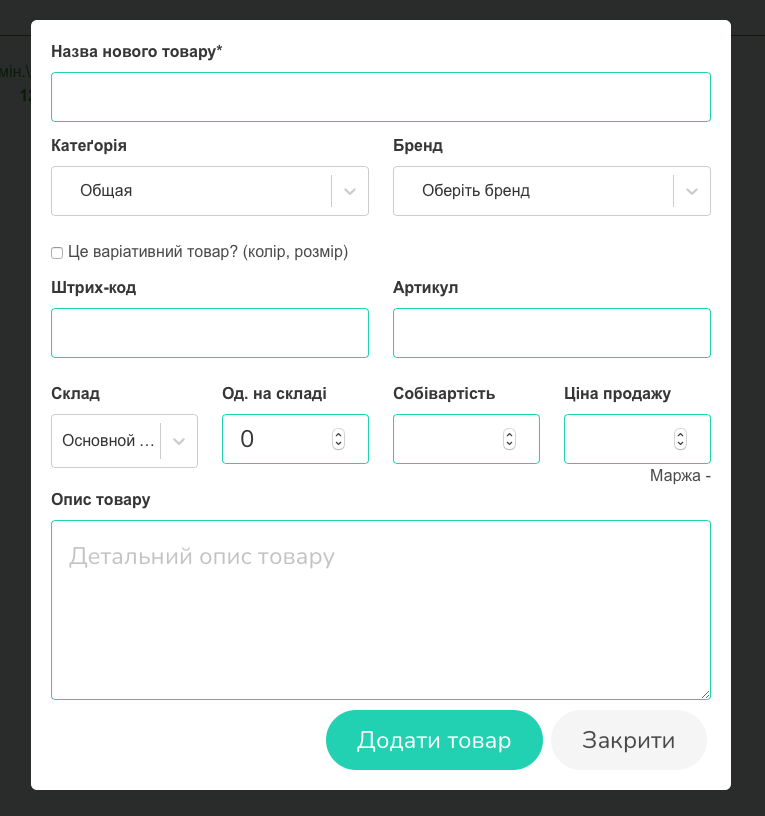
Then you need to fill in all the fields of the form; or only the first (with the product name), which is mandatory:
- product name,
- category (by default “general” is available) (Additional screen A),
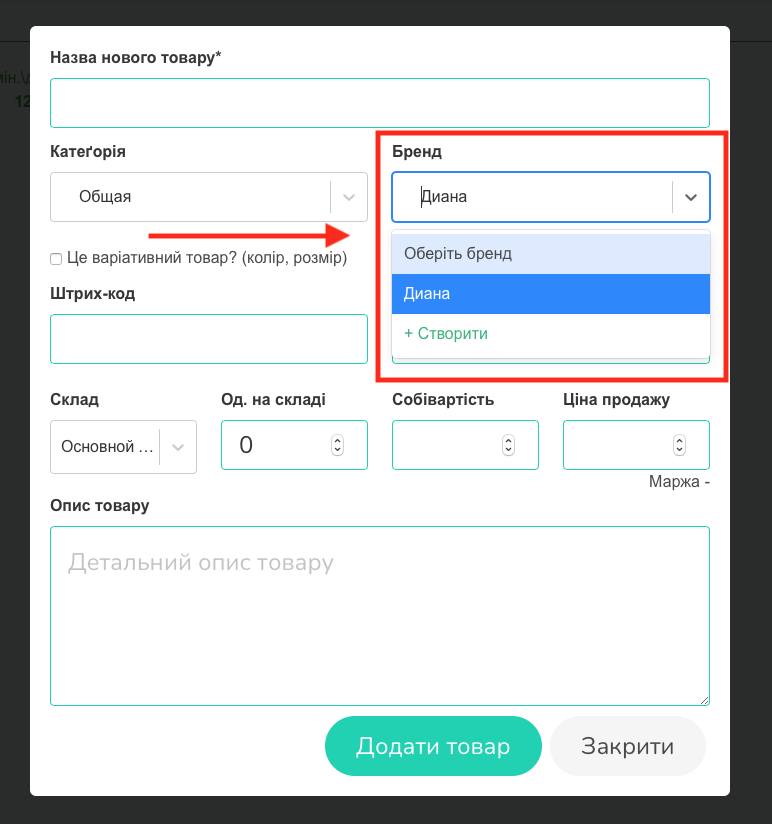
- brand (the system remembers the names of brands and when adding products later, you can automatically select the desired one or immediately create a new one) (App. screen B),
- bar code,
- article,
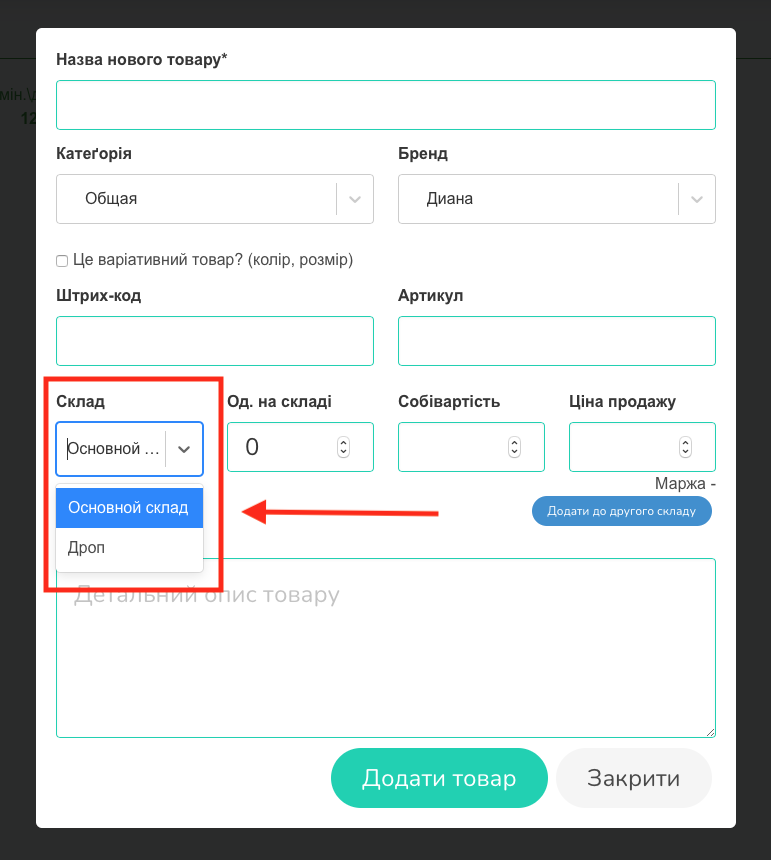
- composition (by default “main composition” is indicated, but you can choose a composition that you have added yourself)(App. Screen C),
- quantity in stock,
- cost,
- sales price (under this field, the program automatically calculates the margin),
- product description.
Importantly! If necessary, by checking the box, you can choose a variant product (read more). After that, you will be able to create and add product attributes (for example, variations of colors, sizes and other options of the same product). You can also choose to create Sets from several products (read more).
Then click the “Add product” button (Screen 2).
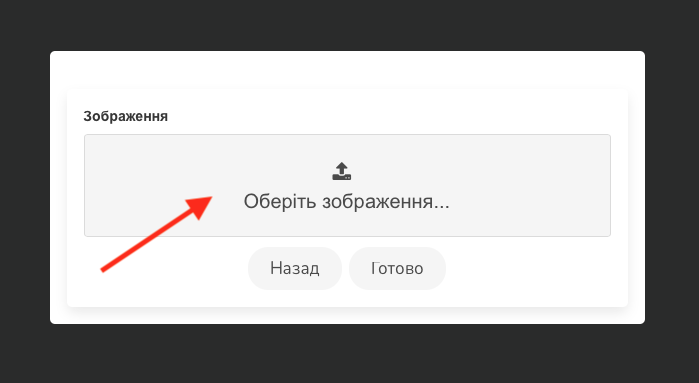
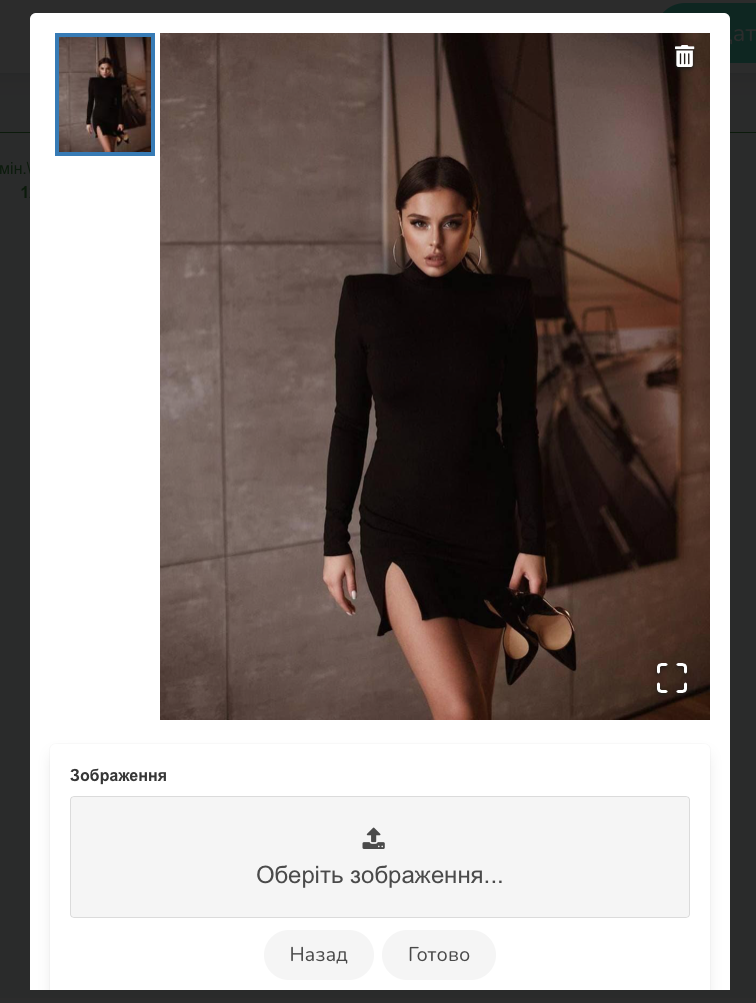
Next, a field for uploading product images will open. You can publish one or more photos or skip this option by clicking “Done” (Screen 3,4).
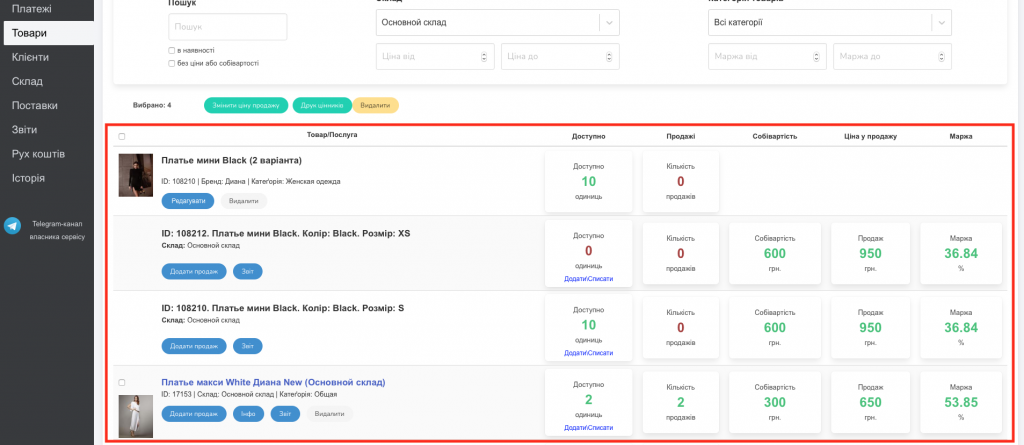
As a result, in the “Products” section, you will have a table with a specific model of the product and all the data about it.
The product report table contains the following data:
- product / service (displays all products or services that you entered on the service),
- available (how many units of each product are in stock),
- sales (the number of sales during the entire period of using the service),
- cost price (purchase price),
- selling price,
- margin
Under the product itself, there are the following active buttons: “Add sale”, “Info”, “Report” and “Delete” (Screen 5).
Additional screens
(Additional screen A)

(Additional screen B)
(Additional screen С)