Step 1.
In order for the order processing functionality to be activated, you need to integrate between the service and your trading platforms.
How to integrate with Prom.ua.
How to integrate with WooCommerce.
Step 2.
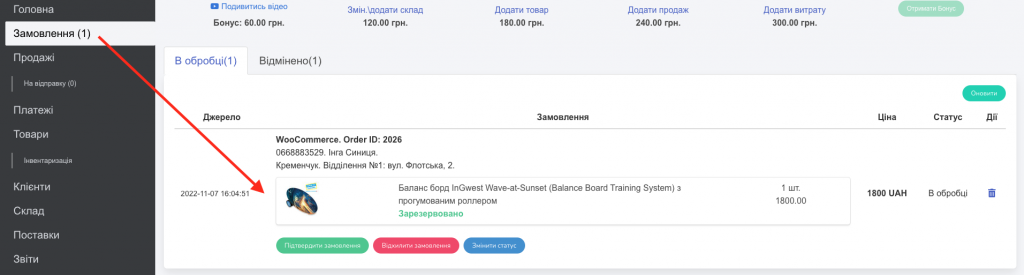
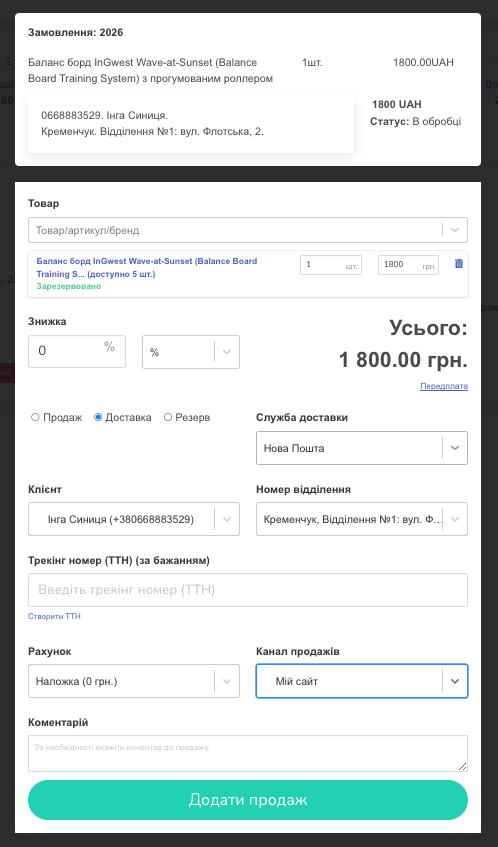
As soon as a product is ordered, the order will appear in the Orders tab. The service will display information about which product was ordered, personal information of the customer, as well as data for shipping the product (Screenshot 1).
When an order is received, it is automatically reserved in the system until its status is changed (Screenshot 2).

Step 3.
Next, you need to choose: (Screenshot 3).
- Confirm the order;
- Reject the order;
- Change the order status;
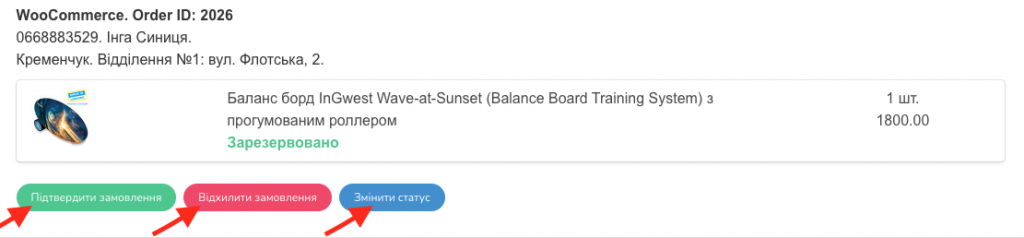
If you have contacted the customer and confirmed the order, choose the first option.
If for any reason the customer refused the product, choose the second option.
The Change Status tab allows you to create any status for your order. For example, CALL BACK, SEND IN A WEEK, anything.
If you chose to Confirm the order.
If you chose to Confirm the order, a sales window will open with the customer’s pre-filled information (Screenshot 4).
You will only need to select the Sales Channel, Receipt of Money, and if necessary, create a Waybill for shipment.
Also, if necessary, you can change all the output data if changes were discussed with the customer (Add another product, give a discount, etc.)
After you click Add Sale, the ordered products will be deducted from your warehouse.
The order status changes to Completed (Screenshot 5).

If you chose to Reject the order
As soon as you choose this option, the reservation of the ordered product is removed, it is returned to the warehouse, and the order status changes to Canceled (Screenshot 6).

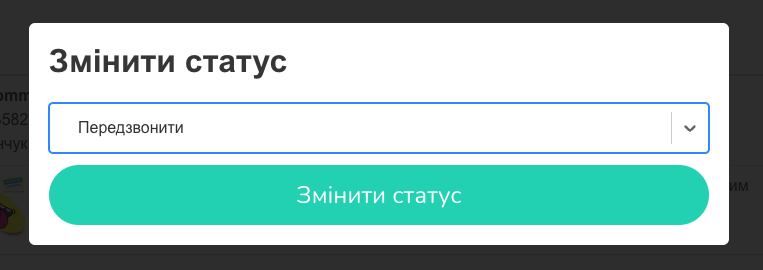
If you chose to Change the status
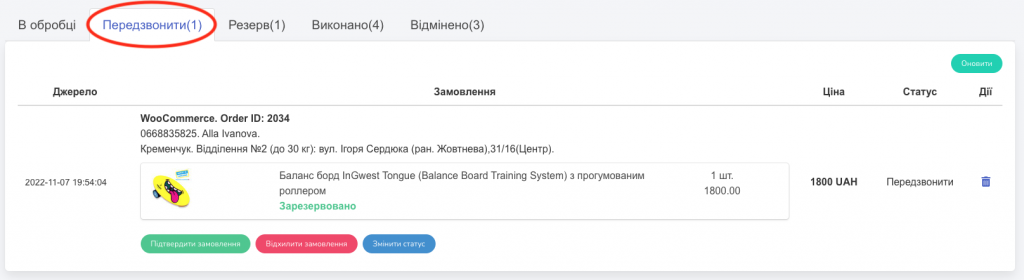
When choosing this option, you can create an unlimited number of statuses for the order. For example, if you couldn’t reach the customer, simply create a Call Back status to remember to do it later (Screenshot 7).
Important! You are creating the status yourself. You can use any label to define the status.
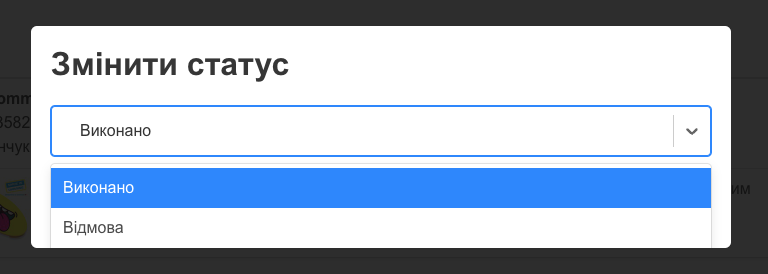
By default, the “Change Status” tab contains two options: “Completed” and “Refused” (Screenshot 8).
After you have determined the status, a tab will appear on the panel where all orders with the same status will be sent (Screen 9).