Why do you need shipments?
This service option allows you to track whether the suppliers are sending the right goods and whether they are in the right amount.
Also, with the help of the option, you can control several deliveries at the same time and immediately add new goods to the database, setting the sales price taking into account the change in the purchase price, which may increase for one reason or another.
- Create a delivery.
- Delivery registration.
- Confirmation of the goods’ arrival at the warehouse.
- Payment for delivery (+ delivery).
- Check sales prices.
- Downloading the delivery report
Create a shipment
If you have not made a delivery yet, click the “Make first purchase” button in the “Deliveries” section.
When ordering further deliveries, use the “Create product delivery” button and follow the step-by-step instructions of the service (Screen 1).
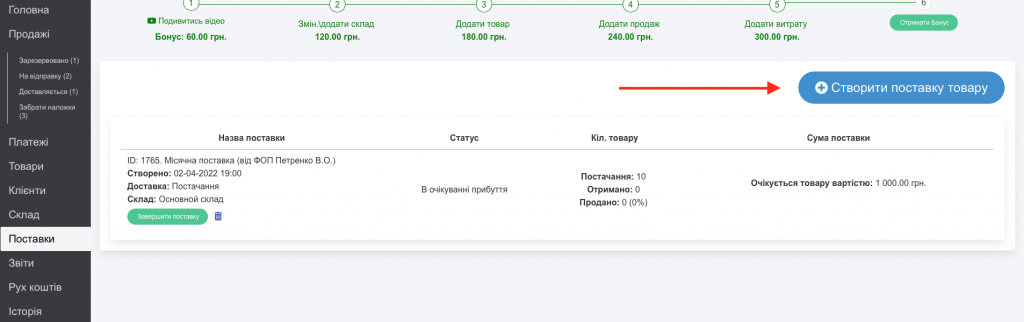
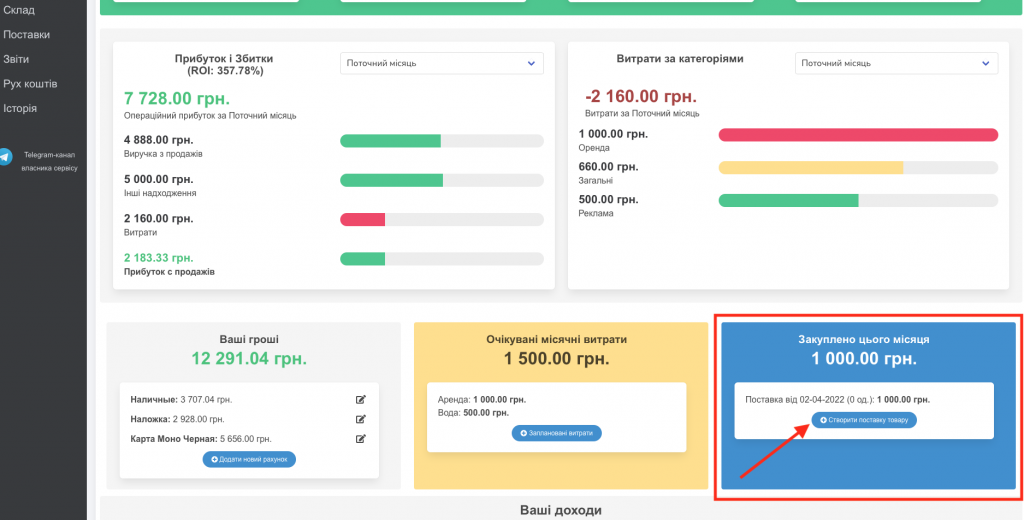
You can also add deliveries from the main page of the site using the “Purchased this month” widget (Screen 2).
Delivery registration
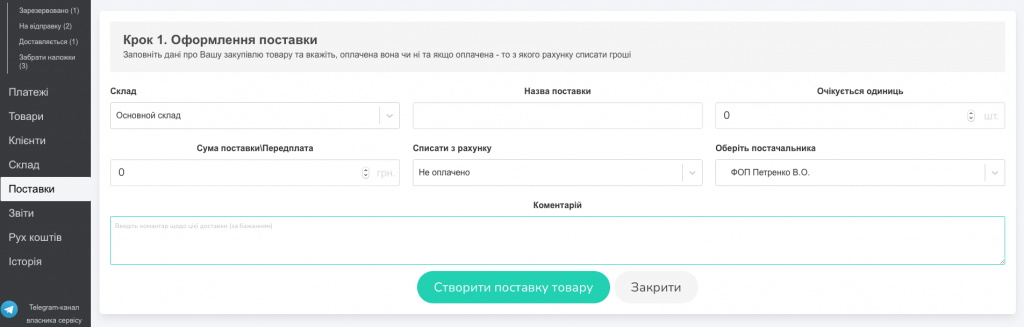
Step 1. Ordering the delivery
Fill in the “Delivery registration” fields by specifying:
- the warehouse to which the goods will arrive,
- delivery name,
- the number of expected units of the product,
- delivery amount/overpayment,
- from which account the money will be debited if the delivery has already been paid (if not paid, do not select an account),
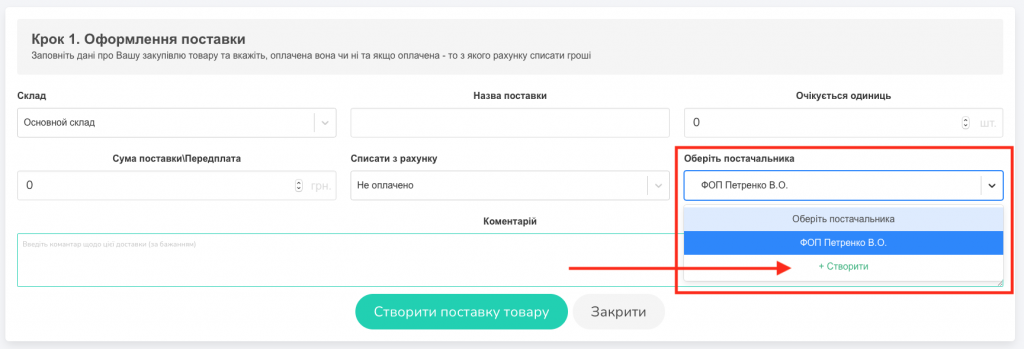
- provider (you can add a new provider by entering the name in the field and pressing the Enter or “Create” button) (Add. screen A).
- if necessary, you can add comments.
Then click the button “Create product delivery” (Screen 3).
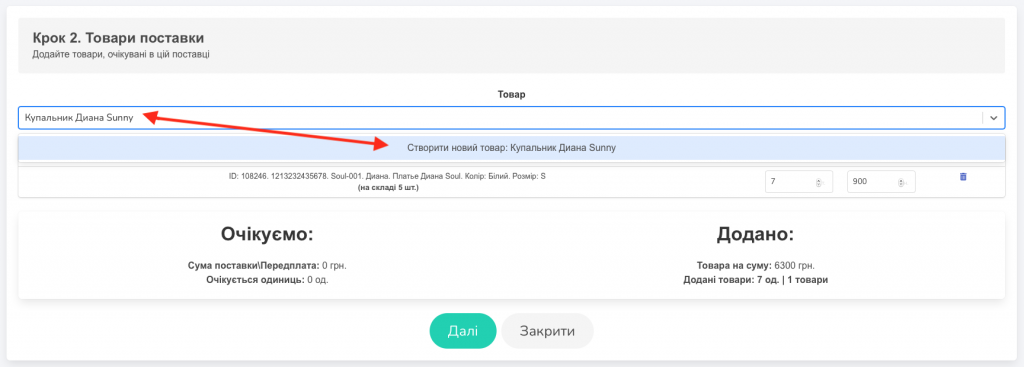
Step 2. Delivery goods
Adding delivery items.
- Fill in the “Product” field.
Select a product from the list by starting to enter the article number or brand name, or by using a barcode reader (if you have already ordered this product before); or add a new product (manually or again using a barcode reader).
When adding a new product, it can be created in the “Product” field by specifying the name and selecting the “Create” item from the menu or by pressing the Enter button (Screen 4, 5).
And after filling all the fields in the product card, which is written in detail in the “Products” section.
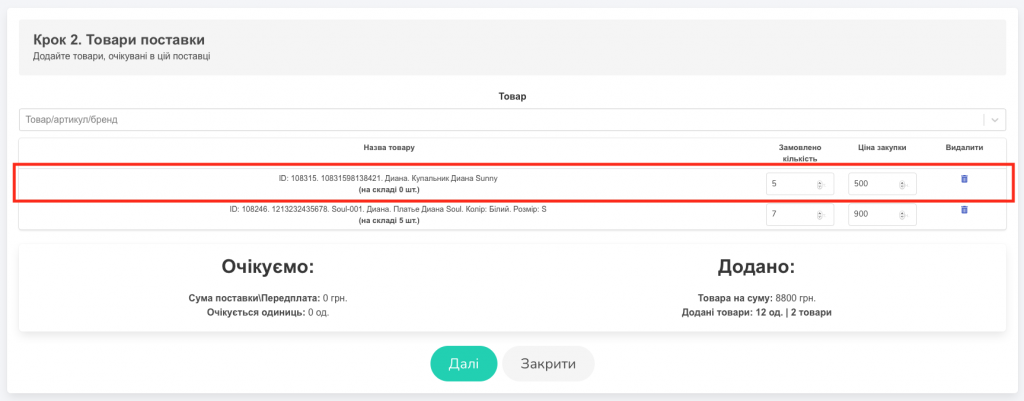
- Next, indicate the quantity of goods ordered and the delivery price for one unit (Screen 6).
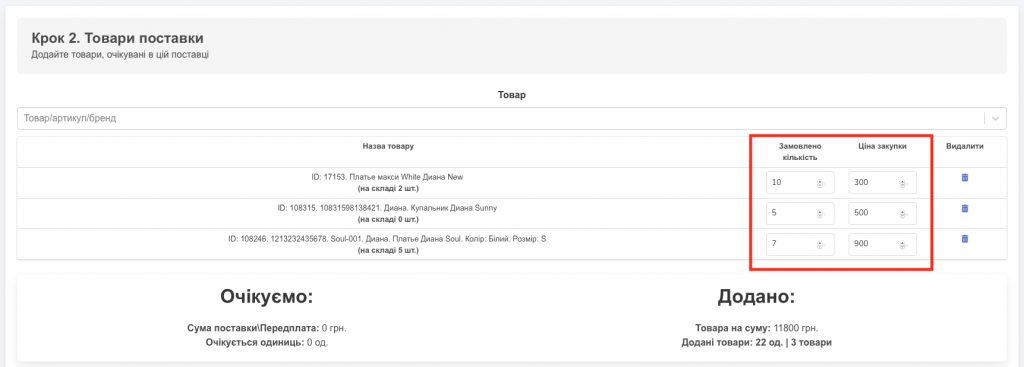
- After you have entered all expected goods in the delivery, click “Next”.
You are already halfway there =) (Screen 7).
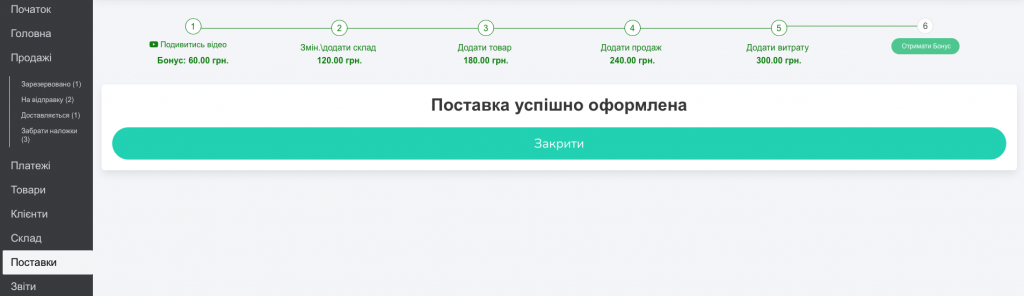
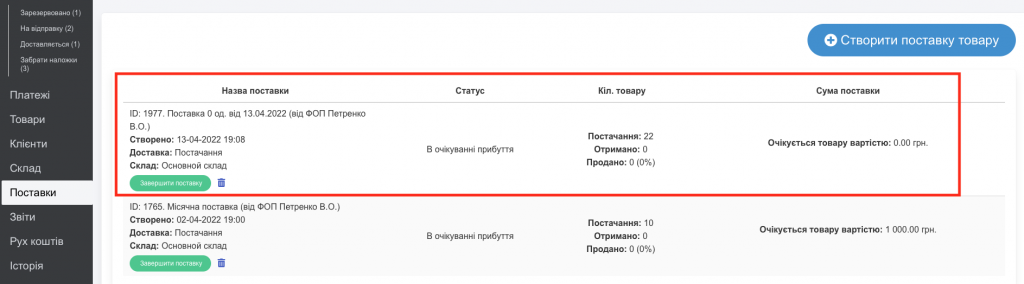
After that, a report on the formed delivery will appear in the “Deliveries” section, indicating: name, status, quantity of goods, delivery amount (Screen 8).
Confirmation of the goods’ arrival at the warehouse
When the product has arrived at the warehouse, you can complete the delivery. To do this, click the “Complete delivery” button (Screen 9).

Step 1. Confirmation of goods arrival at the warehouse
Fill in the required fields:
- received quantity of goods (you can transfer the expected quantity of goods, if everything is correct there, or manually enter the received quantity),
- the purchase price per unit (if you did not do this in the first step) (Screen 10).
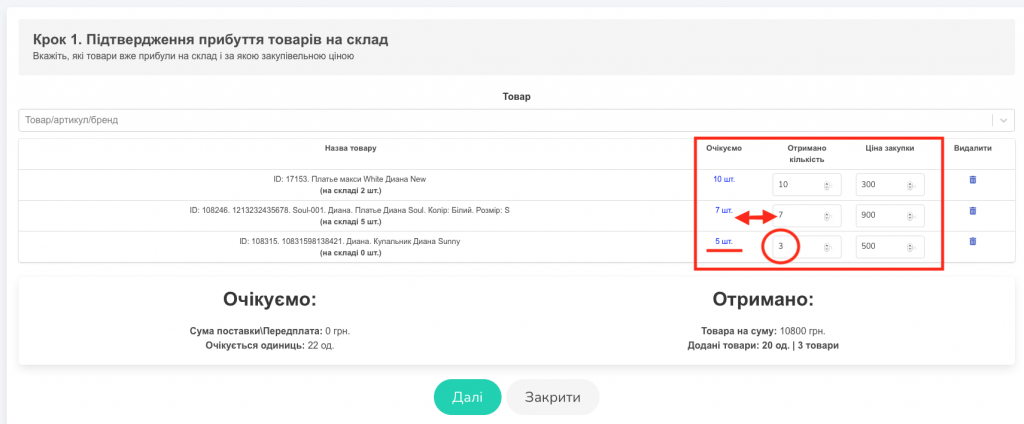
Importantly! If you did not enter a product in this delivery at the first stage, but want to confirm its receipt, go to the “Product / Article / Brand / Barcode” field and select / enter the desired product, then fill in the same fields with the number of units and the purchase price . (Screen 11).
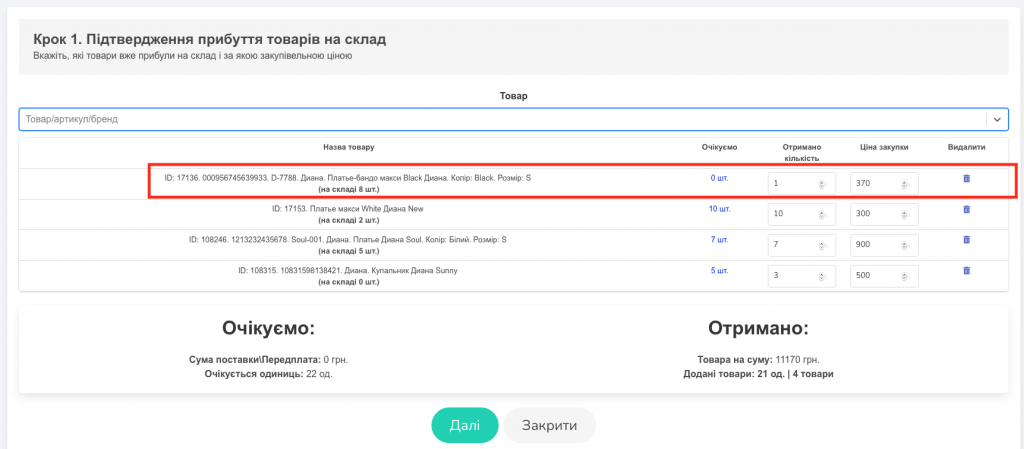
After filling in all the fields, click the “Next” button.
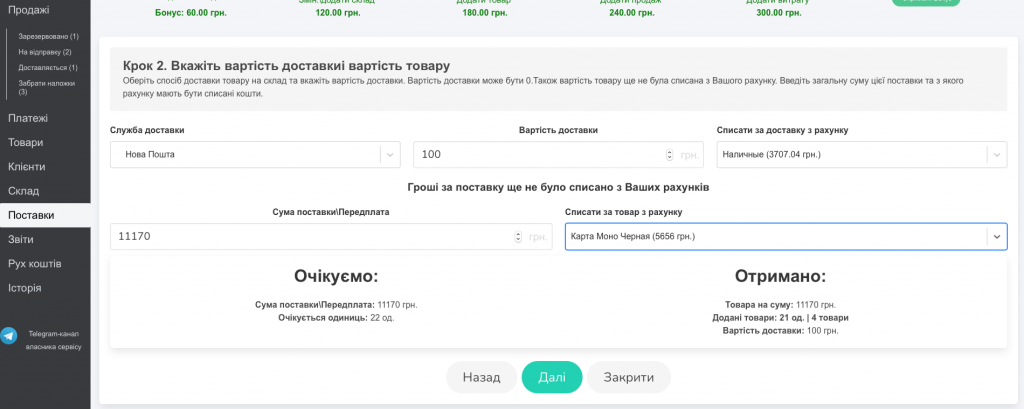
Payment for delivery (+ delivery)
Step 2. Specify the cost of delivery and the cost of the product
In the window, specify:
- Method of product delivery (Nova Poshta, Ukrposhta, Delivery, own car, supplier). You can also list other delivery methods: for example, Justin’s service. To do this, enter the name of the method and press “Create” or Enter.
- The shipping price (it can be 0), and then the purchase price will remain the same.
- The account from which payment for delivery will be debited.
- You also need to indicate from which account to debit the money for the delivery.
Then click the “Next” button (Screen 12).
Check sale prices
Step 3. Check the sales prices of the products
Setting the selling price of goods.
Since the purchase prices may have changed (for example, taking into account the delivery costs), when the delivery process is completed, you can change the selling price and immediately see the margin. You must also set a price for the new item (Screen 13).
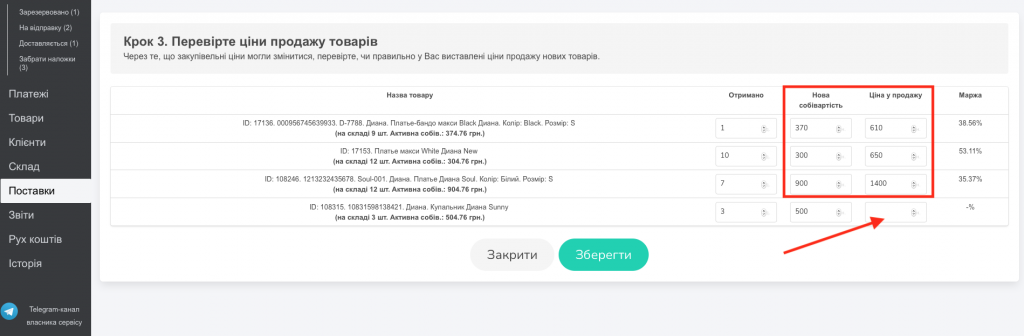
Then click the “Save” button. That’s it =) (Screen 14).
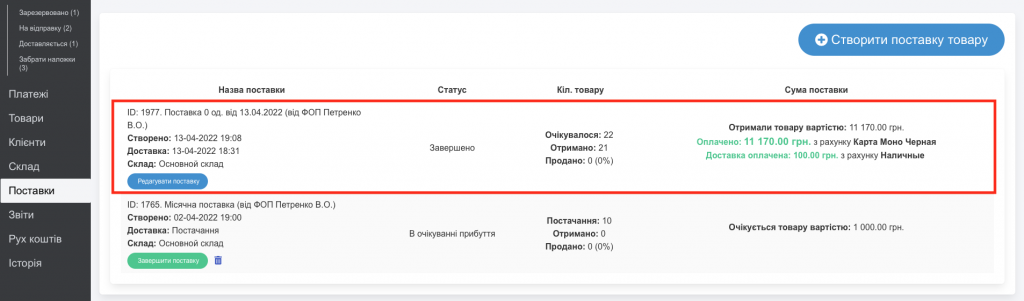
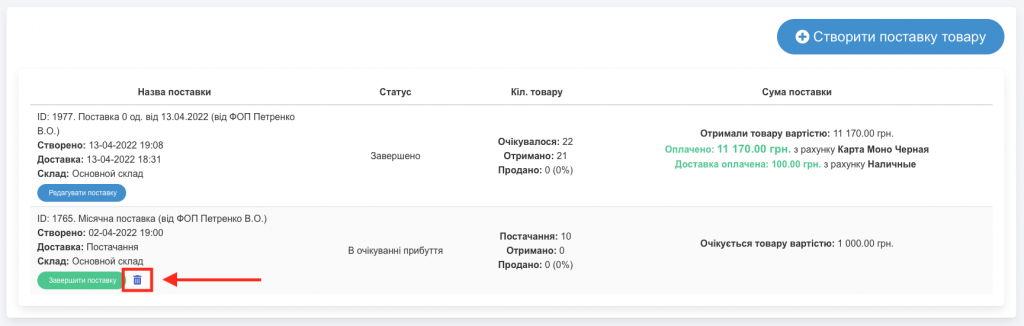
WARNING! In the “Deliveries” tab, as well as in the “Purchased this month” widget, you can always see completed and unfinished deliveries.
Incomplete deliveries can be deleted using the button with the image of the basket (Screen 15).
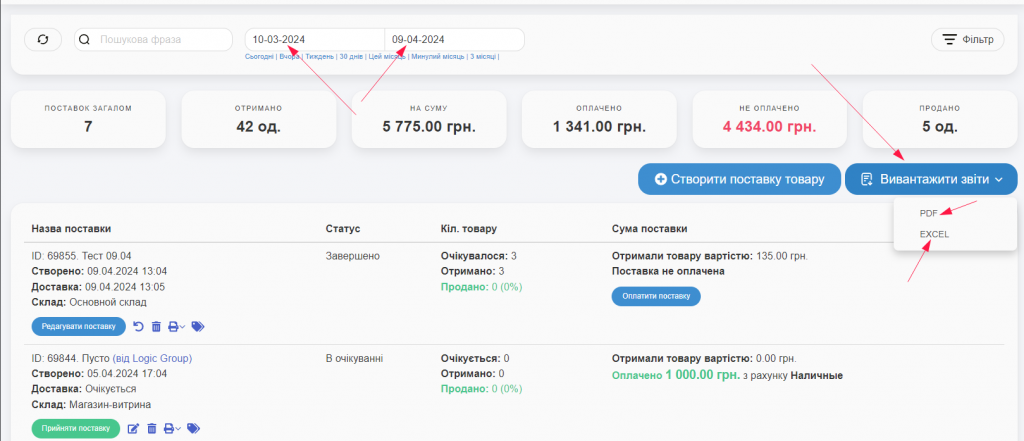
Downloading the delivery report
You can choose the necessary time intervals and filters for unloading certain deliveries.