
Quick start: launch your store in 11 steps
The HugeProfit online store is a website built on the products, prices, and stock you already have in HugeProfit, and its orders go straight to the CRM. Here's how to launch a store from scratch in 11 steps. It takes about an hour.
💚 Your free trial doesn't run while you set things up. The 30 free days start only after you click Publish store (step 10). No card is required. If you pay for a plan before publishing, you don't lose the free days: the paid period starts after them.
1 Create the store
- Sign in to your HugeProfit account.
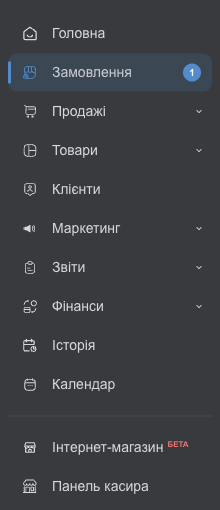
- In the left menu, open the Online store section.
- Click Create store.
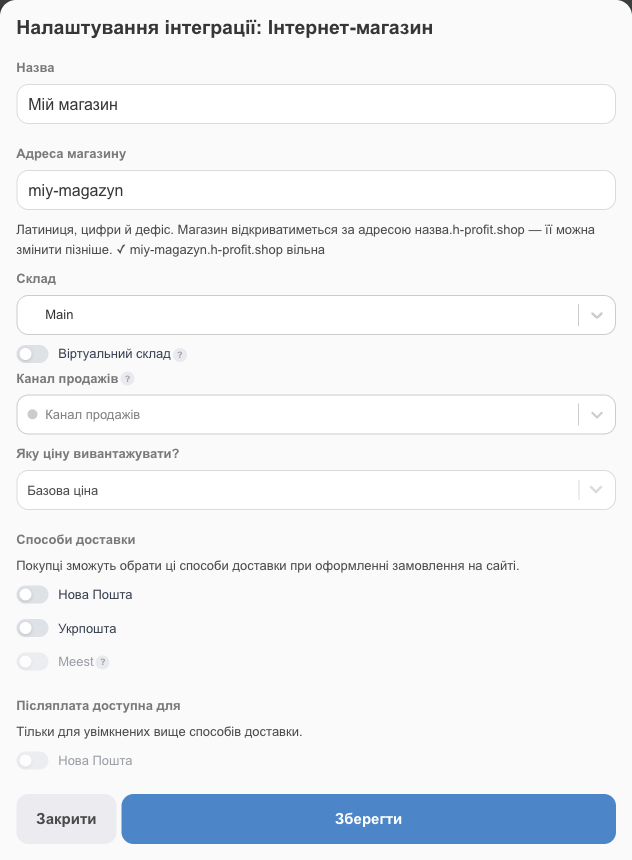
- In the Name field, enter the store name, for example “My store”.
- In the Store address field, come up with an address in Latin characters: letters, digits, and hyphens, 3 to 40 characters. For example, with
miy-magazynthe site will open atmiy-magazyn.h-profit.shop. You'll see right below the field whether the address is available. - In the Warehouse field, choose the warehouse you'll sell from: the site takes prices and stock from it.
- Optionally, choose a Sales channel. If you leave it empty, a channel is created automatically.
- Click Save.
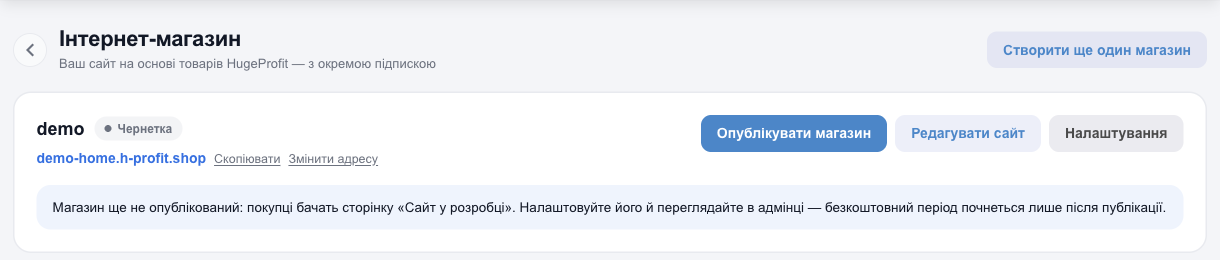
✅ The store is created as a draft: customers see a “Coming soon” page for now, so you can set everything up at your own pace.
2 Check your products
- Open the Products section in HugeProfit. If you've already added products, you don't need to create them again: they appear on the site on their own.
- Check names, photos, descriptions, prices, and categories.
- Make sure products have a price above 0 and stock in the store's warehouse. Products with a zero price or zero stock aren't shown on the site (services are always shown).
- If you have no products yet, click Add product and fill in the details.
For details on the fields and creating a product, see Product card in HugeProfit.
💡 You edit products, prices, and stock only in HugeProfit. Changes show up on the site within a minute.
3 Turn on product categories
- Go back to Online store and click Edit website. The site editor opens in a new tab.
- In the editor menu, open Categories.
- Check the categories you want customers to see.
- Click Save draft.
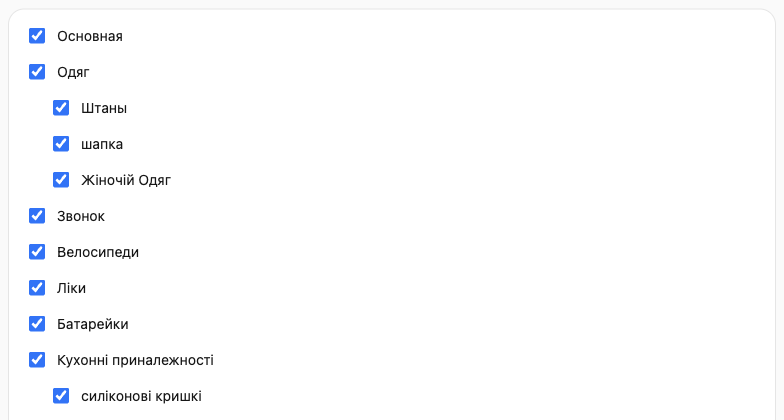
⚠️ Customers won't see a disabled category or any of its products, either in the catalog or in search. A new category you create in HugeProfit later appears on the site disabled, so remember to turn it on here.
4 Set the site colors
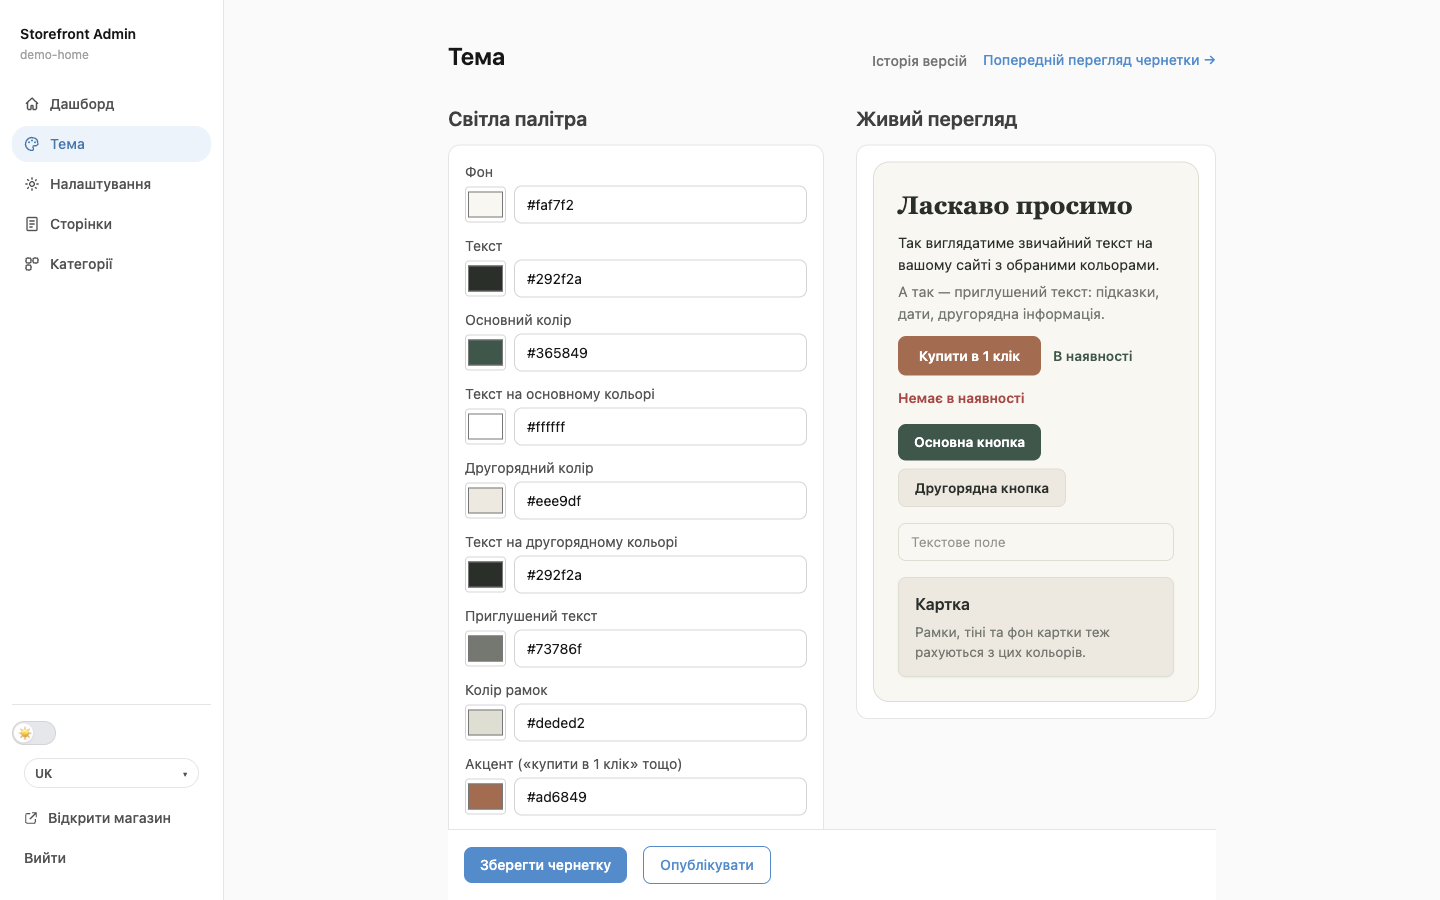
- In the editor, open the Theme section.
- Choose the Primary color: it's used for buttons, the header, and the footer.
- Set the background, text, and other colors. The Live preview block on the right shows the result right away.
- Optionally, change the body and heading fonts.
- Click Save draft.
5 Add your logo and contacts
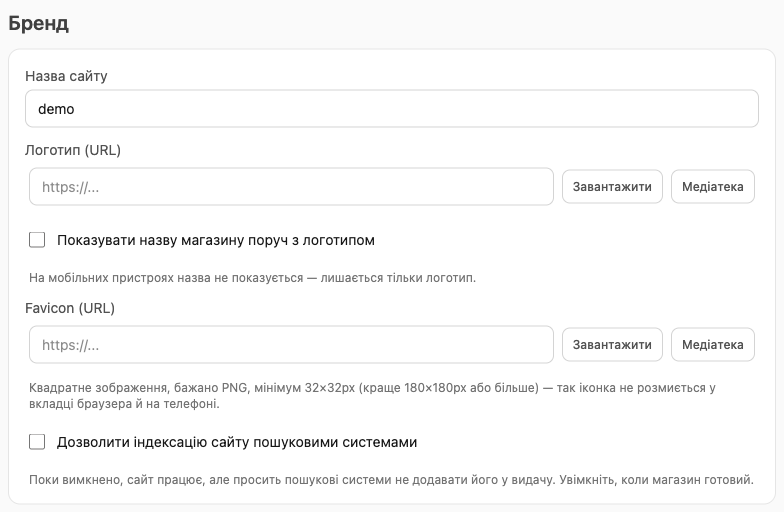
- Open Settings in the site editor.
- In the Brand section, fill in Site name and upload your logo with the Upload button. Use the Logo size field to make it bigger or smaller. You can also add a favicon here, the icon on the browser tab.
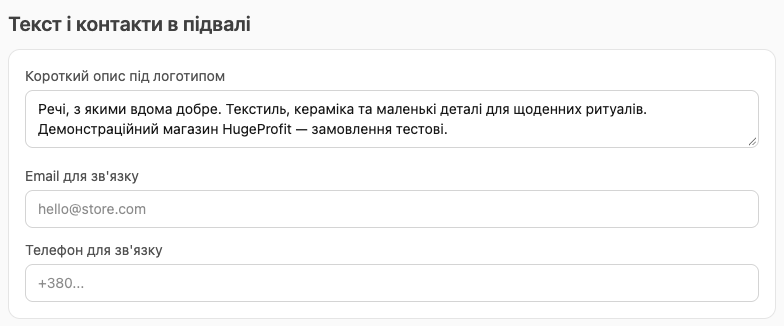
- Below, in the Footer text & contacts section, add a short store description, a phone number, and an email.
- In the Social links (for footer) section, click + Add social link and paste the full link, for example
https://instagram.com/myshop. - Click Save draft.
6 Edit the home page
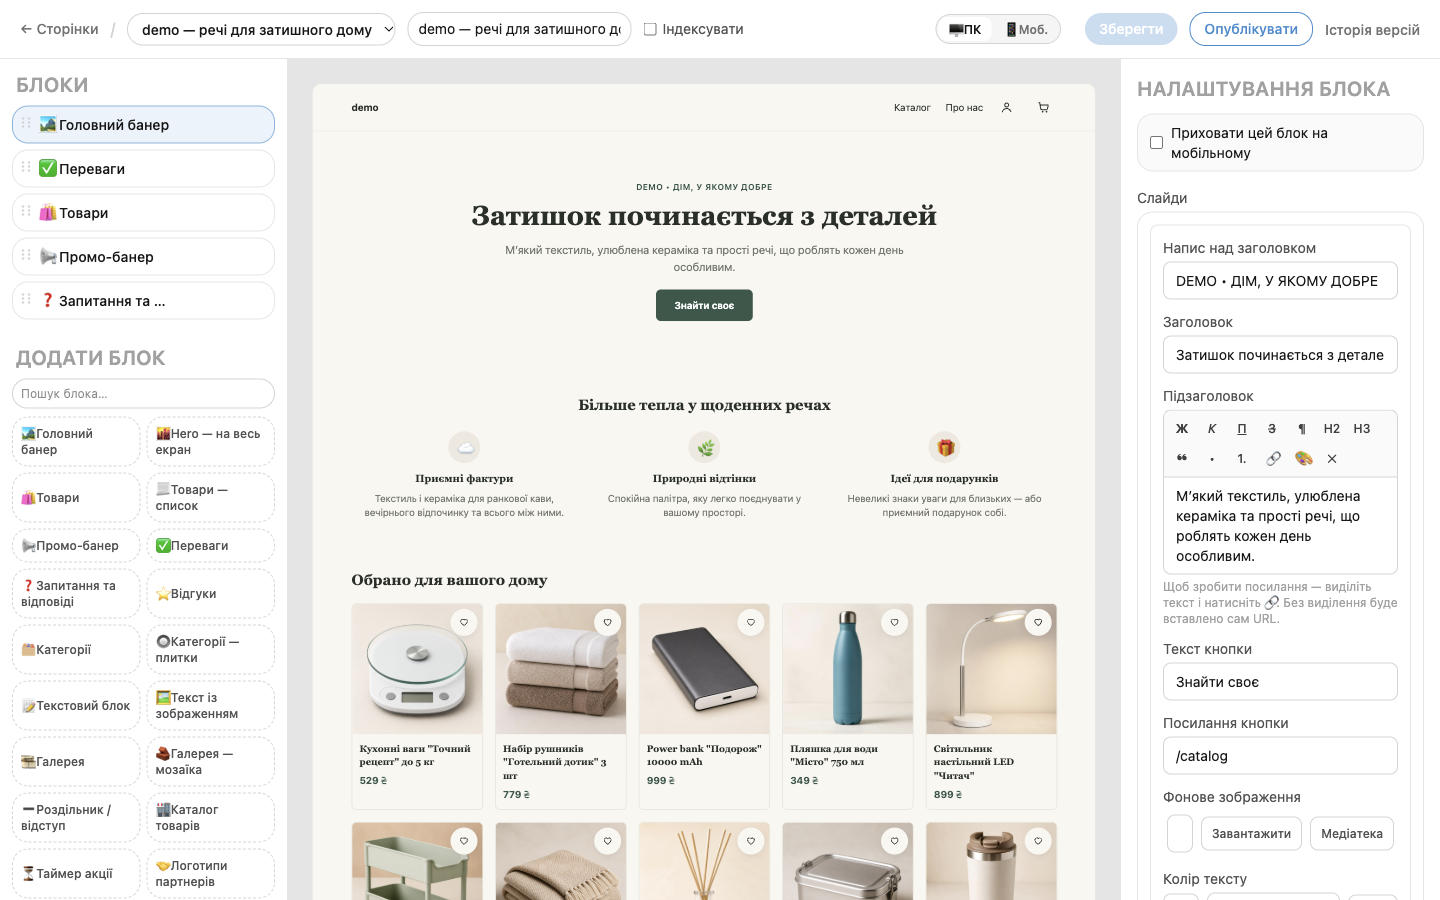
- In the editor menu, open Pages and choose the home page (it's first in the list, address
/). - On the left is the list of blocks that make up the page. In the middle is how the page looks now.
- Click a block, for example Hero banner.
- On the right, change its text, background image, and button text and link.
- Use Add block to add products, categories, store benefits, reviews, and FAQs. Drag blocks with the mouse to reorder them.
- Changes are saved automatically (you'll see ✓ Saved at the top).
⚠️ A new store comes with a sample home page. Be sure to replace the sample texts and promotions with your own, such as “5+ years in business” or “10% off your first order”. The site has no promo codes, so it's best to remove the sample promotion.
7 Set up payment
- In the editor, open Settings → the Payment methods (at checkout) section.
- Check the payment method names. By default, customers can choose Pay by card transfer (you send the payment details yourself) and Pay on delivery (COD). You can turn off a method you don't need with the show at checkout checkbox or add your own with + Add payment method.
- Click Save draft.
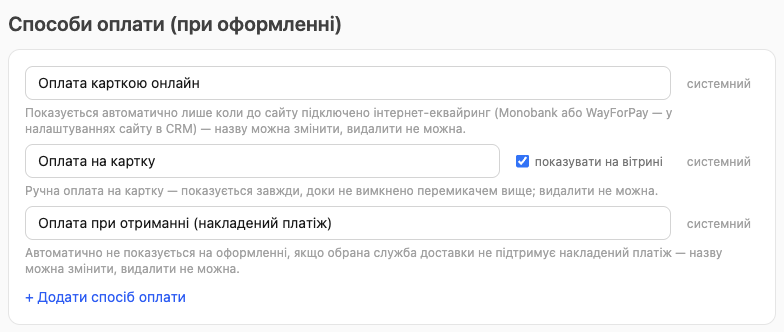
Online card payment. To let customers pay by card right on the site:
- In HugeProfit, open Settings → Integration and connect Monobank Acquiring or WayForPay Acquiring.
- Go to Online store → Settings, turn on Accept online card payments on the site, and save.
- The Pay online by card method then appears on the site automatically.
💡 Connecting monobank or WayForPay doesn't turn on payments on the site by itself. You need the checkbox in the store settings.
8 Set up delivery
- In HugeProfit, open Settings → Integration and connect the carrier you need: Nova Poshta, Ukrposhta, or Meest (if it isn't connected yet).
- Go back to Online store and click Settings.
- Under Delivery methods, turn on the carriers you want.
- Under Cash on delivery available for, turn on the carriers for which you allow payment on delivery.
- Click Save.
Pickup, local delivery, nationwide delivery, international shipping, or your own method are set up in the site editor, not in HugeProfit: Settings → the Delivery methods (at checkout) section. Check show at checkout next to the methods you want, optionally add information for the customer (address, opening hours), and publish. For details, see Delivery and cash on delivery.
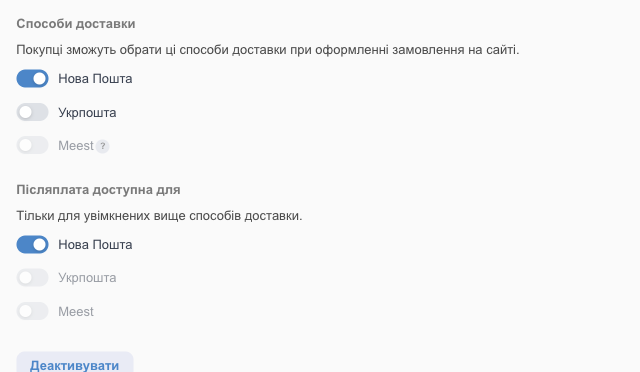
💡 An inactive (gray) carrier isn't connected in Integration yet. The site doesn't calculate shipping costs: the customer pays them at the carrier's rates. For pickup and other methods from the editor, customers aren't offered payment on delivery.
9 Check how the site looks
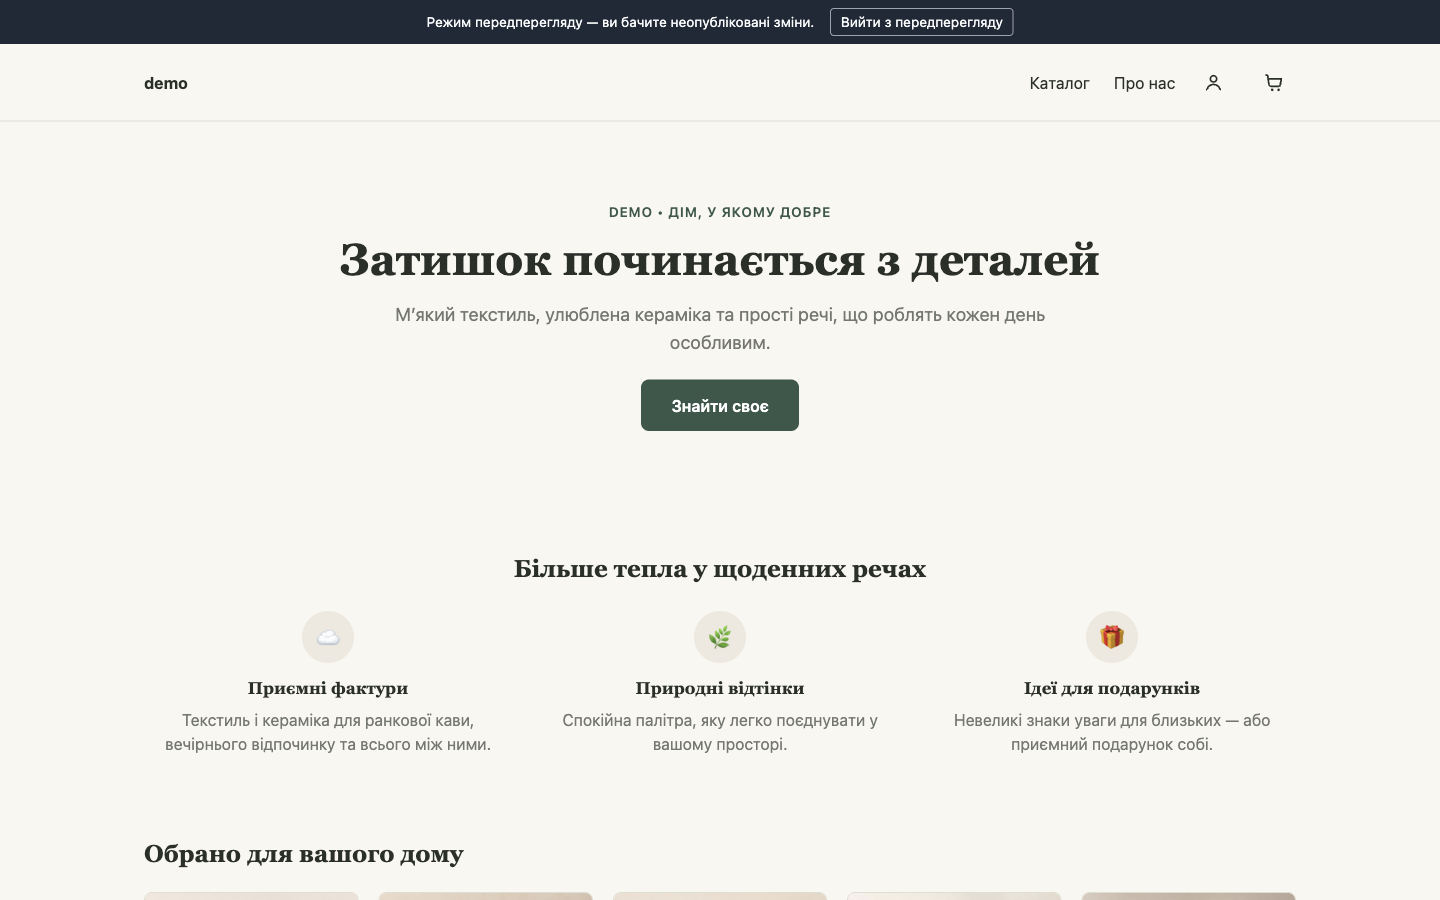
- In the editor, in the Settings or Theme section, click Preview draft →.
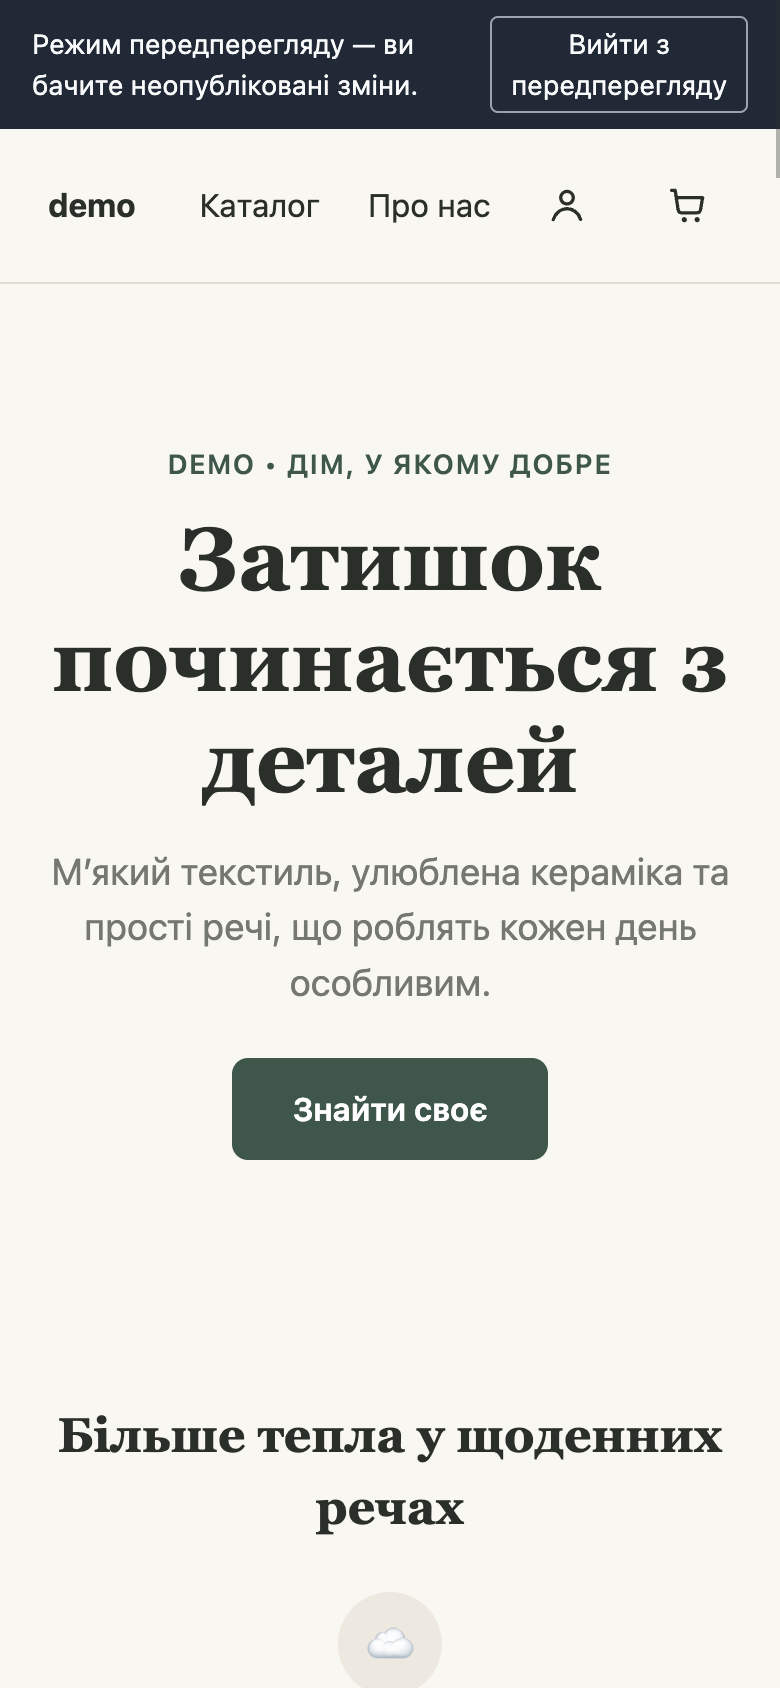
- Your site opens with the changes you haven't published yet. A “Preview mode” bar appears at the top.
- Check the home page, catalog, product pages, and footer contacts.
- See how the site looks on a phone: open the link on your smartphone or switch to 📱 Mobile in the page editor.
- If something's off, go back to editing. To leave the preview, click Exit preview.
10 Publish the store
You publish in two places, and you need both:
- In the site editor, click Publish (the button at the bottom of the Theme, Settings, Products, Categories, and Analytics pages, or at the top of the page editor). This puts all your draft settings on the site.
- In HugeProfit, go back to Online store and click Publish store.
- Confirm the launch with the Publish store button in the dialog.


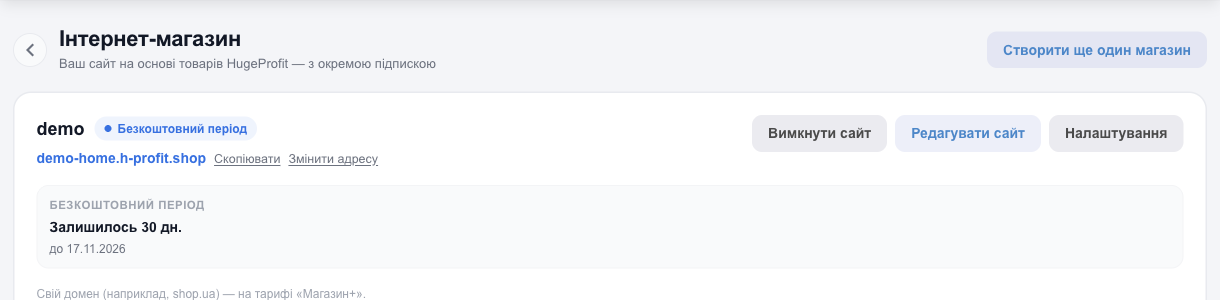
✅ Your site is now open to customers! From now on, click Publish after each batch of changes in the editor. You don't need to click Publish store again.
💡 If the site shows the old version right after publishing, reload the page once more: the first load may show a saved copy, the second shows the new one. For details, see Draft, preview, and publishing.
11 Place a test order
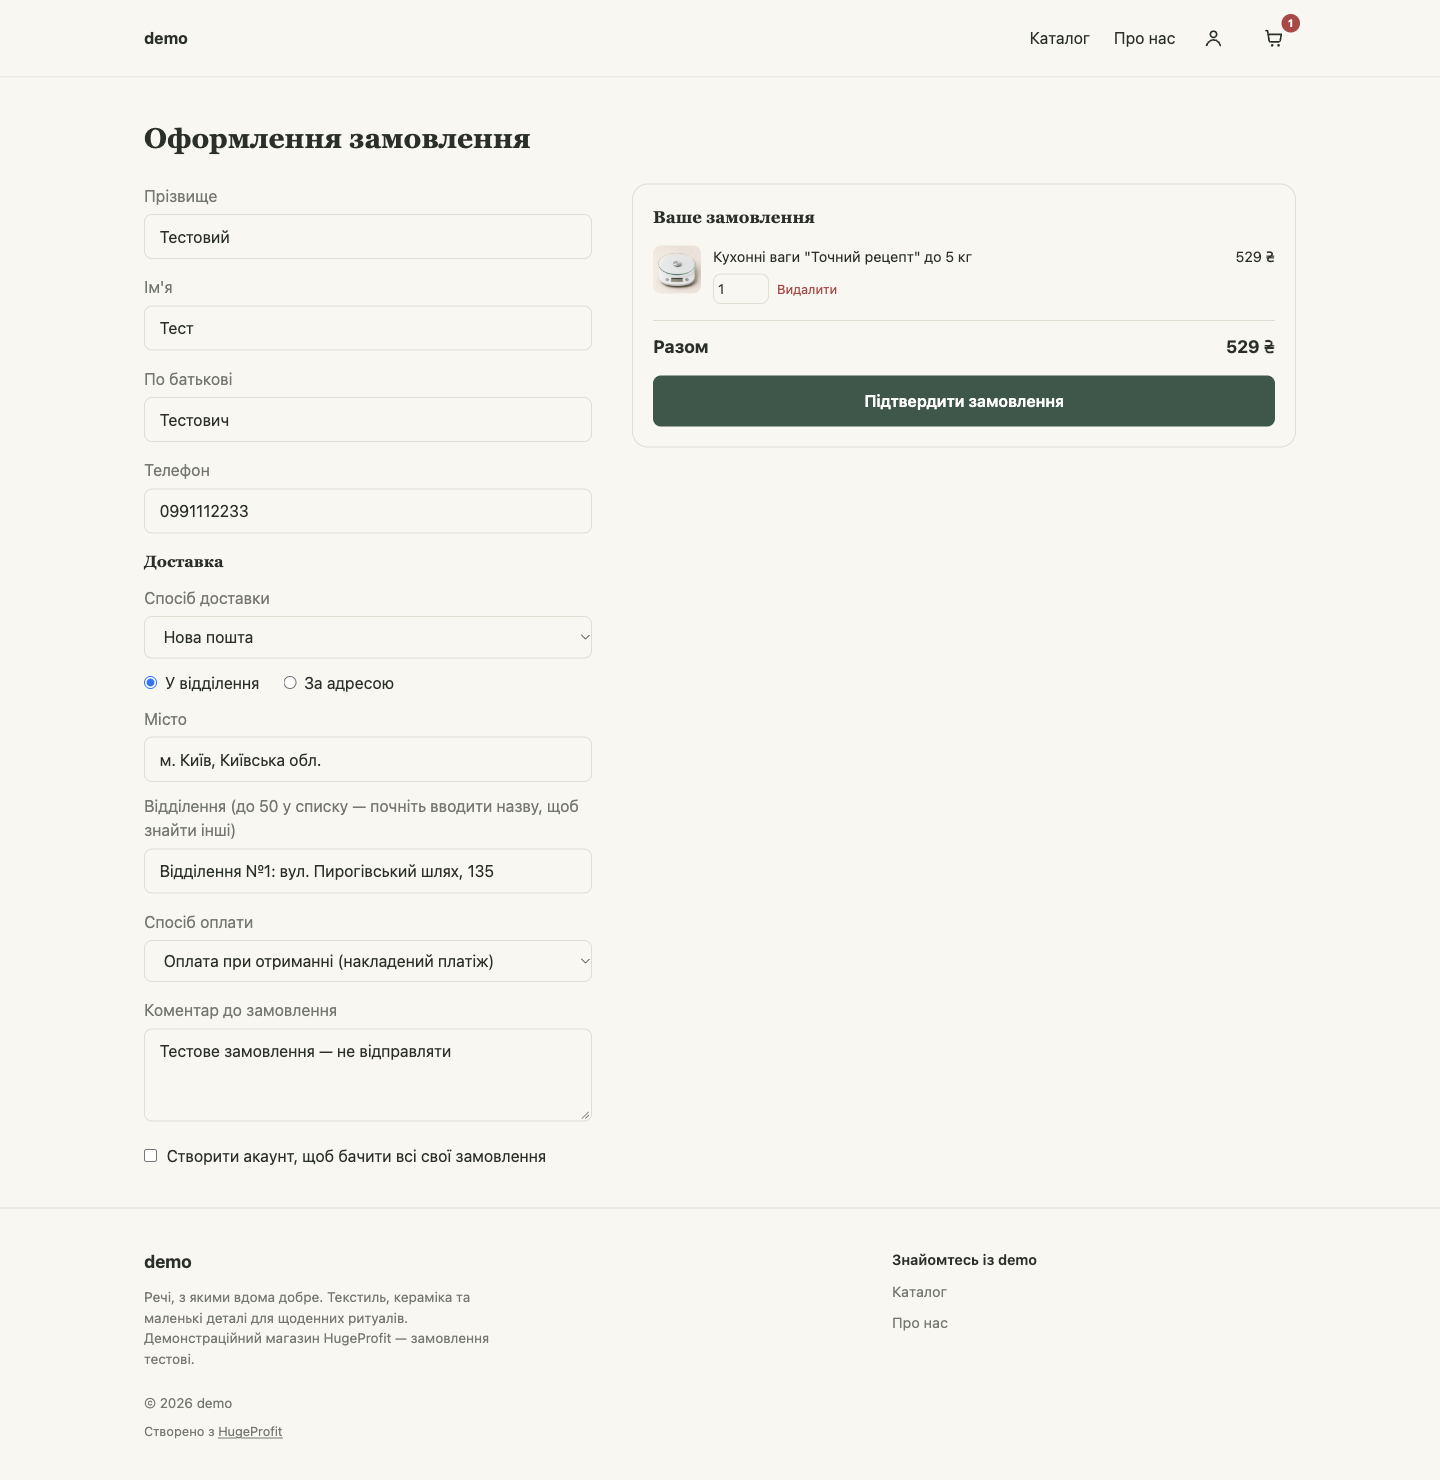
- Open your site as a regular customer (the link is on the store card).
- Add a product to the cart and click Place order.
- Fill in the last name, first name, patronymic, and phone, then choose delivery and payment. In the comment, you can write “Test order”.
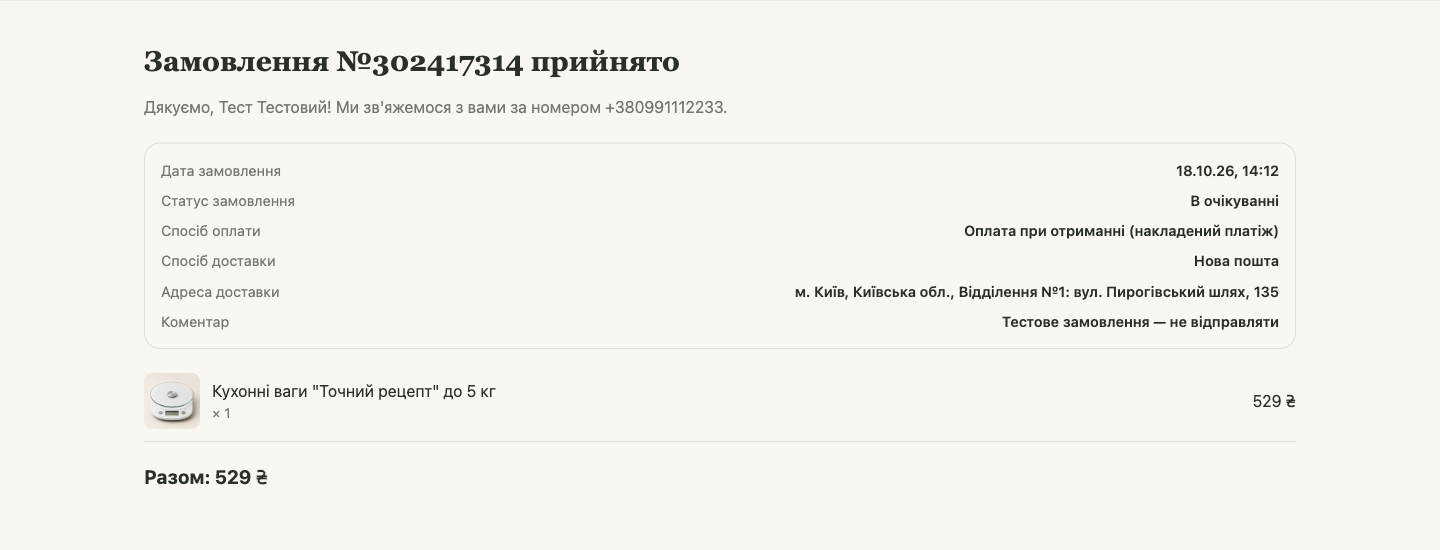
- Click Confirm order. A page with the order number opens.
- Check the Orders section in HugeProfit: the order appears there with the same number and your store's name.

💡 After checking, cancel the test order in HugeProfit to release the reserved stock.
What's next
- Choose a plan before your free trial ends: plans and prices are shown right on the store card in the Online store section. For details, see Plans, free trial, and payment.
- When the store is fully ready, let search engines index the site: Settings → Allow search engines to index this site.
- Add “Shipping and payment”, “Returns”, and “Contacts” pages and link to them in the menu.
- Connect Google Analytics, Google Tag Manager, or Facebook Pixel on the editor's Analytics tab. See Analytics.
- Pack every order in a branded box? Set up a default product in the cart so the packaging is written off from the warehouse.
- Sell only to “insiders” (wholesale, a private club)? Make the store private with an access code.