
HugeProfit quick start: from sign-up to your first sale
HugeProfit tracks products, stock, sales, and money for small businesses: you always see your stock, the profit on every sale, and where your money is. Below is how to get started from scratch in 11 steps, from sign-up to your first sale and profit report. The first three steps take about 5 minutes.
💚 You don't have to set everything up at once. Steps 1–2 are enough to see your first profit. You can do the rest later, in any order.
Contents
1 Sign up
- Open the HugeProfit website and click sign up.
- Sign in with Google or enter your E-mail, Phone, and Password. If you have a promo code, enter it in the Promo code field.
- Click Registration.
✅ Your account is created, and the setup wizard opens right away.
2 Complete the setup wizard
The 4-step wizard helps you add a product, make your first sale, and see your profit in a few minutes. You can skip any step with Skip or I'll do it later. To go back a step, click ← Back.
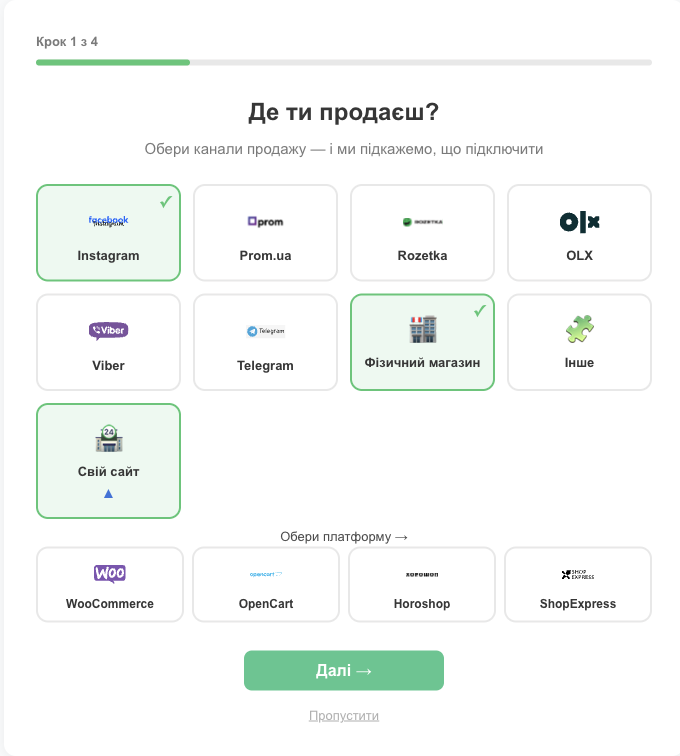
Step 1 of 4. “Where do you sell?”
Select every place where you sell: Instagram, Prom.ua, Rozetka, OLX, Viber, Telegram, Physical store, Other. If you have a website, click Own website and choose the platform: WooCommerce, OpenCart, Horoshop, or ShopExpress. Your choice determines what the wizard offers to connect next. Click Next →.
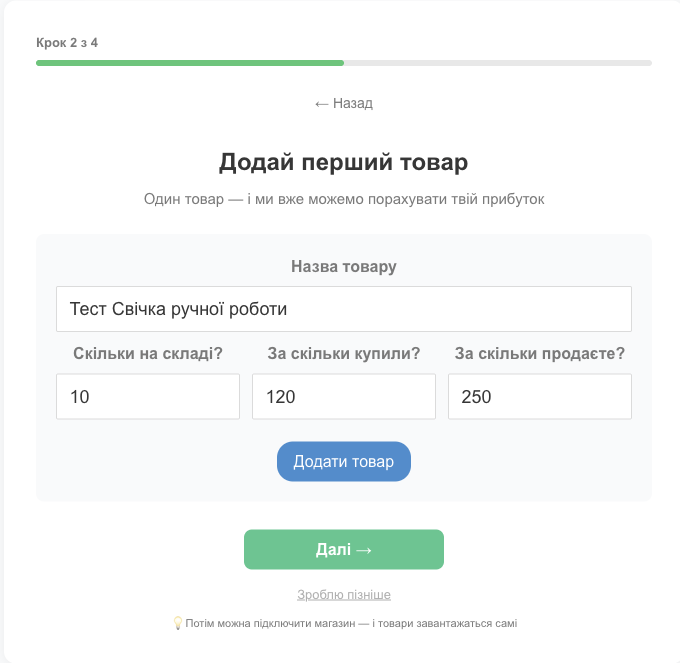
Step 2 of 4. “Add your first product”
- Product name: what you call it.
- How many in stock?: how many units you have now.
- Purchase price?: the cost price of one unit. This is what profit is calculated from.
- Selling price?: the price you sell at.
- Click Add product. The product appears in the Added list. You can add several products this way. Then click Next →.
💡 If you sell on Prom, Rozetka, or your own website, you don't need to enter your whole catalog by hand: once you connect the marketplace, products are imported automatically (step 3).
Step 3 of 4. “Make your first sale”
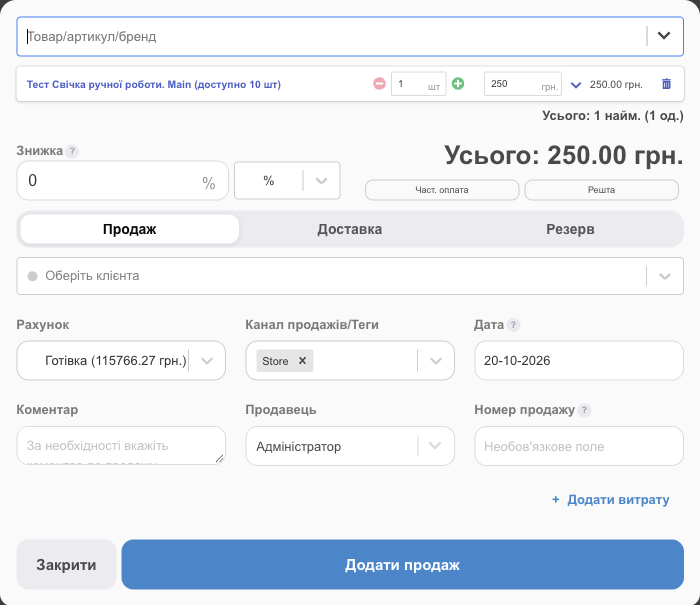
- Click Create first sale. A sale window opens with your product already in it.
- Check the quantity and price, and choose the Account the money went to (Cash by default).
- Click Add Sale.
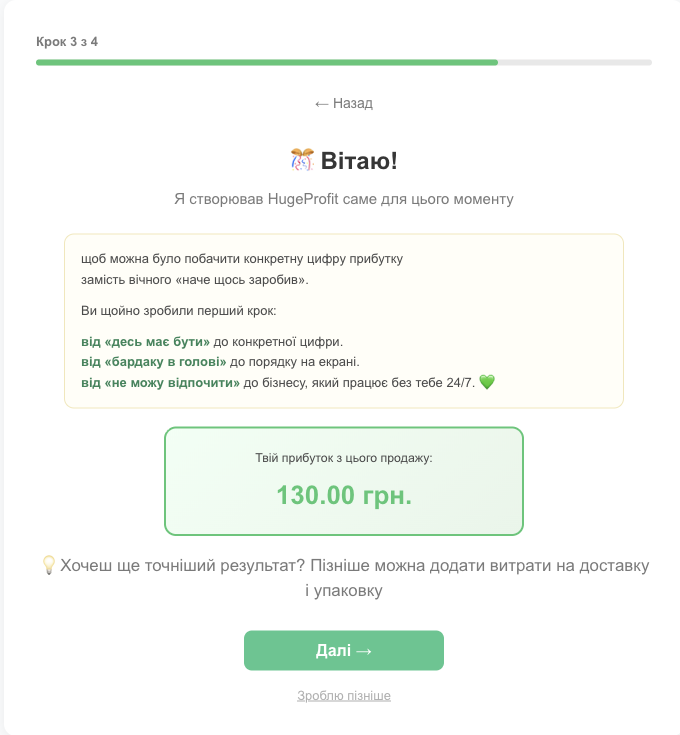
✅ The sale is recorded: the product's stock went down, the money was added to the account, and HugeProfit showed the profit (the selling price minus the cost price).
Step 4 of 4. “Want to customize it?”
Optional settings. You can do each one now or later:
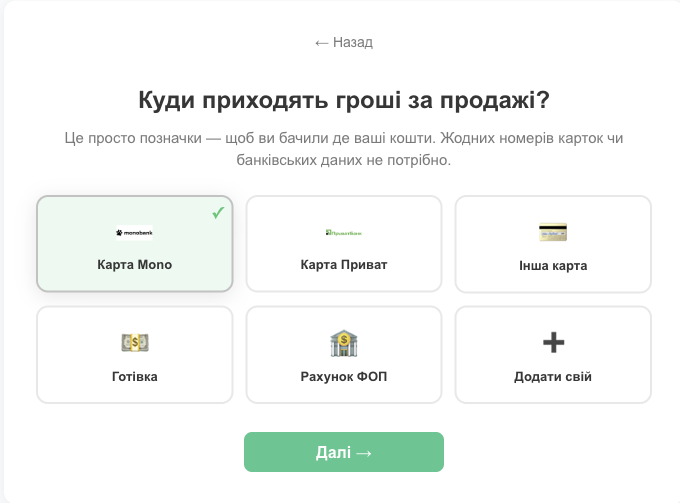
- Add your accounts: where your money is kept, such as a monobank card, a PrivatBank card, another card, cash, a sole proprietor (FOP) account, or your own option. These are just names for bookkeeping; no card numbers or bank details are needed.
- Connect your stores: appears if you chose a marketplace or a website in the first step. Once connected, orders arrive automatically.
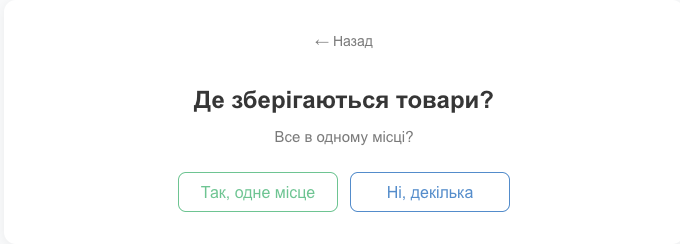
- Set up warehouses: if you keep products in several places.
- Add teammates: if you don't work alone.
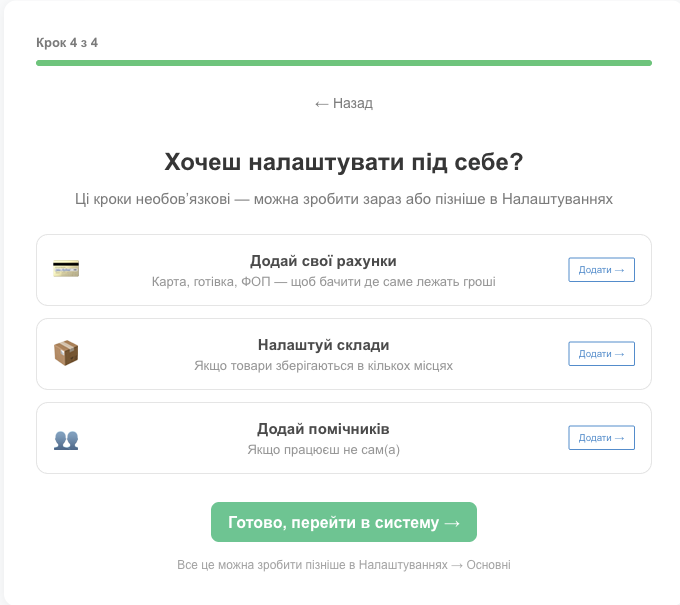
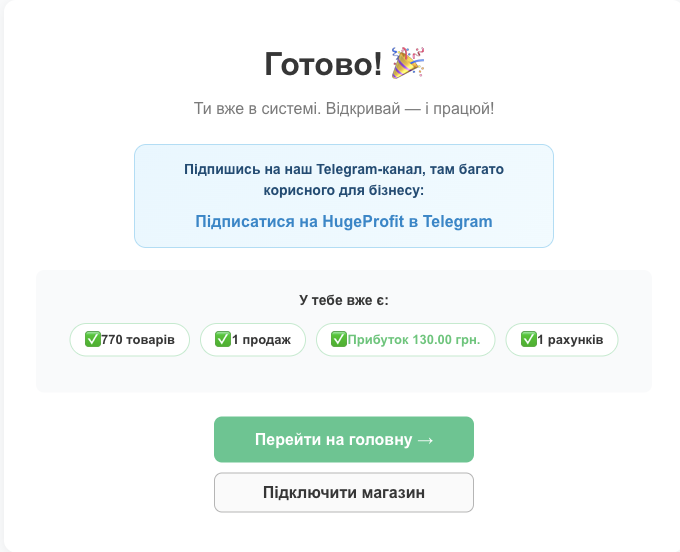
Click Done, go to the app →. The last screen shows what's already in the system, along with the Go to dashboard → and Connect store buttons.
3 Add all your products
Open the Products module. You can add products in three ways.
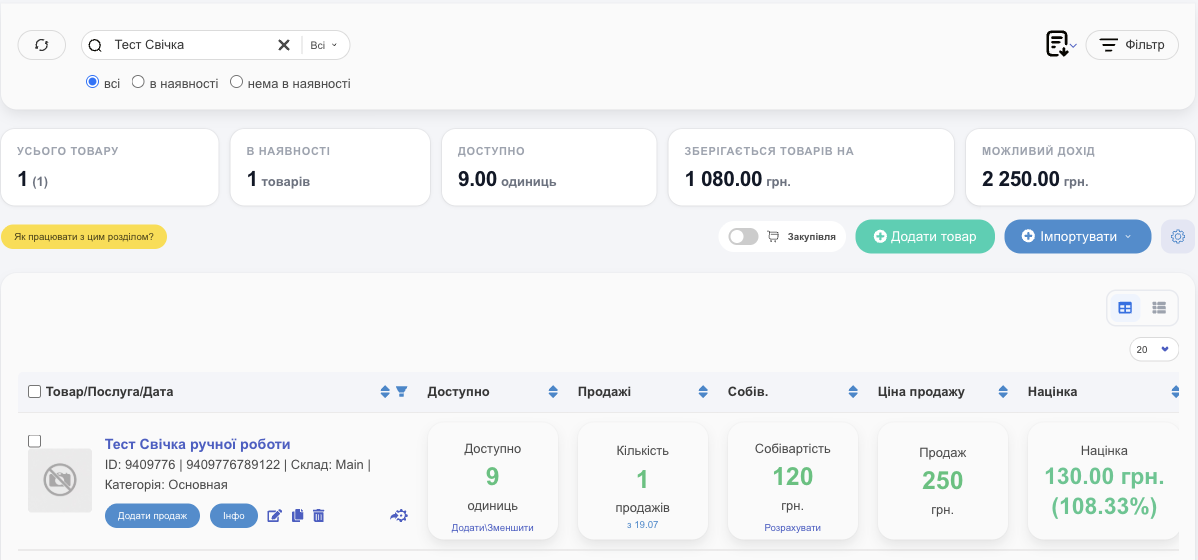
Manually
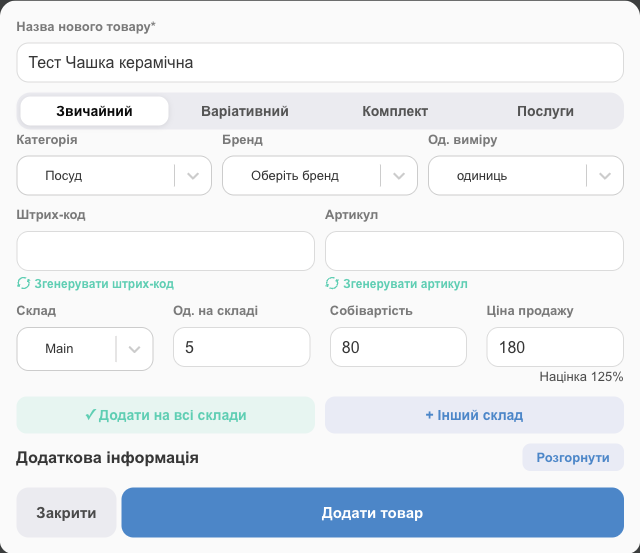
- Click Add New Item.
- Enter the New Product's Name and choose a type: Simple, Variable (sizes, colors), Bundle, or Services.
- Optionally, fill in Category, Brand, Units, Barcode, and SKU. You can generate the barcode and SKU with a single button.
- For the warehouse, enter Units in Stock, Cost price, and Selling Price. The markup is calculated automatically.
- Photos, a description, and attributes go in the Additional Information block → Expand.
- Click Add New Item.
From Excel or XML
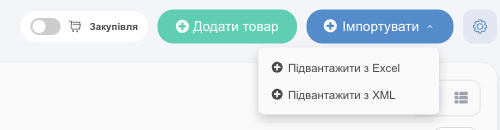
Import → Upload from Excel or Upload from XML. Use this to move your catalog from a spreadsheet or another program.
From a marketplace or website
If you sell on Prom, Rozetka, or a WooCommerce, OpenCart, Horoshop, or similar website, connect it in Settings → Integration and import your products from there. Orders from the marketplace will also start arriving in HugeProfit.
Learn more: Products, Product card, Import and export.
4 Set up warehouses
You already have one warehouse after signing up. If all your products are in one place, you can skip this step.
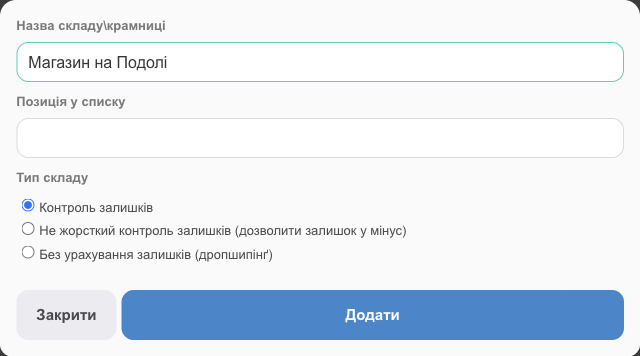
- In the Products module, click ⊕ to the right of the warehouse tabs.
- Enter the Warehouse/store name, for example, “Podil Store”.
- Choose the Warehouse Type:
- Stock control: you can't sell more than you have in stock (recommended);
- Soft stock control (allow negative stock): you can sell into negative stock if the product hasn't been received yet;
- Excluding Balances (dropshipping): for products you don't physically have.
- Click Add.
Learn more: Warehouses and stock.
5 Add accounts
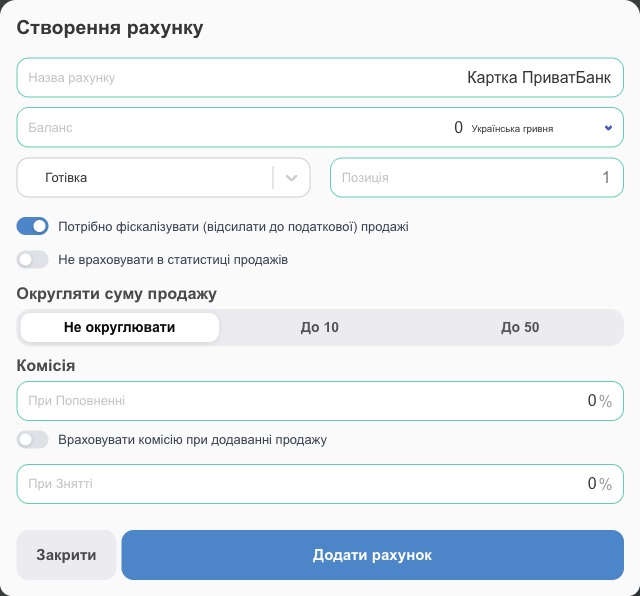
Accounts are where your money is kept: a cash register, a card, a sole proprietor account. Every sale and every expense is linked to an account, so you always see the balance of each one.
- Open Cash Flow → Transactions and click Add New Account.
- Enter the Account Name, the current Balance, and the currency.
- If needed, set up the bank fee (When Replenishing, When Withdrawing) and rounding of the sale amount.
- Click Add Account.
Learn more: Accounts and transactions.
6 Receive products with a shipment
When you buy more stock, create a shipment: stock goes up, the cost price is updated, and the payment to the supplier is deducted from the account.
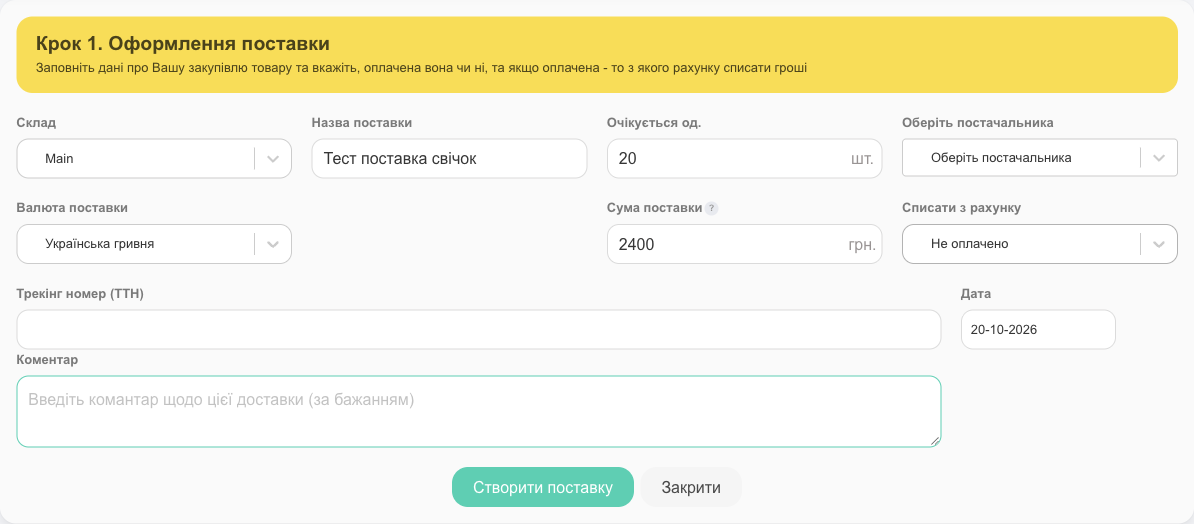
- Products → Shipments → Create Shipment.
- Step 1. Choose the Warehouse, enter the Shipment Name, supplier, currency, and Shipment amount, and choose the account to pay from (or Not paid). Click Create Shipment.
- Step 2. Find products in the The product name/SKU/brand name field and enter the quantity and Purchase Price. You can create a new product right here. Click Next.
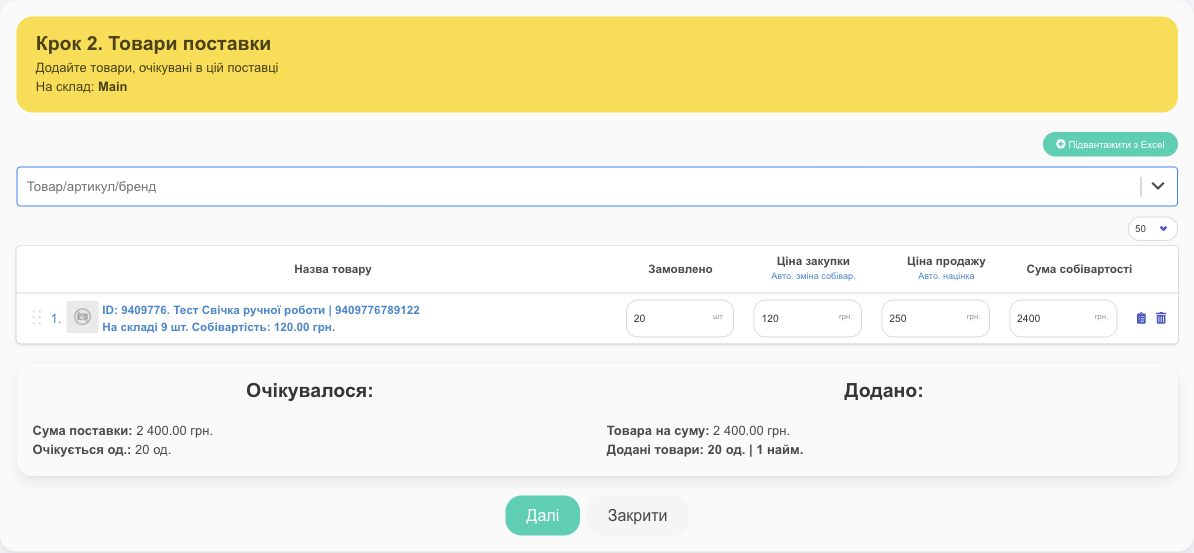
The shipment appears in the list with the Pending status, meaning the products are still on the way. When they arrive:
- Click Complete Shipment.
- Enter how many were received (Received (All) means everything you expected) and click Next.
- Enter the delivery cost and the account to pay for the products from → Complete Shipment.
- Check the selling prices (purchase prices may have changed) → Save. You can also print price tags and labels here.

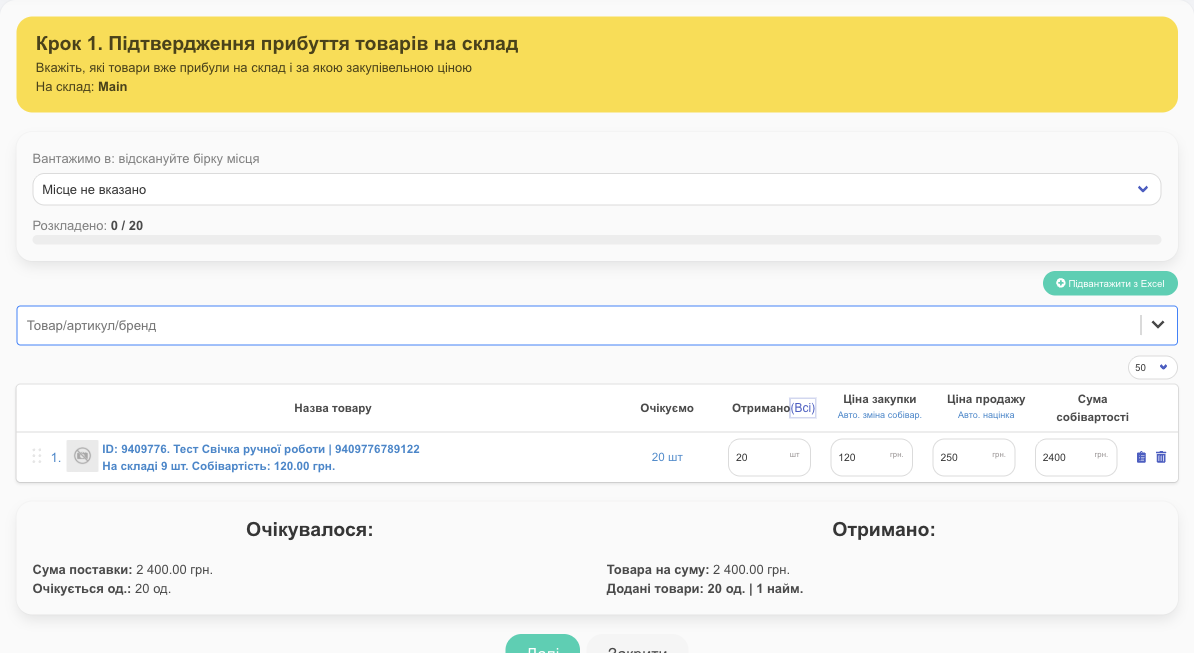
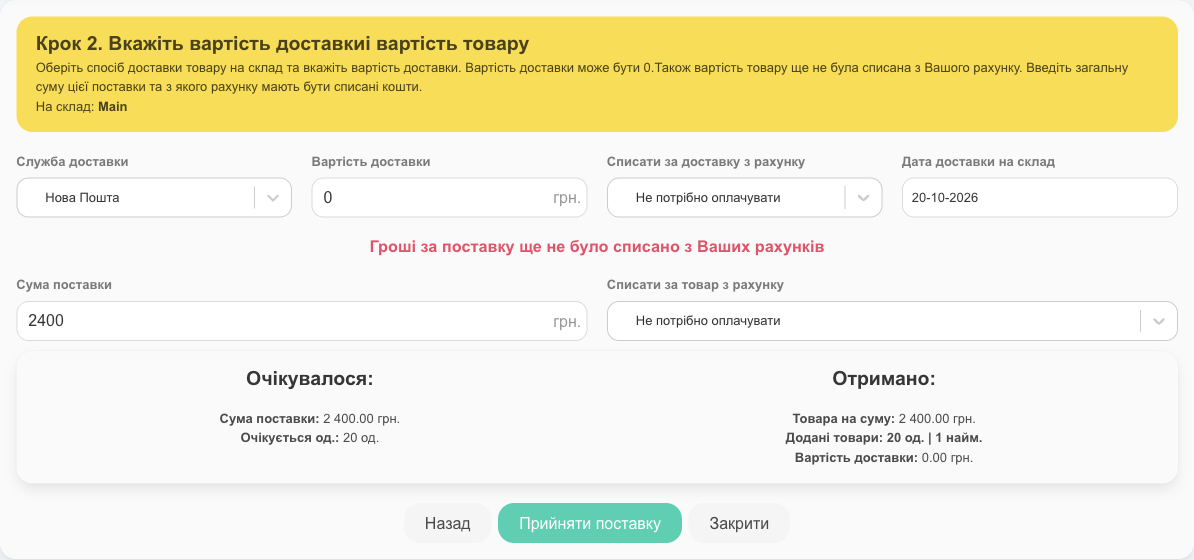
✅ The products are in the warehouse, the cost price reflects the purchase price, and the money has been deducted from the account.
💡 If the products are already in the warehouse and you're just starting to keep records, you don't need a shipment: enter the stock and cost price in the product card.
Learn more: Shipments and suppliers.
7 Make sales
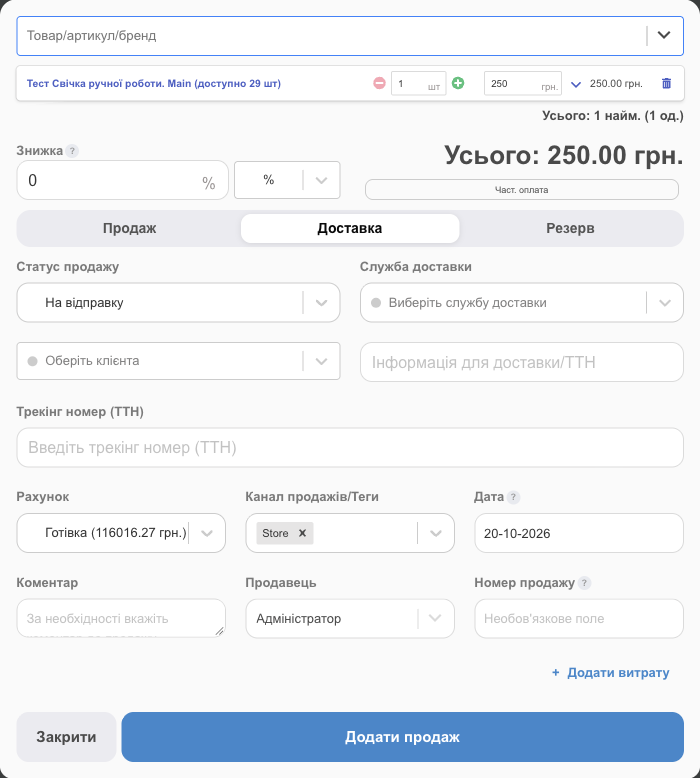
- Click the green + Sale button at the top of any page.
- Find the product in the The product name/SKU/brand name field by name, SKU, brand, or barcode. Enter the quantity and change the price if needed.
- Optionally, give a Discount as a percentage or in UAH.
- Choose how to record it:
- Sale: the product is handed over and the money is received;
- Delivery: the product is shipped by a delivery service (status, service, waybill (TTN));
- Reserve: the product is set aside for a client, for example, with partial payment.
- Optionally, choose a client, Account, Sales channel/Tags, and Seller, and add a comment.
- Click Add Sale.
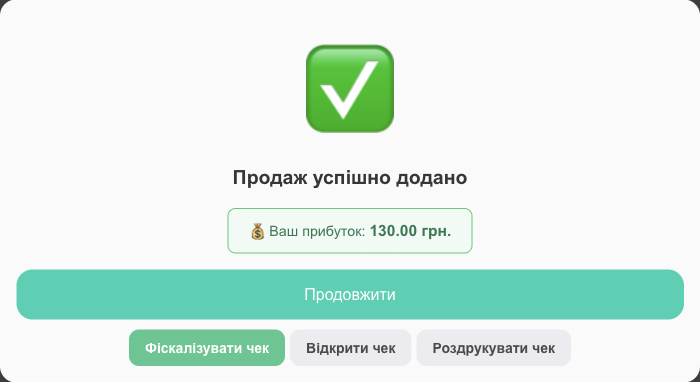
After saving, you see the profit on the sale, and you can open, print, or fiscalize the receipt (if a software cash register (PRRO) is connected).
Learn more: New sale, Delivery and waybills, Reserve.
8 Record expenses
Rent, advertising, packaging, salaries: everything you spend on the business. Without expenses, HugeProfit shows only the gross profit from sales; with them, you get net profit.
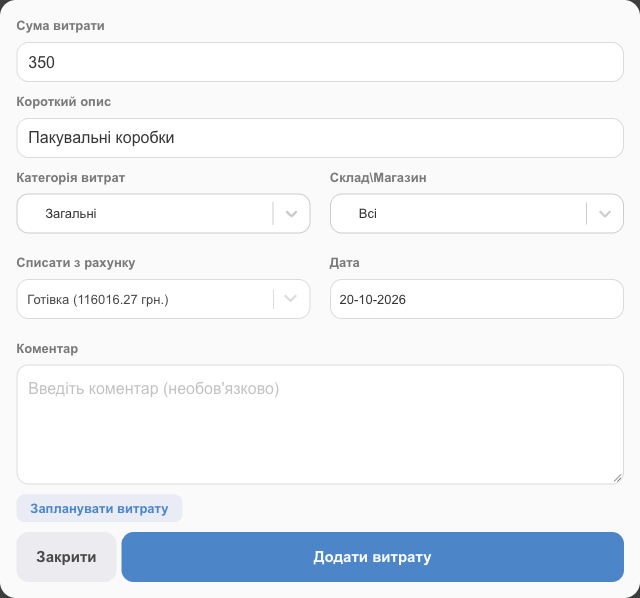
- Click the pink + Expense button at the top of the page.
- Enter the Amount Of Expense and a Short description.
- Choose the Expenses Category, the warehouse or store, and From account.
- Click Add expense. To remind yourself of an upcoming payment, use Schedule expense.
Learn more: Expenses.
9 Check your profit
The Dashboard gives you a quick summary of your business:
- Sales: gross profit, sales amount, number of sales, and average margin for today, the week, month, or year;
- Profit and Loss: revenue, profit from sales, business expenses, and net profit;
- Your Money: the balance of each account and how much money is “frozen” in stock;
- Sales chart, Need attention (unprocessed orders), Last sales, Your tasks.
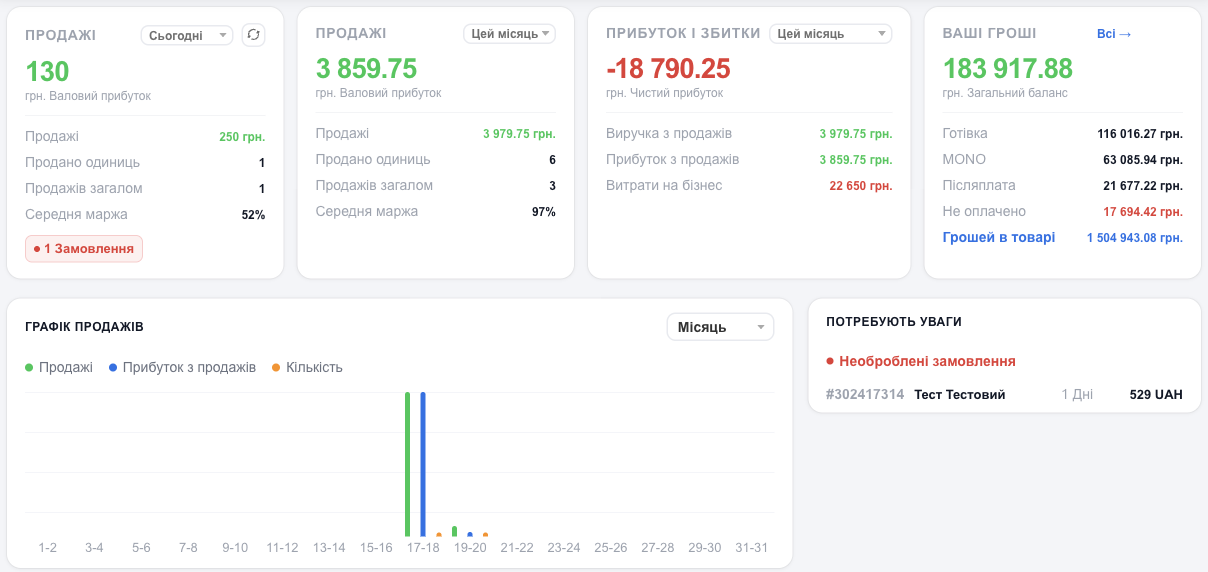
For more detail, see the Reports module: profit by product, category, brand, employee, and finances. See Dashboard and Reports.
10 Add employees
Each employee signs in with their own login and sees only what you allow. Sales show who made them, and you can automatically pay a commission on sales.
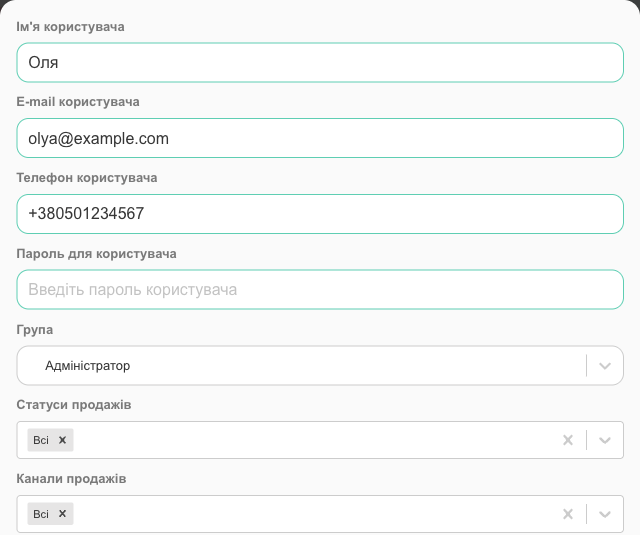
- Settings → Access → Add User.
- Enter the employee's name, email (this is the login), phone, and password.
- Choose the Group: Administrator, Manager, Cashier, or Guest. Below, you can fine-tune which modules and actions are available to them and which warehouses and accounts they work with.
- Save and give the employee their email and password.
Learn more: Employees and access rights.
11 Install the mobile app
- The HugeProfit app is available on Google Play and the App Store. Sign in with the same email and password.
- To get Telegram notifications about new orders, sales, expenses, products running out of stock, and more, connect the bot: Settings → Notifications → Subscribe to the Telegram bot.
Learn more: Mobile app, Account settings.
What's next
- Turn off modules you don't use: Settings → System modules. The menu gets shorter. See System modules.
- Connect marketplaces, a delivery service, and card payments: Integrations.
- Launch your own website in a few clicks: HugeProfit online store.
- Get to know the interface: HugeProfit interface.